Where Do Mosquitoes and Biting Flies Go in the Winter—And Do They Survive Freezing?

As winter settles in, we’re already prepping for next glamping season. Shopping on-line for the coolest glamping tents and screen houses for our new creek side site we begin to wonder: where are those nasty mosquitos and biting flies now anyhow? Do they die? Do they freeze? Or are they just chillin until the warm weather returns? Unfortunately, mosquitoes, black flies, deer flies, and other biting insects have extremely effective strategies for surviving winter—out of sight in hidden corners of forests, wetlands, and your backyard. They’ll be back, but understanding their winter survival tactics can help you manage them a little better when warm weather returns. Mosquitoes in Winter: Surviving the Biting Cold Mosquitoes have been around for over 100 million years, and they’ve evolved with brilliant methods to endure brutal season changes. Their method depends on the species, but all mosquitoes fall into one of a few survival strategies. 1. Some Mosquitoes Hibernate as Adults Certain species—like those in the Culex group—hibernate through the cold months. How it works: The males, however, die off before winter (the poor guys). Only the females survive to lay the next generation of eggs in the spring. These overwintering females are usually the first to bite in early spring, especially on the rare warm day in March or April. If you’ve ever been surprised by a lone mosquito way too early in the year—this is why. 2. Some Mosquitoes Survive as Eggs Other species, like floodwater mosquitoes (Aedes), survive winter as eggs. These are some of the toughest eggs in the insect world. What makes the eggs so tough? When the spring thaw brings standing water, the eggs finally hatch—leading to a sudden boom in mosquito populations. This is why cleaning gutters, removing buckets, and reducing standing water in early spring is extrtemely effective. You’re not preventing adult mosquitoes—you’re stopping eggs that could have been sitting there all winter. 3. Some Mosquitoes Survive as Larvae Under Ice A smaller number of species overwinter as larvae. They live in water that doesn’t completely freeze to the bottom—ponds, springs, slow-moving streams, or marshy pools. Even when the surface is frozen, life is still happening below: This is part of why early-spring wetlands can be surprisingly mosquito-heavy: those larvae have been preparing for months. Do Mosquitoes Die When They Freeze? This answer depends on the life stage. Adult mosquitoes: They cannot survive freezing. If an adult mosquito is exposed to temperatures below freezing for long enough, its body fluids form ice crystals and it dies very quickly. That’s why hibernating mosquitoes don’t hide outside—they shelter in places that stay above freezing. Eggs: Mosquito eggs are the toughest stage, and many species’ eggs survive being frozen solid. They’re designed this way, especially in northern climates. The egg doesn’t rupture the way an adult’s soft tissue would. Larvae: Larvae generally survive cold but not freezing. They need to be in a heated pocket of water deep enough to avoid complete freezing. Black Flies in Winter: Hidden in Streams Black flies plague campers, hikers, and anyone living near moving water in the spring. Their life cycle is tied closely to streams and rivers—and that shapes how they handle winter. Where Black Flies Go in the Winter Black flies survive the winter primarily as larvae attached to rocks in running water. Unlike mosquitoes, black flies need oxygen-rich, moving water, so they don’t overwinter as eggs in dry areas. They use silk-like anchor threads to cling to submerged stones even through snowmelt and freezing temperatures above the waterline. Do They Freeze? Black fly larvae typically do not freeze, because: Larvae remain dormant or slow-moving until spring. What Happens Next? As water temperatures rise: This is what creates the notorious “black fly season” in May and June. Because they overwinter as live larvae, they are ready to explode in numbers very early in the season, often before mosquitoes even get started. Deer Flies and Horse Flies: Buried Alive! Deer flies and horse flies are inland cousins of black flies—larger, louder, and equally annoying. Their winter strategy is one of the most interesting. How Deer Flies Overwinter These flies survive the cold as large larvae buried in mud, often in: They can burrow deep enough to avoid lethal freezing temperatures. These larvae are carnivorous and may continue to feed slowly through winter, depending on the temperature. Can They Survive Freezing? If the soil freezes too deeply, larvae near the surface die. But in most climates: So most larvae survive. In early summer, they pupate and emerge as the biting deer flies that circle your head in humid weather. Why Don’t They Just Freeze to Death, For Goodness Sake? Many insect species have evolved natural antifreeze compounds—glycerol and similar chemicals—that reduce freezing inside their bodies. But this protection only works for: Adult mosquitoes and adult biting flies lack this protection. That’s why you can’t freeze a mosquito in your garage and expect it to survive. But the eggs sitting in a dried-up bucket outside? They’ll be just fine until spring. Why Understanding Winter Survival Helps With Control Knowing where biting insects go in the winter gives you power to reduce their numbers around your campsite, backyard, or homestead. 1. Remove Standing Water in Fall and Early Spring You’re destroying eggs before they hatch. 2. Clean Out Gutters Mosquito eggs love it up there. 3. Manage Marshy Areas Fill depressions, improve drainage, or add small-scale aeration to ponds. 4. Control Compost and Manure Piles This impacts stable flies more than mosquitoes, but still helps. 5. Protect Stream Edges if You Want to Reduce Black Flies Trimming heavy vegetation can reduce larval hiding spots, though moving-water insects are much harder to control without affecting ecology. 6. Use Early-Season Treatments (like BTI) BTI dunks placed in standing water in early spring target larvae that survived winter. So Are They Really Gone in Winter? Not exactly. They’re just waiting. Mosquitoes and biting flies don’t roam around in the cold, but they’re still very much alive in some
Building a Glampsite Blog: What to Know, What to Expect, and Why the Long Game Wins

Running a glamping campsite takes creativity, a desire to connect, and a commitment to the long-haul. Building a glampsite blog takes the same and then some. It’s a place for ideas to land and to be shared with other hosts and enthusiasts. It can build community, trust, authority, and also be a vessel for bookings. But blogging is more of a marathon than a sprint. It’s a slow-build engine that is most likely to reward those who stick with it. If you’re starting or improving a glampsite blog it’s vital to understand what to expect—especially in terms of timeline and traction (we’re nine months in, have learned volumes, and learn more every day). Here are lessons that have rung very true so far and that are paving a successful road ahead. Why a Glampsite Blog Matters A glampsite is an experience business—if done right, people become invested in the story and in the road you’re on. A blog is a great tool for this because: 1. It drives organic traffic for free Search engines dig fresh, niche, high-quality content. A glampsite blog gives you a chance to appear in numerous related searches. Each post becomes a road sign pointing people to your booking page and to your campsite. 2. It builds trust with guests When guests read your posts, they start to feel like they already know you. They can see a level of commitment to passionately doing things right. This can lead to more comfort with booking, staying longer, and coming back again. 3. It showcases your expertise and passion Glampsite guests love stories—stories about: Your blog is where you get to share those stories. How Long Does It Actually Take to Get Traction? (Realistically) It takes quite a while for search engines to reward brand-new blogs. According to a number of marketing studies: • Most blogs take 6–12 months to gain noticeable traction. Meaning: regular visitors, climbing search rankings, and a flow of organic traffic. We started to see some traction after six months, and what a rush it was! • Only about 5–10% of new posts rank in Google’s top 10 within the first year. Until then, posts show up several pages in and almost never get seen. But among the ones that do rank, nearly all have one thing in common: consistent posting. We’ve diligently stuck to publishing once a week with plans to eventually double that. • Traffic often grows slowly for the first 3–6 months, then accelerates. Blogs build momentum like a snowball—each post supports the others, and Google slowly learns your niche. • Blogs with at least 24–50 high-quality posts tend to hit their first “traffic breakthrough.” That’s why consistency is so important. • Most blogs that monetize successfully report that the real payoff hits around the 18–24 month mark. These numbers can be daunting, but if you go in expecting slow but steady growth, you’ll succeed. The Power of Consistency: The One Strategy That Beats Everything Else You can have a beautiful blog site, brilliant writing, and an engaging glampsite story—but without consistency, your blog won’t be able to reach its potential. Here’s why consistency matters: 1. Google rewards active websites Search engines push frequently updated sites higher because consistency looks “trustworthy.” 2. People love returning to creators who show up If readers know you post weekly or monthly, they come back—and returning visitors are incredibly valuable. 3. It builds your writing muscle The more you write: 4. It transforms your brand voice Over time, your blog becomes unmistakably you. 5. It compounds your results The more posts you write, the larger your audience can become. What Should You Write About? (Glampsite Blog Topic Ideas) This is where glampsite blogs shine—there’s endless content. You are in the driver’s seat and passion shines through. We focus on how-tos, lessons learned, mindset and encouragement, knowledge of and respect for nature. When we were just getting started, we made a very worthwhile investment – a blogging course : How to Start a Blog | Perfecting Blogging by Sophia Lee Worth every penny and recommended highly! One lesson that was driven home was: Always write to give something valuable to your reader. The idea isn’t to just journal. It’s not about you – it’s about the reader. It’s to give valuable content that they can use. Words to live by. Tools That Make Blogging Easier You don’t need expensive software to run a successful glampsite blog. In fact, you can get started for next to nothing. Here are beginner-friendly tools that help with the process: For this site, we did some designing ourselves and then made the investment of getting the help of a designer (Brady of Invicta in Rochester NY – tell him Glampsite Joe sent you 🙂 ). Brady was able to create the look and the interactions that we were looking for and for us it was totally worth it. Why Blogging Is a Long-Haul Game—and Why It’s Worth It Most new blogs fizzle in the first six months because they don’t see immediate results. Here’s what long-term blogging really looks like: 3 months in: Barely any traffic. You feel like no one is reading. Totally normal. 6 months in: A few posts start showing up on Google. You get trickles of traffic. You notice guests mentioning your blog. 12 months in: Google starts trusting your site. Several posts rank top 20 or top 10. Traffic grows month by month. 18–24 months: You’re suddenly getting bookings that started with:“I found your blog…” Your blog becomes a revenue-producing asset. One post can pay off for years by bringing new guests to your door and by increasing blog traffic. Higher traffic levels to the blog can also mean opportunities for affiliate marketing, selling products and utilizing other monetization methods. Final Thoughts: Your Glampsite Blog Is An Investment Worth Making A glampsite is already a magical business and a glampsite blog gives that magic a place to live year-round. It takes time.Building traction is slow.Consistency
Thanksgiving Dinner at a Campsite: An Outdoor Feast to Remember
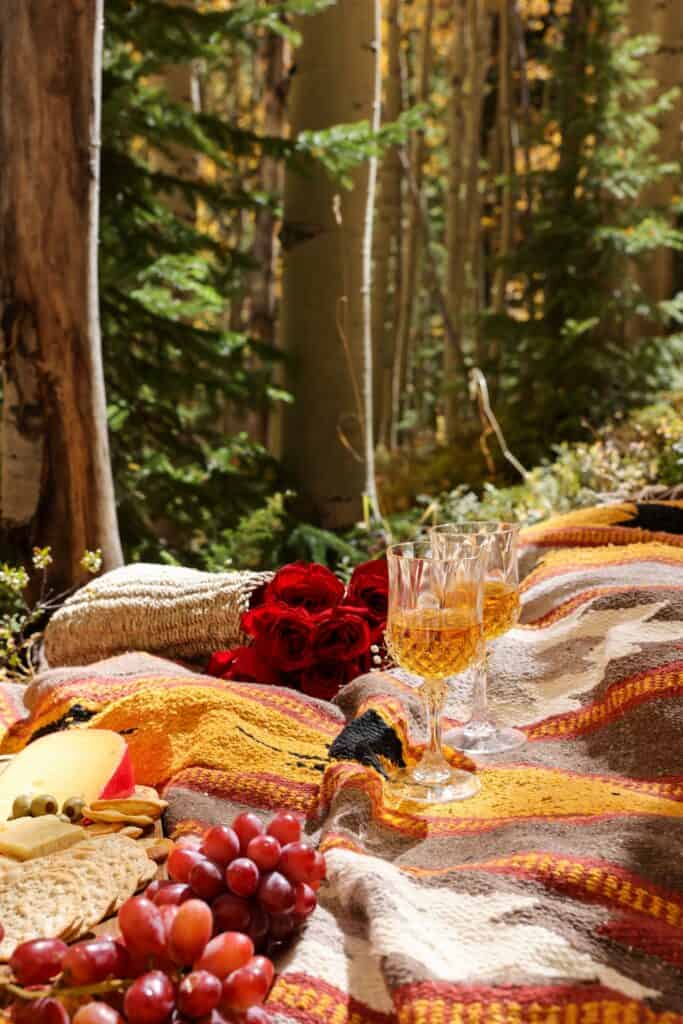
There’s something magic about celebrating Thanksgiving outdoors. The smell of a campfire, the late fall air, the way food seems to taste better when cooked outside. Preparing Thanksgiving dinner at a campsite can create holiday memories that will last a lifetime. Cooking a full Thanksgiving meal outdoors takes planning, creativity, and a willingness to trade the convenience of your home kitchen for a unique and challenging cooking experience. But with the right gear, a thoughtful menu, and a little prep work, you can serve a feast that gives a traditional indoor spread a trot for its money. Here’s everything you need to know to pull off a fantastic campsite Thanksgiving dinner. Start with the Right Setup Before you get to the turkey, make sure your cooking setup is good to go. You don’t need a professional outdoor kitchen, but you do need the tools to cook safely and efficiently. Heat Source Options Most campers will rely on one or more of these: If you’re hosting guests at a glampsite, offering multiple cooking options allows visitors to spread out tasks and avoid bottlenecking at a single heat source. Gear You’ll Want Thanksgiving requires more tools than the average camping meal. Thankfully, you don’t need to pack the whole kitchen—just these essentials: Also very handy, a small outdoor prep table or fold-out station can act as your kitchen counter. We have picnic tables near at our cook station to fit this bill. Plan a Menu That Works Outdoors The menu doesn’t have to be exactly like the indoor version. It’s your Thanksgiving picnic and you can do what you want. Here’s a campsite-friendly Thanksgiving menu that is delicious as well as doable. The Main Event: Turkey! You have a few great options for preparing turkey outdoors, depending on how adventurous you want to get and what equipment you have. 1. Dutch Oven Turkey (Easiest + Most Reliable) If you’re cooking for 2–4 people, a turkey breast or small bone-in roast fits perfectly in a Dutch oven. Add onions, apples, garlic, and herbs, and let it slow-roast over coals. You’ll get moist, flavorful turkey with minimal oversight. 2. Foil-Wrapped Campfire Turkey For simplicity, wrap seasoned turkey pieces (like drumsticks or thighs) in heavy foil with a little butter and herbs. Nestle them in campfire coals. They cook faster than a whole bird and stay juicy. 3. Smoked Turkey on a Portable Pellet Grill If you love smoked holiday turkey, bring the smoker. Many portable units run off small power banks or 12-volt plugs. It takes time, but the flavor payoff is incredible. 4. Pre-Cook at Home, Reheat at Camp This is a smart choice if you’re hosting lots of guests or want to keep things simple. Roast the turkey at home, carve it, pack it in broth, and reheat it in a Dutch oven or skillet. It stays moist and frees up your heat sources for sides. Essential Sides—Campsite Style Sides are where the fun begins. Many Thanksgiving dishes adapt beautifully to outdoor cooking. Campfire Stuffing Sauté onions, celery, butter, and herbs in a cast iron pan. Add bread cubes and broth, stir, and cover with foil. Heat over medium coals until steamy and golden. For extra flavor, toss in dried cranberries or sausage cooked earlier at home. Dutch Oven Mashed Potatoes Boil potatoes in the Dutch oven. Drain. Mash with butter, salt, pepper, and a splash of milk or cream you’ve kept cold in the cooler. They hold heat surprisingly well in the cast iron. Sweet Potato Packets Chopped sweet potatoes + butter + cinnamon + brown sugar + foil packet. Place in coals until soft and caramelized—easy, hands-off, and incredibly good. Campfire Green Beans Toss fresh green beans in olive oil, salt, pepper, and garlic. Wrap in foil and grill over fire. They stay crisp-tender and smoky. Gravy on the Camp Stove Gravy is totally doable at a campsite. You need: Just whisk over low heat on a propane stove. It’s simple, and no holiday feast is complete without it. Don’t Forget the Bread and Appetizers Cornbread in a Dutch Oven This is a classic of campfire cooking. Mix batter at camp or bring it premixed in a jar. Bake over low coals with a few coals on the lid. It smells like heaven. Warm Rolls on the Fire Grab a bag of dinner rolls and warm them inside a foil pouch near the fire. Very easy and often one of the most loved items on the table. Charcuterie Board Outdoors A small appetizer board is always a hit. Cheese, nuts, cured meats, crackers—everything packs well and gives folks something to snack on while the turkey finishes. Dessert! Thanksgiving dessert outdoors is one of the best parts. Dutch Oven Apple Crisp Slice apples, toss with sugar and spices, cover with oat topping, and bake over coals. It’s foolproof and crowd-pleasing. Campfire Pumpkin Pie (Yum!) You can bake pumpkin pie in a Dutch oven using a premade crust. If you’ve never done a pie outdoors, this is your chance to show off and be pumpkiny. S’mores…With a Holiday Twist Graham crackers, chocolate, and marshmallows but also think about adding: It’s fun, easy, and something guests absolutely love. Keep Food Safe When Cooking Outdoors Thanksgiving at a campsite requires a little more attention to food safety, especially if your menu includes turkey or dairy-based sides. Tips for Safe Holiday Cooking Outdoors This requires planning but keeping food safe is very worth it. Creating a Thanksgiving Atmosphere A few small touches can transform an ordinary campsite meal into a warm, memorable holiday. Decor Ideas A few well-placed pieces can create a beautiful Thanksgiving table in the woods. Keep Everyone Warm Late November can be chilly, especially near a creek or open field. To keep guests comfortable: Warm drinks are a must when Thanksgiving camping. Get Guests Involved Campsite Thanksgiving dinners become even more fun when everyone has a job. Ideas: It turns the whole event into a shared holiday experience. Plan for Clean-Up
The Best Use of Time for a Glamping Campsite Host During the Off-Season
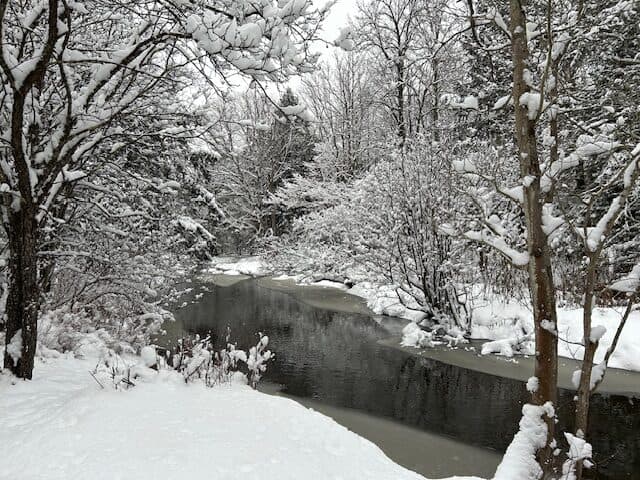
How to rest, reset, and prepare for your best season yet The end of glamping season is bittersweet this year. We’re happy for the break but we already miss the guests and the appreciation they show for our property and the cabins. Other than one regular late- season guest, everything is now quiet. The nights are colder. The leaves have fallen. The campsite is settling in for the long winter ahead. For many hosts, that silence can feel strange at first. After running full-speed through spring, summer, and early fall, switching to a slower pace almost feels unnatural. But the off-season isn’t wasted time. It’s a gift. It’s the perfect window to reset your property, your business, and your own energy. Some of the most important work you’ll ever do for your glamping operation happens when there isn’t a single guest on the calendar. The off-season is your chance to reflect, refresh, and to prepare. It’s where next year’s success starts taking shape. Here’s how to make the most of it. Looking Back Before You Look Forward Once the last guest drives away, take a little time just to walk the property. Bring a cup of coffee and take the time to take it all in. Really look at things—your tents, your cabins, the trails, the fire pits—and notice what the season left behind. You’ll probably see what needs attention but you’ll also see what held up beautifully. Then, once you’re inside where it’s warm, revisit your season from the business side. What worked? What didn’t? Which guests left glowing reviews and why? What frustrated people or confused them? Most importantly, how did you feel during the season? Did you feel stretched too thin? Did you find yourself doing the same annoying task over and over? Did any particular moments make you think, “I need to fix this next year”? These reflections form the foundation of your off-season projects. Before touching a tool or making a purchase, you want clarity on what you’re trying to improve. Giving Your Glamping Units a Fresh Start Deep cleaning is nobody’s favorite job…but there is something strangely satisfying about doing it in the off-season. When you’re not rushing between turnovers, you can finally take your time and reset each unit the way it deserves. Strip everything down and clean like you’re preparing for a grand reopening. Move the furniture, get the cobwebs in the corners, wash the windows you never have time for in July. Refresh bedding. Shake out rugs. Treat wood furniture. You might even reimagine the layout of a space now that you’re not flipping it in a hurry. This is also when you catch little problems before they become big ones. These fixes are so much easier to handle without a countdown to the next check-in. And if you get the itch to redecorate? This is the perfect season to do it. Without guest prep, you have some time to have some fun with it. Even small changes can make your spaces feel completely new when spring rolls around. Protecting Your Property from Winter’s Beating Preparing your property for the harshness of winter is one of the smartest off-season tasks you can do. Water lines get drained, pumps get shut down, cabins get tightened up and secured. Batteries get stored, fuel gets stabilized, and anything fragile gets tucked away. It doesn’t matter if your glampsite is in deep snow country or a milder climate—a little winterizing now saves a lot of headache (and money) later. Making Upgrades You’ll Thank Yourself For Later There’s real joy in the off-season version of “treating yourself.” Except in this case, you’re treating your future guests too. Since you won’t be interrupting anyone or blocking a calendar, this is the ideal time to dream up and build new things. Maybe it’s a new deck, a covered outdoor cooking area, a soaking tub, a hammock lounge spot, a better fire pit setup, or just a small improvement that makes a big impact—like additional hooks, shelves, or reading lights. Some upgrades increase your nightly rate. Others increase guest happiness. The best ones do both. But whatever direction you choose, off-season is prime time for creating the features that set your glampsite apart. Strengthening Your Online Presence Marketing is so much easier when you’re not juggling three turnovers and broken accent lights. This quieter season is the perfect time to refresh your listing photos, update your descriptions, or even shoot some beautiful winter and early-spring shots that show off your property in a totally different light. It’s also a great moment to take a closer look at your website or booking platform and see what needs updating or improving. If you maintain a blog about glamping, hosting, camping, or your own land (like we do!), off-season is your content goldmine. This is when you have the time to write the posts that draw organic traffic or to rework old posts into stronger, more SEO-friendly versions. Marketing often gets neglected during the busy season. Off-season can bring it back into focus. Reconnecting with Your Local Community When you’re hosting nonstop, it’s hard to get out and actually enjoy your local area. Off-season is a great time to reconnect. Visit local makers, farmers, bakeries, wineries, adventure guides—anyone who might become part of your guest experience. These partnerships make your glampsite feel more rooted and more unique. Guests love knowing their stay supports a whole local ecosystem, not just a single host. And if there are other glampsite owners nearby, now is the perfect time to grab coffee and chat. There’s usually a sense of camaraderie among hosts who “get it.” You can swap ideas, share what worked this season, talk about challenges, or even collaborate on something fun. Collaboration beats competition every time. Improving Your Systems So Next Year Is Easier If summer felt chaotic, this is your chance to make next season smoother and lighter. Automating messages, organizing check-in instructions, streamlining your guidebook, improving your signage, updating your inventory
Working Together with Other Glamping Campsites in Your Area

More and more we’re meeting people in the area who want to start hosting. Cabins, farmhouses, campsites of many descriptions- but fairly often we get the sense that there is a fear of being competitors. But now that we have a few hosting seasons under our belt, we know that doesn’t have to be anything to be afraid of. Instead of viewing nearby sites as competition, we think of them as partners in building a stronger regional glamping destination. By working together, we can attract more visitors, improve offerings, and create a sense of community that benefits everyone. Here are some creative, practical ways to collaborate with other glamping campsites in your area. 1. Create a Regional Glamping Trail or Network One of the most effective ways to collaborate is by creating a glamping trail or regional network. Think of it like a wine trail, but for glamping. Each campsite can highlight its unique style—maybe one specializes in rustic cabins, another in safari tents, another in treehouses—and together you create a route that encourages travelers to visit multiple destinations. This kind of collaboration benefits everyone: You can even create a shared website or social media page that features all participating campsites, with links to each booking page. That way, visitors see the region as a cohesive, must-visit glamping hub. 2. Host Seasonal or Themed Events Together Collaborative events are a fantastic way to draw in guests, especially during slower seasons when bookings might dip. Imagine a “Fall Fires & Foliage” weekend, where each campsite offers something special—pumpkin carving at one site, a cider tasting at another, and a guided hike at a third. Guests could stay at one location but travel between sites. Other ideas include: When campsites collaborate on events, they can share marketing costs, pool their creativity, and offer guests a richer experience. 3. Cross-Promote Each Other on Social Media and Websites Social media collaboration is easy, free, and effective. If you and other glamping hosts share similar audiences, it makes sense to boost each other’s visibility. Here are a few ways to do it: For example, if your glampsite focuses on families, and another nearby site caters more to couples or adventure travelers, you can refer guests who might not fit your style. This builds goodwill and strengthens your local network. 4. Share Suppliers and Resources Glamping often requires specialized materials and services—like firewood, laundry service, well service or outdoor furnishings. Instead of sourcing everything alone, neighboring campsites can share suppliers or place bulk orders to save money. We did this when we installed our well. We partnered with our neighbor, both had a well dug, and both got a discount! It can make a lot of sense to: By pooling your resources, you reduce costs and support local businesses at the same time. 5. Develop a Local Booking Partnership Some guests love to hop between different experiences. Maybe they want a few nights in a cabin, then a couple in a canvas tent by a creek. If you and nearby campsites offer different setups, consider creating a multi-site booking option. You could market it as a “Glamping Circuit” or “Wilderness Week” package: This approach encourages travelers to explore more of your region, while you and your neighboring sites benefit from cross-traffic. 6. Collaborate on Marketing and Advertising Advertising is expensive—especially for small, family-owned glamping operations. But when you team up with other local hosts, you can share costs and maximize reach. Consider: You can also collaborate with your local tourism board or chamber of commerce to feature glamping as part of regional marketing campaigns. By working together, you’ll have more resources to reach a wider audience. 7. Offer Referral Discounts or Loyalty Programs If your area has several small glampsites, you can create a referral network. When one site is fully booked, guests can be referred to another participating site—and receive a small discount or bonus for booking within the network. It’s a win-win: This kind of loyalty program fosters collaboration and builds long-term relationships with guests. 8. Share Knowledge and Skills Running a glamping business requires expertise in everything from hospitality to plumbing to marketing. When nearby hosts share knowledge, everyone benefits. You might host informal “glamping roundtables” or meet-ups where you: You can even host skill-sharing days—maybe one owner gives a workshop on solar lighting setups, another demonstrates how to create outdoor kitchens, and another leads a session on SEO for small businesses. Building a supportive network helps everyone stay inspired and resilient. 9. Team Up for Environmental Stewardship Glamping guests often choose the experience because they value nature and sustainability. Collaborating with other sites on environmental initiatives can make your region stand out as an eco-friendly destination. Some ideas include: You could even create a “Green Glamping” certification for your region, highlighting your shared commitment to eco-conscious hospitality. 10. Collaborate with Local Businesses Together Beyond working with other glampsites, join forces to collaborate with nearby small businesses. When several glampsites coordinate, you can negotiate better deals or create more impactful packages. For instance: If every glampsite in your area supports these same local partners, you help strengthen the entire community—and guests get an authentic, immersive experience. 11. Build a Shared Brand Identity for Your Region When multiple glamping campsites unite under one shared identity, you create a brand that travelers remember. For example, you might brand your region as: Create a logo, tagline, and shared story that highlights what makes your area special—its natural beauty, family-owned businesses, or historic roots. Then use that identity consistently across websites, social media, and local tourism materials. This creates a sense of place that draws in visitors from far beyond your immediate area. 12. Support Each Other During Challenges Sometimes collaboration is less about business strategy and more about community. Whether it’s helping each other recover from storm damage, lending tools or supplies, or sharing advice during slow seasons, nearby glampsite owners can be each other’s greatest allies. Running a glamping site can be isolating at
Building a safe, legal walking bridge over a 30-foot creek — what you actually need to get started
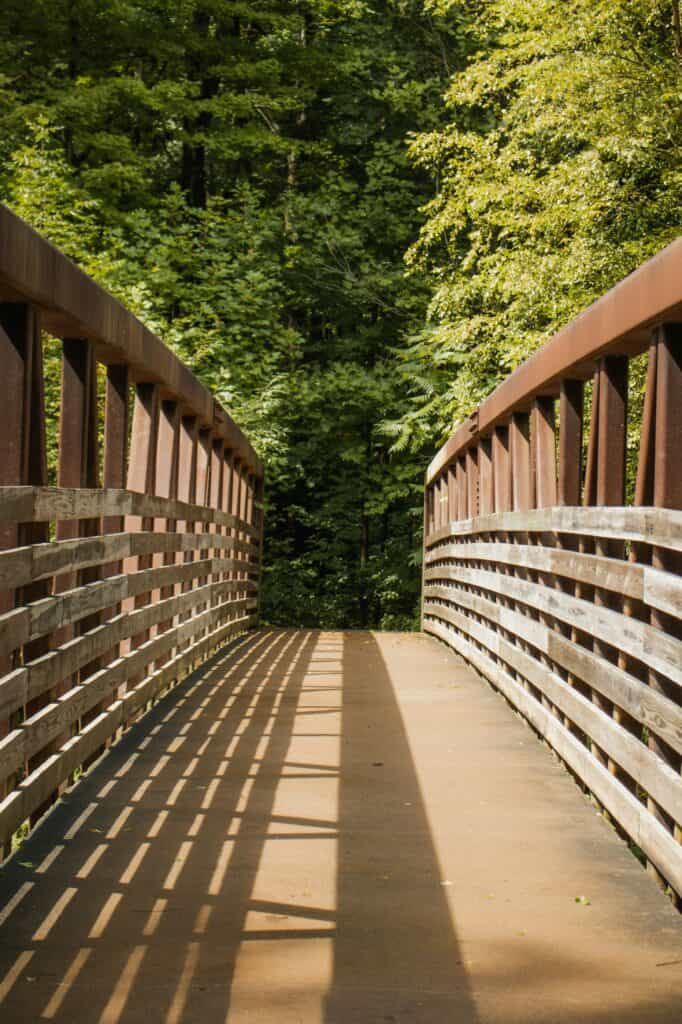
With the glamping season all but over, it’s time to set our sites on plans for the future. And on the top of our wish list is to finally build a walking bridge across Black Creek. On the other side of the creek (we call it the ‘crick’ out here in the country)is a beautiful Hemlock forest and the perfect spot for treehouses! But to build a bridge that will be safe and in compliance with a ton of regulations, where do we learn what is really needed to get started? We’re envisioning a simple footbridge across a 30-foot creek, but between stream rules, structural safety, site conditions, and local building rules there are a lot of pieces to get right. This blog is a practical overview of what you need to start— permits, professional help, design basics, and construction considerations. As a bonus, there are links to relevant government web pages for your convenience (specifically for Allegany County NY, but many regulations are universal). 1) First step: decide scope (private vs public, temporary vs permanent) Before anything else, decide whether the bridge will be: That matters because public or municipal projects have stricter accessibility, insurance, and permitting requirements. Even on private land, many environmental and federal/state permits still apply if you work in or near the stream. 2) Permits & approvals you must consider a. NYSDEC — stream/stream crossing permits.Any work in or that disturbs a stream bed or stream banks in New York usually needs NYSDEC authorization. DEC issues general permits that cover typical stream-crossing work but you have to confirm whether your project fits the general permit or requires an individual permit. You don’t want to assume a small bridge is exempt — the rules apply to “work in any stream” and there are specific stream-crossing guidance documents. Department of Environmental Conservation+1 b. Freshwater wetlands and wetland mapping.If your footprint touches mapped freshwater wetlands, you may need a freshwater wetlands permit as well. DEC has informational wetland maps and the permitting thresholds depend on how much wetland is affected. Department of Environmental Conservation c. U.S. Army Corps of Engineers (Section 404/“waters of the U.S.”).If the creek or area is considered waters of the United States, the Army Corps may require a permit (dredge/fill permits) or you may qualify for a regional/general permit. You will want to check the New York District regulatory pages. nan.usace.army.mil+1 d. Local building permits & design professional stamp.In many towns, plans for bridges or substantial structures must be prepared or stamped by a registered New York design professional (engineer) before submitting. It’s a good idea to contact your town’s building & zoning office early. Town & Village of Allegany, NY+1 e. Floodplain / FEMA / county rules.If the proposed bridge or abutments are in a mapped floodplain, you’ll need to follow floodplain development rules; the DEC general permit documents and county planning materials tie into flood risk guidance. There are often additional siting or structural requirements in flood zones. Ext Apps DEC NY+1 3) Who should you involve 4) Design basics for a 30-foot pedestrian bridge A typical small walking bridge has these design choices and issues: Span & geometry Loads Deck width Guardrails and handrails Foundations and scour Materials Erosion control 5) Environmental & seasonal considerations 6) DIY vs hiring a pro 7) Cost drivers (what will eat your budget) Rather than quote a hard number, get 2–3 contractor estimates once you have stamped plans. 8) Practical checklist before you start 9) Where to look for official guidance & help Final thoughts A 30-foot creek crossing is very doable and can be an attractive, long-lasting addition to a private glampsite trail — but not a project where you want to “wing it.” The most common trouble spots are inadequate foundations, neglecting permits (which can stop a job or require removal), and failing to design for scour and floods. Start with a survey, talk to your town and NYSDEC, get an engineer’s stamped plans if required, and then price installation options (prefab span vs site-built timber). That approach keeps you legal, safe, and much less likely to have a bridge you need to rebuild after the first big storm. Any ideas or suggestions? Comments are always welcome! . . . Photo by Sydney Moore on Unsplash Photo by Brice Cooper on Unsplash Photo by Globelet Reusable on Unsplash Photo by Kiriakos Verros on Unsplash
Should I Charge for Firewood at My Glampsite?
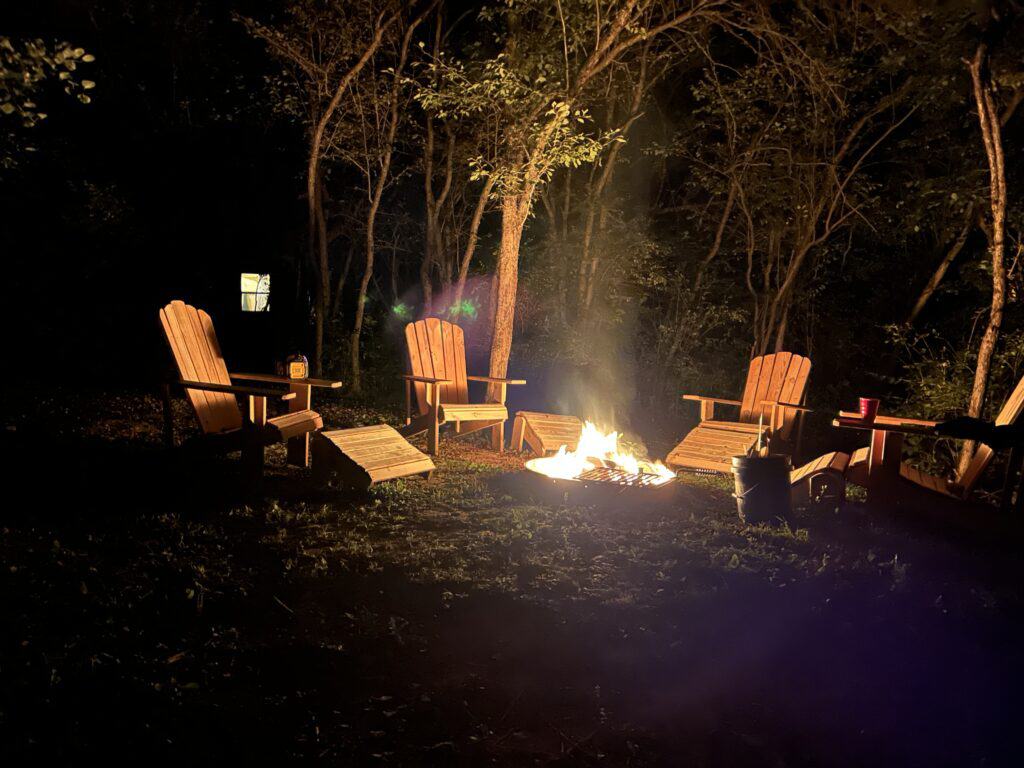
A question came up a lot at the end of this season, and we’re guessing other hosts have asked this as well. Up to this point, we haven’t charged extra for firewood. Should we? An abundant, dry supply is always available near the main firepit, complete with lighter, firestarters, and kindling. We even prep the fire in a covered pit next to the creek. But as we get busier and busier, we’ve been asking ourselves, is this sustainable? On one hand, an amazing fire is a focal point of the camping experience and we wouldn’t want our guests to ever be without it. But on the other hand, wood costs money, time, and labor to provide. Some guests decide not to have a fire at all while others burn through a quarter of a face cord. Should we be doing something to balance this out? In this blog we explore the practical, financial, and guest-experience sides of this decision. The Role of Firewood in the Glamping Experience It helps to remember why firewood matters so much.At a traditional campground, guests expect to rough it a little — chopping or hauling their own wood might even be part of the fun. But glamping is different. Guests come for comfort, convenience, and atmosphere. A warm campfire is often a centerpiece of the stay. It sets the tone for an evening that brings peace and quiet, time with friends, romance – whatever guests are looking for. It’s a place to cook, connect, and enjoy nature without sacrificing luxury. In that sense, firewood isn’t just another supply — it’s part of the experience. The question becomes: do you build it into your nightly rate, or make it an optional extra? The Case for Providing Firewood for Free Many glampsite owners (like us) start out offering complimentary firewood, especially when they’re small or just opening. It’s an easy way to add charm and hospitality to a new site. Here are the advantages: 1. Guest Satisfaction and Positive Reviews Nothing delights a guest more than arriving to find a neat stack of dry wood ready to go. It’s a thoughtful touch that says you’ve gone the extra mile.Free firewood can boost reviews, encourage repeat bookings, and make your glampsite stand out from competitors who nickel-and-dime for every amenity. 2. Simpler Guest Experience Including firewood removes one logistical step for your guests. They don’t have to wonder where to get it, how much to bring, or whether they can collect it on-site (which might be restricted). It simplifies their trip planning and contributes to a more relaxed stay. 3. Perceived Value Even a small gesture like free firewood can make your overall offering feel top shelf. It’s similar to free breakfast at a bed and breakfast — guests know it costs something, but they appreciate the gesture of including it. 4. Minimal Impact for Small Operations If your glampsite has only a few cabins or tents and your guests burn a manageable amount, the cost may be small enough to absorb. Especially if you have access to your own downed wood or can source locally at low cost, the expense may not justify complicating the guest experience. The Case for Charging for Firewood On the other hand, offering unlimited free firewood can quickly get expensive — or even unsustainable — as your glampsite grows. Here’s why you might want to start charging. 1. Firewood Costs Add Up Buying seasoned, pest-free firewood can cost anywhere from $5 to $10 per bundle wholesale — it costs us $75 a face cord but the price and the labor still add up. If your guests tend to build large or multiple fires, costs can escalate fast. For us, this varies from group to group, and usage jumps later in the season when the nights get cooler. Charging helps offset this and ensures fair use. 2. Discourages Waste When firewood is unlimited and free, guests sometimes burn more than they need — or leave half-burned logs behind. Charging per bundle encourages more responsible use and less waste, keeping your costs and cleanup manageable. 3. Covers Labor and Delivery Supplying firewood can get labor intensive. There’s time involved in cutting, stacking, drying, and hauling it to cabins or tents. Charging a small fee compensates you for the effort. 4. Keeps You Compliant Depending on your location, you may have restrictions on moving or cutting firewood due to pest control regulations (like the Emerald Ash Borer). Where we’re located in Upstate New York, wood that isn’t certified heat-treated (certified insect- free) can’t be transported further than 50 miles. Finding the Right Balance: Hybrid Models Many successful glamping hosts find a middle ground between free and paid firewood options. Here are a few models that work well: 1. The Starter Bundle Model Provide one complimentary bundle of firewood per night or per stay, and sell additional bundles at a set price. 2. The All-Inclusive Premium Rate Build the average cost of firewood into your nightly rate. 3. The On-Demand Option Offer wood as an optional add-on at booking or upon arrival. 4. The Self-Service Kiosk If your property allows it, set up a small covered rack or shed where guests can grab wood on the honor system. Pricing Your Firewood If you decide to charge, pricing needs to be fair, simple, and transparent. Here are a few tips: How Firewood Policies Affect Guest Behavior Your approach to firewood can subtly influence how your guests use and respect your property. Make sure you include your firewood policy in your guest welcome guide and booking description — transparency goes a long way. Marketing the Firewood Experience If you do decide to include or sell firewood, make it part of your glampsite’s charm. You could: Guests aren’t just buying firewood — they’re buying the camping experience. Safety and Liability Considerations Whether you charge for firewood or not, fire safety is essential. Always include: If you allow guests to use your wood, make sure it’s dry and seasoned
Exploring State Lands Near Birdsall, NY: What You Can Do & What to Know
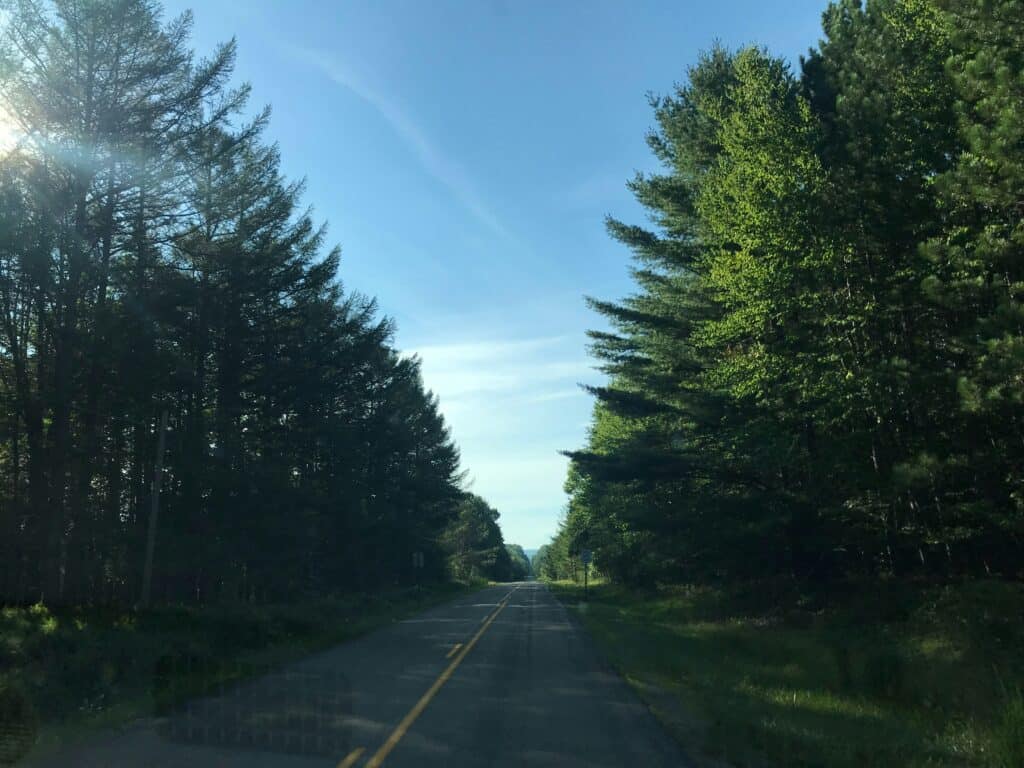
We admit it. We absolutely love our property so we haven’t ventured on to the 4,000 plus acres of state land that’s right next to us all that much. But this summer we explored a lot more – riding the dirt roads and trails in side by sides and checking out some trail heads on foot. We discovered some amazing spots we didn’t know existed. Areas like Keeney Swamp State Forest, Keeney Swamp Wildlife Management Area, Hiltonville State Forest, Klipnocky State Forest, and others in the Allegany Unit of state forests. We also learned a bit more about activities allowed on state land. Hiking, paddling, wildlife watching, hunting, fishing, and more. Unlike our other posts, this blog is specific to our glamping campsite vicinity. It walks you through what activities are allowed, where to go, what rules to follow, and how to make the most of several thousand acres of state land. Nearby State Lands: A Quick Overview Here are some of the state lands close to Birdsall: (with links to DEC pages) These areas lie in DEC Region 9, so many of the same rules apply, and the DEC Almond or Allegany offices are the right contacts for up-to-date information. Department of Environmental Conservation+1 What Activities Are Allowed According to the DEC, here are the allowed activities in these lands near Birdsall, along with details, highlights, and tips. 1. Hiking & Walking 2. Paddling & Freshwater Exploration 3. Camping (Primitive / Dispersed) 4. Hunting & Trapping 5. Fishing 6. Wildlife Viewing, Birding, Nature Study 7. Snowmobiling & Winter Sports What Is Not Allowed or Restricted Here are the key constraints. Rules & Regulations You Should Know When using these lands near Birdsall, here are the official rules, best practices, and legal requirements you or your guests should follow. Sample Day Itineraries Here are some ideas for state land outings in the area while staying at our park: Itinerary Activities Tips Morning Birdwatch & Paddling Head into Keeney Swamp State Forest at sunrise. Walk to the pond or along Black Creek; bring binoculars. Then launch a canoe or kayak (non-motorized) in a beaver pond (if accessible). Wear waterproof footwear; mosquitoes may be heavy early; bring insect repellent. Confirm water level & launch point. Half-Day Hike & Picnic Pack a lunch, hike through forest roads around Keeney Swamp, explore mixed upland / swamp edges. Look for balsam fir (rare in this county) and wetland flora. Bring map; waterproof pack. Pick a trail that loops so you’re not retracing steps. Fishing & Evening Campfire Fish in Black Creek or nearby ponds. In the evening, set up a primitive camp in the State Forest (following rules), build a fire in safe location using downed wood. Check fishing regulations; bring firewood or collect downed wood where allowed; have water for fire safety. Winter Adventure Use snowmobile trails if open (Corridor Trail 3D) for snowmobiling. Or snowshoe/ski in quieter forest roads. Wildlife tracking, birding with winter plumage. Dress in layers; watch weather forecasts; snow cover can hide hazards. Use appropriate gear. Why These Lands Are Special What Guests Should Bring / Be Prepared With To enjoy these lands well, here’s a packing list and preparation checklist: What You’ll Need to Ask / Check With DEC Before heading out (especially for larger groups or specialized uses), contact: Summary The state lands around Birdsall, NY – especially Keeney Swamp State Forest and WMA – offer a wide range of outdoor activities: hiking, paddling, wildlife viewing, fishing, hunting, snowmobiling in winter, and primitive camping (with rules). Truthfully our park is our favorite slice of nature in the area – a private park where you can explore Black Creek, wetlands, fields and dense and ancient forests. But the state land all around us makes it even more special! Any thoughts on state land usage? We’d love to hear your comments! . . . . Photo by Lisa Siefert on Unsplash Photo by Bo Schoonejans on Unsplash Photo by Jed Owen on Unsplash
Should I Get a Side-by-Side for My Campground?
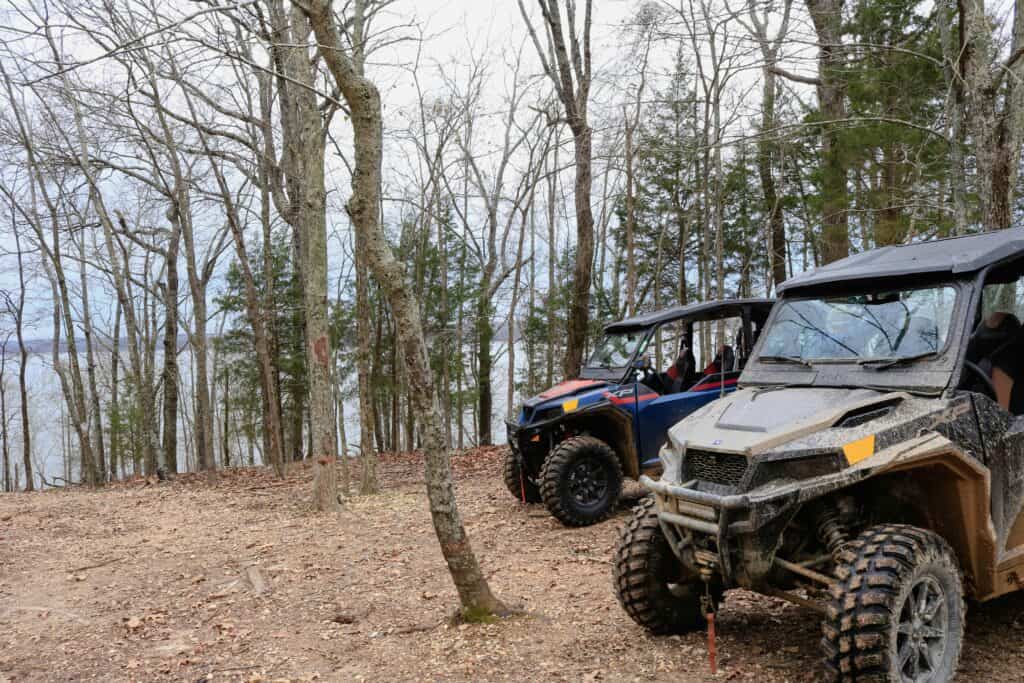
A few weekends ago we went to a side by side poker run (sponsored by the Birdsall Inn, a watering hole and restaurant a mile from our campsite – we highly recommend it!). Almost 500 machines thundered over dirt roads, meeting up at designated spots and raising money for childhood cancer research. An incredible day and so much fun! Now we’re sold on the idea of finding a machine that can thrash on trails but also be a practical and useful addition when managing our campsite. Hauling firewood, checking on guests, accessing parts of the property that are far off and hard to get to on foot (side by sides love mud!). So we’ve been riding with friends, doing research, and deciding if a side-by-side (UTV) will make our campsite management life easier. Side-by-sides (aka utility terrain vehicles or UTVs) are rugged, many use machines meant for both work and play. But are they really worth the investment for a campground owner? In this post, we’ll go over the pros, cons, and considerations when deciding. What Is a Side-by-Side? A side-by-side is an off-road vehicle with seating for two to six people, usually with a roll cage, cargo space, and four-wheel drive. Unlike ATVs (which usually have one rider sitting on a straddle seat), side-by-sides have a steering wheel, seat belts, and often have a small bed for hauling. They’ve become popular among hunters, farmers, and outdoor workers because they can handle rough terrain while carrying tools, supplies, or passengers. For campgrounds, they can serve as both a workhorse as well as a fun perk. The Benefits of a Side-by-Side for a Campground 1. Efficiency in Daily Operations If you have several acres to manage, walking everywhere isn’t always realistic. A side-by-side lets you: They save time and energy, especially during peak season when you’re constantly moving. 2. Hauling Power Many models come with a small dump bed or towing capability. That means you can move gravel, woodchips, trash, or construction materials without needing a full-sized truck. For campsite improvements—like building trails, maintaining roads, or setting up new units—a UTV is a huge help. Add a winch and it becomes even more useful. 3. Access to Rough Terrain If your campground has steep hills, muddy trails, or wooded areas, a side-by-side can get you places a standard truck can’t. This makes it a good fit for: 4. Emergency Response In case of a medical emergency or a guest stranded in a remote part of your campground, a UTV lets you to reach them quickly. Some campgrounds outfit their side-by-sides with first-aid kits or stretchers for safety. 5. Fun Factor (With Boundaries) A side-by-side can add some fun for your family or staff after hours. It’s also possible to build guest experiences around them, like guided tours of your property—but you will want to know and follow local laws, know your liability coverage, and know your insurance requirements. The Downsides of Owning a Side-by-Side 1. Cost A new side-by-side can range anywhere from $10,000 to $30,000 or more, depending on the brand and features. Even used models tend to hold their value, so this is not a small investment. 2. Maintenance and Repairs Like any vehicle, a UTV requires fuel, oil changes, new tires, and occasional repairs. If it breaks down mid-season, you’ll need access to a mechanic familiar with off-road vehicles, which may not always be nearby. 3. Fuel Use Most side-by-sides run on gas, and frequent use can add up. If you’re driving it daily across your property, fuel costs might be noticeable compared to just walking or using a smaller ATV. 4. Noise Side-by-sides are louder than golf carts or electric utility vehicles. If you drive one around while guests are enjoying nature, it could interrupt their peace. You’ll want to be mindful of when and where you use it. 5. Safety and Liability With any motorized vehicle, there’s a risk of accidents. You’ll need to ensure only trained staff (or yourself) operate it. Allowing guests to drive it is usually a bad idea—your insurance provider might not even allow it. Alternatives to a Side-by-Side Before investing, consider other options that may fit your campground better: Key Questions to Ask Yourself Before making the purchase, you’ll want to think about: Tips for Choosing the Right Side-by-Side If you decide it’s worth it, here are a few features to consider: Final Thoughts So, should you get a side-by-side for your campground? If you have alot of acreage, rough terrain, and frequent hauling or maintenance tasks, a UTV is almost definitely worth the investment. It saves time, energy, and stress—especially during peak season. But if your campground is smaller, mostly flat, and easier to manage on foot or with a golf cart, a side-by-side may be overkill. You could put that money into guest experience upgrades instead. Like most campground investments, it comes down to your specific property, budget, and long-term plans. A side-by-side isn’t a must-have for every owner—but for the right campground, it can be a game-changer. Have you used a side-by-side at your campground or while camping? Share your experience in the comments below—we’d love to hear how it worked for you! . . .Photo by Nathaniel Hutcheson on Unsplash ✅ Word count: ~1,540
Knowing When It’s Time to Expand at Your Glamping Campsite

Running a glamping campsite is a rush but it’s also a lot of work. Bringing hospitality and comfort into the great outdoors draws adventurous travelers looking for something beyond a traditional hotel or tent site. For many owners, the project starts small. But as your business grows, you might start to wonder: is it time to expand? Expansion is one of the biggest decisions a campsite owner will make. It involves careful planning, financial investment, and an understanding of your market. Expand too soon, and you risk straining resources and burn out. Wait too long, and you may lose potential revenue and momentum. This article explores some signs that it’s time to expand your glamping campsite, factors to consider before taking the leap, and strategies to expand wisely. 1. Your Occupancy Rate Is Consistently High A sign that it may be time to expand is when your existing accommodations are consistently full. If you find yourself turning guests away regularly during peak season—or, better yet, throughout much of the year—it means demand is exceeding supply. Add in consistently high reviews, and you know you’re on the right track. A consistently high occupancy rate indicates two important things: If you notice that your accommodations are booked out months in advance, that’s a strong business signal. Expansion can help you capture those missed opportunities and grow revenue without drastically changing your business model. 2. You’re Getting Frequent Requests for Something You Don’t Offer Sometimes, guests tell you exactly what you should consider adding. Maybe they keep asking if you have family-sized cabins, a pet-friendly option, or a hot tub. Maybe they want activities like kayaking, fishing, or stargazing decks. If you repeatedly hear similar requests, it might be worth exploring expansion in that direction. This doesn’t always mean building more units right away—it could mean diversifying your offerings. For example, if you only provide couple-sized tents, adding one or two larger family yurts might increase your guest base. Guest feedback is extremely important because it highlights gaps in your current setup. Expansion should always serve a real demand, not just what you think guests want. 3. Your Revenue Is Steady and Profitable Expanding your glamping campsite takes money—sometimes a lot of it. Before considering building more units or adding facilities, it’s important to check your financial health. Here are some good financial indicators: Expansion should be done from a position of strength. If your current operation is already financially sustainable, then scaling up becomes far less risky. 4. You Have Repeat Guests and Strong Word-of-Mouth Glamping thrives when there is customer satisfaction. If people are returning year after year, that’s a powerful sign that your site has lasting appeal. Likewise, if new bookings often come from referrals, friends, or family of past guests, it suggests your brand is strong. Repeat customers don’t just show loyalty—they also validate that your experience is memorable enough to invest in. If your current setup has already created a loyal base, expanding gives those same guests new reasons to return and spend more. 5. You’ve Outgrown Your Infrastructure Sometimes, the need to expand is less about adding new accommodations and more about upgrading your supporting systems. For instance, you might notice: In this case, expansion isn’t just about growth—it’s about sustainability. Improving infrastructure ensures that your current and future guests continue to have a smooth, comfortable experience. Without these upgrades, even adding one or two new glamping units could overwhelm your operations. 6. The Local Market Supports Growth Your expansion decision shouldn’t be based only on your property’s success—it also depends on the broader market. Some questions to ask include: If tourism is growing in your region and there’s demand for unique stays, your campsite may be well positioned for expansion. On the other hand, if the market is stagnant or shrinking, it may be wiser to hold back. 7. You’re Personally Ready for the Next Step Expanding isn’t just a business decision—it’s a lifestyle decision. More accommodations mean more responsibilities: more cleaning, maintenance, marketing, and guest relations. Ask yourself honestly: Many campsite owners value the personal connection with guests. Expansion may change that dynamic. Think carefully about whether growth aligns with your personal goals as much as your financial ones. How to Expand Wisely If you’ve weighed the signs and feel confident it’s time, here are some smart approaches to expanding: Start Small and Test Instead of doubling your capacity overnight, consider adding just one or two more accommodations. This lets you test whether demand holds steady without taking on too much risk. Diversify Accommodations Adding a different type of glamping unit—like a treehouse, dome, or cabin—can attract a wider variety of guests. Diversity also creates repeat business, as people return to try something new. Upgrade Infrastructure First If your bathrooms, kitchens, or septic systems are already near capacity, address those first. Expanding without improving infrastructure can hurt your guest experience. Focus on Quality Over Quantity It’s better to have a smaller number of high-quality units than a large number of poorly maintained ones. Glamping guests expect comfort, cleanliness, and a good vibe. Market Expansion Strategically It’s smart to avoid just building more space—you also have to make sure people know about it. Announce new units with professional photos, early booking discounts, or social media campaigns to create excitement. Potential Risks of Expanding Too Soon Expansion can be exciting but there are also risks involved: Understanding these risks helps you make a balanced decision and avoid expanding just for the sake of growth. Conclusion Knowing when to expand your glamping campsite is a delicate balance between demand, financial readiness, and personal goals. Signs like high occupancy rates, frequent guest requests, steady revenue, and repeat customers suggest that you may be ready for the next step. At the same time, it’s extremely important to assess infrastructure, market trends, and your own capacity to handle growth. Expansion, when done wisely, can take your campsite from a small passion project to a thriving destination. The key is to