Things to Consider When Setting Pricing for a Glamping Campsite

It can be a real challenge to figure out what to charge your guests when you’re running a glamping campsite. Price your stays too low, and you may cover costs but struggle to turn a profit. More important, you may attract guests who don’t value and care for your property. Price too high, and you risk empty cabins and campsites because guests look for something more reasonable. The right pricing strategy involves understanding your costs, your guests, and your long-term goals. A thoughtful approach to pricing will help you stay competitive, keep your site booked, and ensure your business is sustainable. In this post, we’ll look at the key things you should consider when setting your glamping campsite pricing. 1. Calculate Your Costs Since the beginning, we’ve been focused on creating a phenomenal guest experience – going above and beyond without initially being overly concerned about turning a profit. But we knew that making a profit would be necessary once we were established in order to make our project sustainable. A big part of this was pricing guest stays appropriately. Price must cover your costs. Running a glamping campsite comes with both obvious and hidden expenses. Calculate your break-even point—the minimum price you need to charge to cover costs. From there, you can add a margin that ensures profit. 2. Think About the Value You Provide Glamping is more than lodging —it’s about the experience. Guests are paying for comfort, nature, and memories that they can’t get in a more traditional setting. Ask yourself: The more value your site offers, the more you can reasonably charge. Many guests are willing to pay premium prices if they feel the experience is worth it. In fact, we find that guests often value the experience more when the cost is a bit higher. 3. Study Your Competition Look at other glamping operators in your region. Even if your setup is different, competitor pricing provides a baseline. If your site is more unique or higher-end, you may be able to charge more. If you’re trying to draw in first-time glampers, competitive pricing may be key. 4. Understand Your Guests Different types of travelers look for different price points. Knowing your audience helps you set prices they’ll find fair. Align your pricing strategy with your target audience’s budget and expectations. Too low or too high will lead to missing the mark. 5. Adjust for Seasonality and Demand Most glamping businesses see seasonal demand. Summer weekends and fall foliage are usually peak times, while mid-week stays in off-season months may be slower. You can: A flexible pricing system takes a bit more work but can help maximize profits while keeping bookings consistent. 6. Pick the Right Pricing Model There are several approaches to charging guests: Mixing models can give you flexibility. For example, charge higher weekend rates but offer discounted packages for guests staying three nights or more. 7. Use Psychology in Your Pricing Sometimes small details make a big difference in how guests perceive your prices. These subtle techniques can influence booking decisions without lowering your profits. 8. Consider Your Long-Term Goals Your pricing strategy should reflect the direction you want to take your glamping business. Think about sustainability—not just profit today, but what will keep your business thriving years from now. 9. Plan Discounts and Promotions Carefully Discounts can help fill slow nights, but too many discounts can weaken your brand. Guests may even learn to wait for deals instead of booking at full price. Consider using: Make sure promotions add value instead of simply lowering your rates. 10. Revisit Pricing Regularly The market changes. Your costs rise. Guest expectations evolve. That’s why pricing isn’t a one-time decision—it needs to be revisited. At least once a year, review: Small adjustments can help you stay profitable without shocking returning guests. Final Thoughts Pricing your glamping campsite is both an art and a science. You need to cover costs and make a profit, but you also need to understand your value, your guests, and your long-term vision. Take time to research, test, and adjust. The right pricing will help you attract your ideal guests, fill your accommodations, and keep your business sustainable for years to come. We’d love to hear your thoughts! Please leave any of your insights in the comments section. Happy hosting! . . . . Photo by Alfred Quartey on Unsplash Photo by Kenny Eliason on Unsplash Photo by Igal Ness on Unsplash
Is Adding a Treehouse to My Glamping Campsite Worth It?
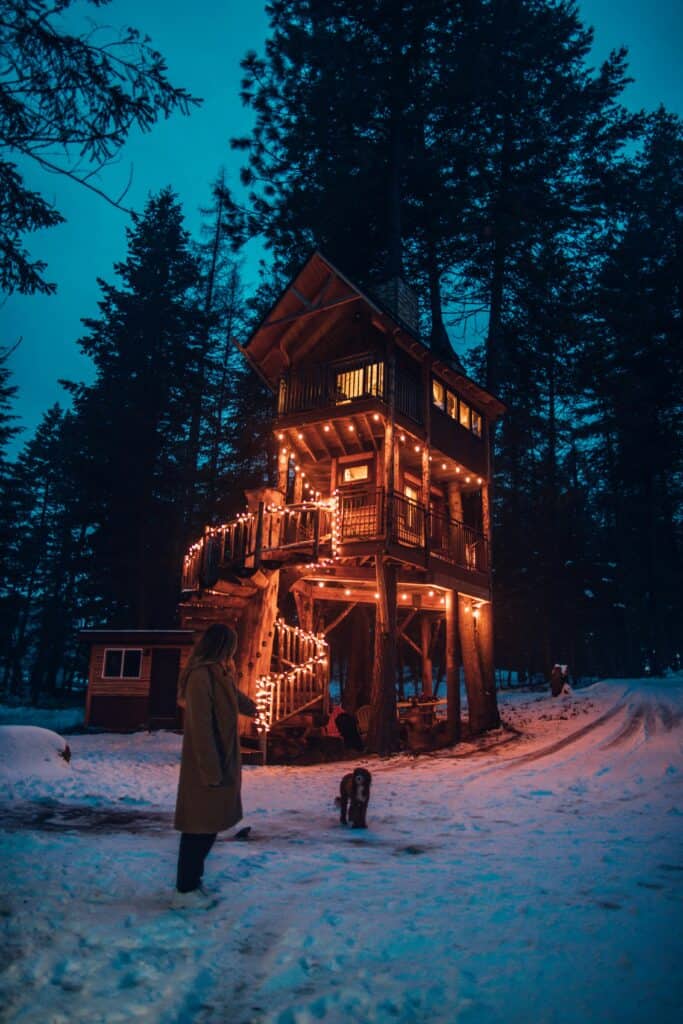
Treehouses have a magic about them for certain. They stir up childhood memories, spark the imagination, and create an instant “wow” factor for guests. Everyone we talk to lights up when we tell them that treehouses are coming soon to the campsite (this blog is the first of many on this topic ). In the glamping world, a treehouse can be the ultimate Instagram-worthy accommodation — and the ultimate investment. But before you start hauling lumber up into the branches, it’s worth asking: Is adding a treehouse to my glamping campsite really worth it? The answer depends on your budget, location, market demand, and how you plan to use it as part of your overall guest experience. Let’s look at the pros, cons, costs, and considerations so you can decide if a treehouse is the right move for your site. 1. The Attraction of the Treehouse Experience A well-built treehouse can be more than just a place to sleep — it can be the centerpiece of your glamping business. Guests often choose glamping for its uniqueness, and few things are more unique than a night in the trees. Treehouses appeal to: If your goal is to stand out from other glamping sites in your area, a treehouse can be a great move. 2. The Potential Benefits of Adding a Treehouse Higher Nightly RatesTreehouses can command higher rate because of their novelty and limited availability. If your average cabin rental is $150 per night, a treehouse might easily bring in $200–$300 per night, depending on amenities and location. Free PublicityA unique structure like a treehouse can naturally attract media coverage, social media shares, and word-of-mouth buzz without extra advertising spend. Guests love posting about unique stays, which can mean free marketing for you. Repeat GuestsEven if someone has stayed at your campsite before, a new accommodation type gives them a reason to return. Loyal customers love seeing you add new features. 3. The Challenges and Risks High Upfront CostsBuilding a safe, sturdy, and guest-friendly treehouse is not cheap. Even a small one can cost $20,000–$50,000 (or more) when factoring in design, permits, materials, and labor. Custom luxury treehouses with plumbing and electricity can run over $100,000. Permits and RegulationsTreehouses may be subject to strict local building codes. In some places, they require the same permits as traditional structures — plus additional inspections for safety. If your land is zoned for certain types of accommodations, a treehouse may or may not be allowed. Accessibility LimitationsTreehouses generally require climbing stairs or ladders, which may exclude some guests (older visitors, people with mobility challenges, or families with very young children). This can limit your booking market. MaintenanceTrees grow, sway, and shed leaves. A treehouse requires ongoing inspection and upkeep — more so than a standard cabin. You’ll need to watch for rot, shifting supports, pest issues, and weather damage. 4. Cost Breakdown Example Let’s take our developing project as an example – a mid-range treehouse for two guests, with a porch vaulting over the cliff above the creek. A wood burning fireplace, no electricity or plumbing. Bathrooms and showers are available in the common access Water Shed. (Sounds amazing, doesn’t it!). Keep in mind this varies from region to region- this is a pretty close ball park where we are located. Expense Estimated Cost Design & Engineering $3,000 Permits & Fees $300 Lumber & Materials $10,000 Professional Labor $10,000 (we’re doing a lot of the work ourselves but still need to hire some out) Interior Furnishings/ wood burning stove $5,000 Landscaping/Access Path $2,000 (building in a Hemlock forest in a remote area across the creek) Total $30,300 If you charge $250/night and book 120 nights a year, you’d bring in $30,000 annually — meaning we could recoup your investment in a year under strong occupancy. Not bad. 5. Treehouse Styles to Consider Your style choice will affect both the cost and your target audience. 6. Marketing a Treehouse When you add a treehouse it can become a pivot point attraction – what catches the eye and makes you stand out. A few marketing ideas: 7. Real-World Guest Considerations Before committing, think about your actual guests: If most of your guests book for comfort and accessibility, a ground-level luxury tent might be a better investment. If your guests love novelty and the outdoors, a treehouse could be a perfect fit. 8. Ways to Maximize ROI If you decide to build, here’s how to make the most of your investment: 9. Pros and Cons Summary Pros: Cons: 10. Is It Worth It? A treehouse can absolutely be worth the investment — if your market demands unique, photo-worthy accommodations and you have the budget and time to maintain it. It’s not a small undertaking, but when done well, it can become your signature attraction and a major revenue booster. We are beyond excited, and so is anyone we have told about our treehouse project. If you already have a strong guest base and want to add something that gets people talking, a treehouse could be the crown jewel of your glamping site. If you’re just starting out and have a tight budget, it might be wiser to first focus on lower-cost accommodations that build steady income, then reinvest in a treehouse later. That’s what we did, starting with a base camp and building from there. We’d love to hear your thoughts on moving your glamping campsite project into the trees. Happy building!
Should You Bring on a Partner and/or Investors for Your Glamping Campsite?
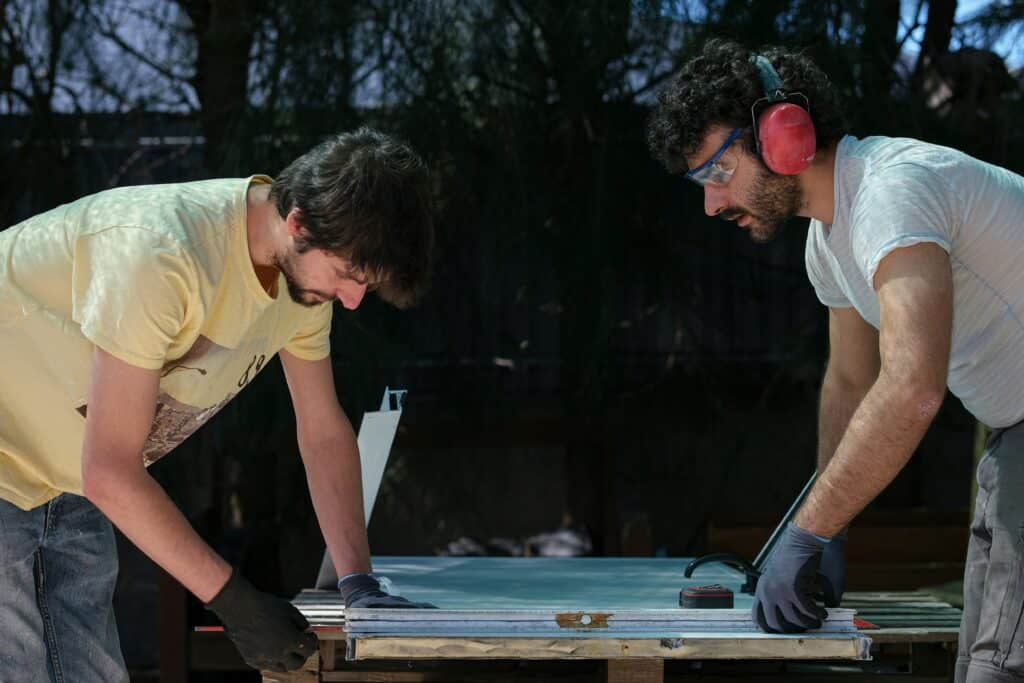
Building a glamping campsite from the ground up is no small task. Whether you’re still in the beginning stages or you’re ready to install saunas and treehouse cabins, there’s always one looming question: Should I bring on a partner or investors to help grow this business? It’s a question many camp owners wrestle with. The idea of sharing the workload, increasing capital, and speeding up development is tempting—but there are also risks, both financial and emotional. In this article, we’ll break down the ups and downs of bringing on a business partner or investors for your glamping campsite and help you decide if it’s the right move for your land and your long-term goals. Why Consider a Partner or Investor? Running a glamping business is expensive and labor-intensive. If you’ve been working solo or with limited help, you may feel like you’ve plateaued. Here’s where partners or investors can help: 1. Access to Capital Building a high-end glampsite isn’t cheap. Between land prep, structures, permits, bathrooms, and amenities, the upfront investment can range from tens to hundreds of thousands of dollars. Investors or capital partners can provide: 2. Shared Skills and Workload A partner might bring complementary skills—like digital marketing, carpentry, or hospitality experience—that you might not have. They can also share the physical and emotional weight of running the business day-to-day. 3. Faster Growth If your vision includes a multi-site operation, themed retreats, or luxury add-ons like wood-fired hot tubs or guided stargazing, a financial or strategic partner can help accelerate the timeline. The Potential Downsides While the upsides can be exciting, it’s important to understand the risks of giving up equity or decision-making control. 1. Loss of Autonomy When you bring on a partner or investor, you’re no longer the sole decision-maker. Even a minority partner will expect to be heard. Investors might push for more profit-driven decisions that clash with your values or slower, eco-conscious approach or vice versa. 2. Differences in Vision A partner may see the site as a boutique resort; you may see it as a quiet back-to-nature escape. These differences can be subtle at first and turn into big issues later. 3. Profit Sharing Even if your business becomes wildly successful, you’ll be sharing that success. Investors will expect returns, and partners will expect income or equity. Make sure you’re comfortable with long-term profit splits before signing anything. 4. Relationship Strain Business relationships, like marriages, require trust, communication, and compromise. Disagreements can turn personal and affect the entire campsite atmosphere. What’s the Difference Between a Partner and an Investor? Partners are typically hands-on. They may co-manage the site, contribute labor, or make operational decisions. They’re usually involved in: Investors, on the other hand, are usually hands-off. They provide money in exchange for equity or a repayment plan. They may sit on your advisory board or have occasional check-ins but won’t help clean cabins or troubleshoot power outages. We think of it this way: Key Questions to Ask Before Bringing Someone On Whether you’re considering a family member with a checkbook or a stranger with a hospitality background, ask yourself these questions: Types of Partnerships and Investment Structures Depending on your goals and comfort level, here are some structures you might consider: 1. Silent Investor (Equity or Debt-Based) They give you money and stay out of operations. You either: Best for: Those who want control but need money fast. 2. Active Partner (Co-Owner) They contribute money, labor, or both. You share decision-making and profits. Best for: Those who want a teammate to grow with. 3. Limited Partnership You retain general control, and they act as limited partners—financial backers with no management say. Best for: Campsite owners who want capital but don’t want to be micromanaged. 4. Revenue Share Agreement Instead of giving away equity, you agree to share a percentage of monthly revenue until the investor is paid back, with interest. Best for: Those who want to keep ownership intact. Tips for Making It Work If you do decide to bring someone on, we recommend that you follow these best practices: 1. Put Everything in Writing Even if they’re family or your best friend (maybe especially if they’re family or a friend), formal agreements are extremely important. We recommend using a lawyer to draft: 2. Start with a Trial Period Considering a short-term agreement (6–12 months) to test the waters is a great idea. See how it goes before locking into a long-term commitment. 3. Communicate Often Regular check-ins—weekly or monthly—can prevent resentment or confusion. Transparency and communication are key. 4. Define Success Together Whether it’s booking out every weekend or earning $5,000/month, it’s important to be clear about your goals. This should be a win-win. Misaligned expectations are a top cause of failed partnerships. Alternatives to Partners or Investors If you’re hesitant about giving up control, here are other options to consider: Final Thoughts: Trust Your Gut and Your Numbers There’s no one-size-fits-all answer. Some of the most beautiful glamping sites were built by passionate individuals slowly over time. Others exploded onto the scene with investor support and partnerships. Bringing on a partner or investor could be the boost your campsite needs—or a source of ongoing stress. Take your time, ask the hard questions, and consider starting small. You’ve already done the brave work of creating a space where people can unplug, recharge, and reconnect with nature. Any future step should help you do more of what you love—not take you away from it. Have you brought on a partner or investor in your glamping journey? Thinking about it? Share your story in the comments!
“Why We Finally Hired a Housekeeper for Our Glamping Campsite (and What It’s Changed)”

Running a glamping campsite is very rewarding but is ALOT of work. Until very recently, we did everything ourselves and, with the season really picking up, we have been burning the candle at both ends. Every turnover, every sheet, every floor mopping— we did all the cleaning ourselves. We wanted to be very familiar with what is involved and we saw it as saving money, which it did for a while. Also, to be honest, there was something satisfying about making each cabin perfect for the next guest. But over time, with all the building, yard work as well as the cleaning, we felt like we were missing the bigger picture: growing the business, connecting with guests, and enjoying what we had built. So we made the decision. We hired a housekeeper. And it’s changing everything. The Breaking Point: When DIY Stops Making Sense When we first launched our glampsite, guests were more spaced out and tackling all the chores was manageable. A vacuum and mop, surface scrub, a fresh set of linens and restocking. But as we expanded to more campsites and added a shower house, reality hit. Cleaning thoroughly between guests, often on tight time windows, became a stressor that we couldn’t ignore. We were finding ourselves blocking off days, basically turning away guests, to keep from being overwhelmed or from having standards slip. After a fully booked Fourth of July as well as most of the days that have followed, it was time to take the leap and hire on some help. What We Were Afraid Of (and What Actually Happened) Hiring help felt like a big step and we had concerns. Like: Here’s what actually happened: How We Found the Right Person We actually got very lucky, and ran into a perfect person out of the blue (although it felt like more than a coincidence somehow). We were looking for help. She had experience, was looking for some work with flexibility- and she was local! All felt perfect, and so far all is going great. Aside from luck, here are some ways to find and bring on a new team mate: The Long-Term Wins Hiring a housekeeper is doing more than just save time—it’s shifting our whole approach to running the glampsite. Here’s how: 1. Better Work-Life Balance We finally have some of our weekends back. This means family time, actual rest, and a chance to enjoy the land we love. 2. Guest Satisfaction Professional cleaning means the continued highest standards. Cleanliness continues to be a selling point without the long hours. 3. More Time for Growth With fewer daily chores, we can focus on marketing, updating the website, refining our booking system, and adding more incredible campsites. 4. Emergency Buffer It’s no longer just us who can get the cabins guest ready. Our housekeeper has it handled. Things We’ve Learned If you’re thinking about hiring a housekeeper for your glampsite, here are a few things we’ ‘ve learned: Should You Do It Too? If your campsite is growing, and you’re feeling stretched, hiring a housekeeper might be the best decision you can make. It’s not just about cleanliness—it’s about protecting your energy, preserving your sanity, and creating a guest experience that’s consistently great. Yes, it’s an expense. But it’s also an upgrade—to your time, your quality of life, and your guest reviews. Whether you bring someone on part-time during peak season, or create a long-term partnership, hiring help means you can focus on what only you can do—shaping the vision and making your glamping site something truly special. Final Thoughts Hiring a housekeeper didn’t mean giving up control. It meant choosing what kind of business we want to run—and what kind of life we want to live while running it. Now, instead of dreading turnovers, we look forward to guest arrivals again. Our vibe stays positive, and our guests pick that up. If you’re on the fence, our vote is that you lean toward going for it and grow your team. You don’t have to do everything yourself. Sure it’s an added expense, but sometimes, the best way to take care of your guests and to grow your business is to take care of yourself. Happy Hosting! . . . Photo by Slaapwijsheid.nl on Unsplash
Should You Use Credit Cards and Loans to Build a Glamping Campsite?

Debt sucks, especially when its credit card debt. But when you’re getting a glamping campsite guest-ready as quickly as possible sometimes using credit card and loans can be an attractive option. Is this a terrible idea? The answer isn’t one-size-fits-all, but with the right information and honest self-assessment, you can make the decision that’s best for your goals and risk tolerance. The Appeal of Financing a Glamping Project Building a glamping site can cost anywhere from a few thousand to several hundred thousand dollars, depending on your ambitions. Even a simple site with a couple furnished tents or cabins can have expenses that run up quickly. And ordering on Amazon Prime is so easy, with so many cool things to buy. Or how about a shopping spree at Home Depot on a store credit card that doesn’t charge interest for the next two years? Financing expenses with loans or credit cards in order to start hosting paying guests can be appealing for several reasons: But with these benefits come with risks, and it’s important to think about the upside and downside before pulling the trigger. Understanding the Costs of Credit Cards and Loans Credit Cards: Fast But Dangerous Man, does it feel easy to use credit cards and take out a loan or two- it’s almost like not even spending real money, which makes them so dangerous. Using a personal or business credit card is one of the fastest ways to finance expenses like materials, furnishings, or online marketing. But credit cards come with high interest rates—often 18% to 29%—and can quickly take on a life of their own if not paid off relatively quickly. So When to Use Credit Cards?A good rule is to only use credit cards if you have a plan to pay off the balance within a few months. Have we always done this? To be honest, no. But those big box credit cards are always paid off long before the interest grace period is over, and almost every penny we’re making is going toward killing all debt. For large construction projects or long-term investments, it’s a better idea to consider a loan if absolutely necessary. We provided our own labor for most projects, looked for deals, paid cash wherever we could, but building infrastructure can still be EXPENSIVE! We have a solid pay off plan that we can commit too for the loan we took out (for a chunk of the well and leach field installation) and that plan is so important. Loans: Structured and Strategic Loans come in many shapes and sizes : personal loans, business loans, home equity loans, SBA loans, or lines of credit. Unlike credit cards, they generally offer lower interest rates and more predictable repayment plans. Pros: Cons: When to Use Loans:Loans make more sense for big-ticket items: septic systems, cabins, roads, bathhouses, or large-scale infrastructure. They’re a better fit for long-term investments that will generate revenue over years. What Will the ROI Look Like? Before using any kind of financing, its important to estimate how long it will take to recover the investment. For example: But this only works if: Seasonality, weather, and unforeseen events can interrupt cash flow, so it’s a good idea to build in extra cushion before taking on the debt. When Financing Can Work in Your Favor 1. You Have a Clear Business Plan If you’ve done your research, run the numbers, understand your market, and have a booking strategy, financing can help you accelerate growth. You can build faster and start earning sooner, rather than waiting years to save cash. 2. Your Land Already Has Infrastructure If your land already has road access, a well, septic, or power, you’re starting miles ahead. A small loan might be all you need to build your first rental cabin or safari tent. 3. You Start Small and Scale Up One of the smartest strategies is to finance your first build—just enough to start hosting guests—and then use profits to fund future builds. This helps you test your ideas with less risk. 4. You Use 0% APR Offers Strategically Some credit cards offer 0% APR for 12–18 months. These can be a smart way to float materials or furnishings, as long as you pay the balance off before the promo ends. When Financing Can Lead to Trouble 1. You Underestimate Costs It’s easy to underestimate taxes, insurance, labor, licensing, and repairs. If you borrow too little, you may run out of funds before finishing the build. 2. You Overestimate Demand Just because you would love to stay in a tiny house in the woods doesn’t mean 20 strangers a month will too (although they probably will ;)). It’d always smart to do a competitive analysis and check similar listings on Airbnb and Hipcamp before projecting income. 3. You Borrow Without a Payback Plan Borrowing without knowing when and how you’ll repay—especially with credit cards—is a recipe for long-term stress and potential default. Paying off debt has to remain a top priority. 4. You Have No Emergency Fund If you max out your credit and leave yourself with no safety net, even a small emergency could derail your business. Always keep a few thousand in reserves. A Word of Advice – Talk to a CPA or Financial Advisor Real-Life Example: Financing Done Right Suppose you want to build a glamping yurt with a woodstove, solar lights, and a composting toilet. Your total build budget is $18,000. You use: You list the yurt at $140/night and average 12 nights/month for $1,680 gross. Subtract loan payments, cleaning costs, and platform fees, and you’re still bringing in a steady income—and building equity in your business. Final Thoughts: Should You Use Credit or Loans? It depends on your risk tolerance, planning, and goals. Debt is a tool, and not a way to cheat. When used wisely, it can help you build faster and host paying guests sooner. But it has to be part of a thoughtful strategy (we have a two- year
Why You Shouldn’t Quit Your Glamping Campsite Dream
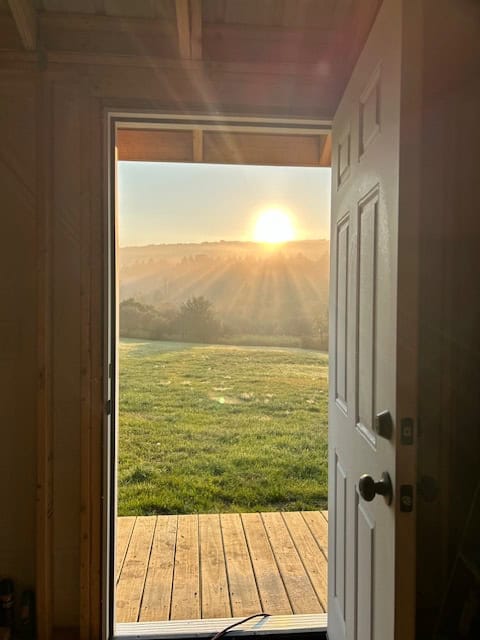
Running a glamping campsite isn’t easy. In fact, some days it can feel downright impossible. Between the endless maintenance, unpredictable guests, competition, social media pressure, weather damage, and the weight of wondering if it’s really worth it — you might start to ask yourself, “Should I just quit?” If that thought has crossed your mind, you’re not alone. But before you walk away from your vision, take a breath, step back, and remember why you started. Glamping isn’t just a business — it’s a lifestyle, a calling, and a gift to others. What to give your energy to is a very personal choice, and building and managing a glamping campsite isn’t for everyone. But if you’re on the fence, here are some reasons that it’s worth hanging in there. 1. You Built Something Amazing Wherever you started, you had a vision and you acted on it. This is something not everyone accomplishes, and an important part of life. You took a piece of land and turned it into a place people travel to for peace, adventure, and connection. Every cabin you built, every fire ring you placed, every trail you cleared was the result of a dream. You envisioned what other people might enjoy and appreciate and then you created that space for them. That kind of commitment to a vision deserves time. Even when growth is slow or bookings are down, the foundation you’ve created matters – it’s a long-term investment and can’t be easily replaced. Tip: Take photos of your site, during different seasons and during different stages in various projects. Revisit them when you’re feeling discouraged to remind yourself how far you’ve come. That feature that your guests appreciate so much wasn’t always there – you made that. 2. You’re Offering More Than Just a Place to Stay Glamping guests aren’t looking for a hotel — they’re looking for an experience. An adventure rooted partially in childhood. The crackling fire. Splashing across the creek, into the big woods. No place they have to be, but some place they get to be. A quiet morning with a mug of coffee on a deck overlooking the woods. A safe escape from every day stressors. For us, nothing is better than reading through comments left in a guest book on the windowsill. Couples falling more in love as they spend time away. Families closer than they’ve been in years. Stories filled with adventure and wonder. They say they will be back, and they’ve found the magic place they’ve been looking for. Nothing beats that. 3. Every Business Has Tough Times Running a glamping business is seasonal in more ways than one. There are high and low booking months — but also mindset seasons: motivation, momentum, burnout, self-doubt. You might go a whole month without a single booking and then get flooded with bookings. The early years are especially tough, but they’re also where the groundwork gets laid. Remember: Growth does not always follow a straight line. It’s okay to have bad weeks, or bad months. What matters is that you keep showing up. 4. The Market Is Still Healthy Glamping isn’t going anywhere and isn’t a fading trend — it’s continuing to grow. Travelers want to have unique, comfortable outdoor experiences now more than ever. From millennials wanting unique stays to families seeking screen-free vacations, glamping fills a need that hotels can’t. It’s true that competition is growing. But so is demand. With a little creativity and persistence, your campsite can still be a favorite destination. If you create a great vibe, your guests will feel it. Bonus Tip: Focus on what makes your location or story different. Family land? Stargazing potential? Local hikes? Share it online and let your story set you apart. 5. You’re Closer Than You Think People tend to quit just before things start to get better. It’s protection from the unknown, which everyone does, but its pretty backwards. Maybe your website is just starting to gain SEO traction. Maybe your next guest is going to write a review that goes viral. Maybe you’re going to tap into the perfect way to get the word out and have more business than you can handle. Momentum builds slowly — then all at once. If you’ve already put in the hard work, why not stick around and keep going so that you can see it all come together? 6. It isn’t Just You Glamping campsite hosting is off the beaten path but you are not alone. A sense of connection with other hosts makes challenges a little easier. In fact, wanting to have an opportunity to connect with other hosts and would-be hosts was a major part of why we started Glampsite Joe. Building a community, sharing lessons learned, and learning from readers has made it a great ride so far. 7. You Can Make Changes Without Quitting If something’s not working, it doesn’t mean the whole project is a bust. Maybe you need to adjust your pricing. Maybe your marketing isn’t targeting the right guests. Maybe you need to hire help with cleaning or bookkeeping. Tweaking your approach is not quitting — it’s growing. Many successful glamping sites went through multiple versions before finding their stride. Ask yourself: What specific part is draining you right now? Is there a way to simplify, delegate, or improve it? 8. Your Guests Believe in You Sometimes all it takes is one kind review, a repeat guest, or a heartfelt message in your guestbook to remember why you’re doing this. People often leave changed for the better after staying at your place — even if you don’t always get to see it. They believe in the magic you’ve created. 9. Your Family Will Thank You Whether you’re doing this to create a legacy, a side income, or a place for your family to gather — you’re building something that matters. Your children or grandchildren may one day walk those trails you cut, sleep in those cabins you built, and continue
What Burns Best? A Guide to Firewood for Your Campfire
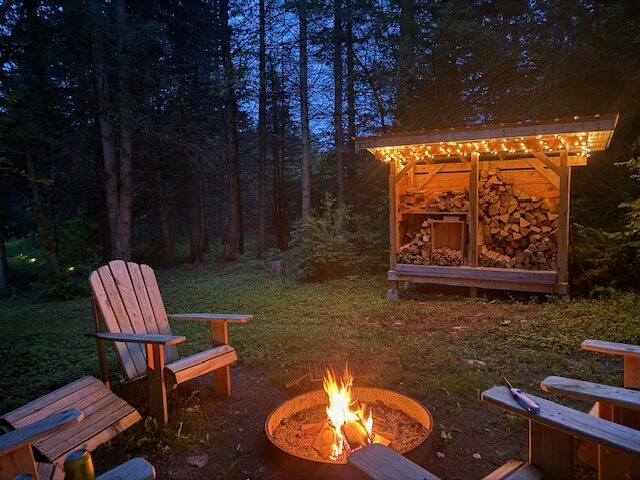
A great fire is key on any camping trip. For starters it has to be dry – something that almost never happened prior to building a woodshed by the firepit (in the feature pic). But even when dry, sometimes it’s hard to guess how a fire will burn. Will it smoke? Will it throw a ton of heat? Will it smell good? Not all firewood is created equal. Knowing what types of wood to use, how to store it, and how it burns can make a ton of difference. So, without further ado, here’s a guide that breaks down the most common firewood (in the Northeast anyway), some of its features, and how to use it to build that perfect campfire. So Why Does Firewood Choice Matter? Well, for a few reasons. Such as: Best Local Firewoods for Outdoor Fires Here are some of the best options for firewood that you’ll find in the forests and woodlots in the Northeast: 1. Oak (Red or White) 2. Sugar Maple (Hard Maple) 3. Beech 4. Birch (Yellow or White) 5. Cherry 6. Ash (White or Green) 7. Apple or Fruitwood Firewoods to Avoid or Use With Caution 1. Pine and Other Softwoods 2. Green or Unseasoned Wood 3. Driftwood 4. Treated or Painted Wood BTUs and Burn Qualities BTUs (British Thermal Units) measure how much heat wood produces. The higher the BTU, the longer and hotter the fire. Here’s a chart for quick comparison: Tree Type BTU (Million/Cord) Burn Quality Oak 25-26 Excellent heat, slow burn Maple 24-25 Clean, steady burn Birch 20-22 Bright, aromatic Pine 15-17 Fast burn, crackles Ash 23-24 Even, steady burn How to Season Firewood Seasoning is drying wood until it reaches the best moisture level for burning. Here are some pointers: How to Store Camp Firewood Upstate NY winters and rainy springs can ruin your firewood if not stored correctly. Legal & Environmental Notes for Upstate NY A Few More Fun Firewood Facts Final Thoughts Choosing the right wood helps you build a cleaner, longer-lasting, and safer fire that’s perfect for your camping adventure. With a little knowledge and the right woodpile, every fire you build can be a warm and memorable one. Wishing you peace and warmth! . . . Photo by Rach Cohen on Unsplash
Should I Allow Pets at My Glamping Campsite?
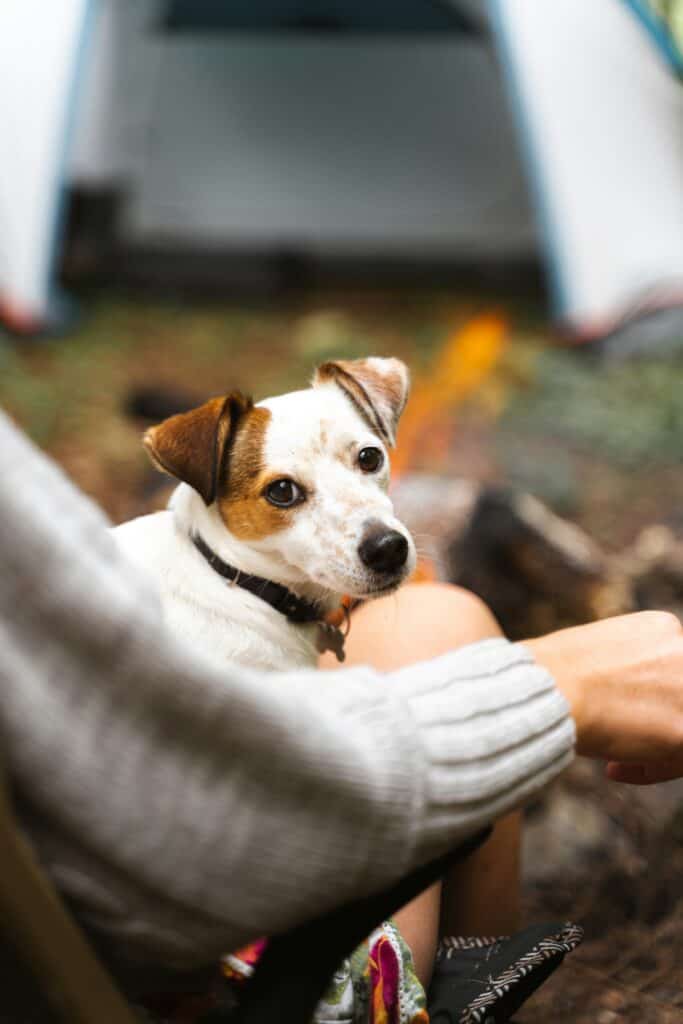
When I first started building my glamping campsite, an experienced host recommended that I didn’t allow pets. They had a tough experience one time, with a dog who was supposed to be friendly, but got aggressive with the other guests. Being an animal lover and knowing that, for many, pets are part of the family, I wasn’t sold on the pet ban, but also knew that there were risks involved. Sure enough, one question kept popping up from potential guests almost from the beginning:“Can we bring our dog?” At first, I wasn’t sure how to respond. The idea of happy dogs and happy campers was wonderful, but I had concerns — about cleanliness (with our creek comes mud!), damage, noise, liability, and the guest experience overall. As my glampsite grew from a personal project to a business, I knew I needed to seriously consider whether or not to allow pets. If you’re a campsite owner — or interested in becoming one — you may be wondering the same thing. So let me walk you through what we’ve learned – through research, advice from other hosts, and personal experiences. Here are pros, cons, and key considerations of allowing pets at a glamping site. The Pros: Why Allowing Pets Can Be a Smart Move 1. It Expands Your Audience Pet owners make up a huge portion of travelers. According to surveys from the American Pet Products Association, nearly 70% of U.S. households own a pet, and more than half of dog owners say they’ve skipped a trip because they couldn’t bring their dog. By welcoming pets, you open your doors to a broader guest base — especially families, millennials, and remote workers who travel with their furry companions. 2. It Builds Loyalty People are deeply attached to their pets. If a guest has a great experience traveling with their dog at your campsite, you’ll likely win a customer for life. They’ll return year after year and recommend your site to other pet owners. 3. It Sets You Apart Not all glamping sites allow pets — which means you can become the go-to destination for travelers who are specifically looking for pet-friendly accommodations. This is especially true if you include thoughtful touches like a fenced-in area, dog bowls, or pet-friendly trails. Our trails and private setting are perfect for dog adventures! 4. It Encourages Longer Stays Guests with pets may stay longer, especially if they know their animal is welcome and safe. If someone doesn’t have to worry about getting home to let the dog out or pay for a sitter, they might book an extra night or two. The Cons: Why You Might Think Twice 1. Property Damage Even well-behaved pets can cause issues. Dogs might scratch doors, dig in gardens, chew furniture, or have accidents indoors. Cleaning up takes time and money, especially if you’re trying to maintain a luxury experience. 2. Noise and Disruption Not every dog is quiet or calm. Barking dogs can disturb the peace for nearby glampers, especially in closely clustered cabins or tents. Worse, an aggressive pet could frighten or even injure another guest or animal on the property. 3. Allergies and Cleanliness Even with deep cleaning, pet dander can linger — which could be a problem for future guests with allergies. It might also increase the frequency of cleanings or require switching to more pet-resistant materials in your cabins and tents. 4. Liability If a dog bites someone, destroys property, or gets injured on your land, you could be held responsible. That’s a risk you need to weigh seriously — and may require changes to your insurance coverage or guest waiver forms. My Experience: What I Chose to Do and Why After weighing the pros and cons, I decided to allow dogs. Our cabins are all mop-able and completely scrub-able. I ask potential guests if their dog is house broken and not prone to damaging things. So far there hasn’t been any problems (knock on wood) 1. Designated Pet-Friendly Units I keep one of my cabins completely pet free, out of consideration for guests with allergies or concerns. Cabins with pet guests are cleaned and then cleaned again. 2. A Clear Pet Policy I created a written pet policy that I can have pet owners read and agree to before booking. It covers: Other hosts indicate: Considering our very private setting, we can manage this on a case to case basis (and some dogs who are an aggressive breed are very sweet!) This helps set expectations and reduces surprises on either end. 3. Charging a Pet Fee I don’t do this yet, but may in the future. Many hosts charge a $25–$40 per stay pet fee, which covers the extra cleaning and wear-and-tear. Most pet owners expect this and are happy to pay it. 4. Amenities for Dogs To make the experience better for both the dog and its family, it’s nice to provide: These little touches go a long way in creating goodwill and positive reviews. Things to Consider Before Making Your Own Decision If you’re still on the fence, here are some important questions to ask yourself before allowing pets: 1. What Type of Structures Do You Have? Canvas tents, yurts, and open-air accommodations may be more vulnerable to wear and tear than cabins or tiny homes. If your structures are easily damaged, you may want to limit pet access or only allow them in certain units. 2. How Close Are Your Units? If cabins or tents are clustered closely, a barking dog could ruin the vibe for everyone. More spread-out units are more forgiving and better suited to pets. 3. Do You Have Outdoor Common Areas? A communal firepit, picnic area, or shared trail? You’ll need to enforce leash rules and establish boundaries to avoid accidents or conflicts between guests and animals. 4. Are You Ready to Handle Complaints? Even with rules, accidents happen. Are you ready to mediate between guests, clean up messes, or ask a guest to leave if
Deer Flies: How to Avoid Their Bites While Camping
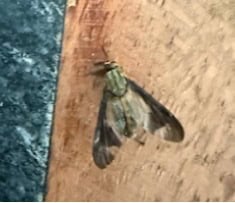
If you’ve ever felt a sharp stabbing on the back of your neck while hiking or hanging out at camp, chances are you’ve met up with a deer fly. These sneaky and persistent insects are among the most frustrating bugs campers deal with—especially in warm, wooded areas near water. In this article, we’ll explore what deer flies are, how they behave, what attracts them, what repels them, and the most effective ways to keep them from biting you. What Are Deer Flies? Deer flies (Chrysops spp.) are biting insects related to horse flies. They’re usually larger than black flies or mosquitoes, with a unique look: they have clear wings with dark stripes across them and have bright green or gold eyes. Adults are about 1/4 to 1/2 inch long. Only the females bite, needing blood to develop their eggs. Males feed on nectar and plant juices. Deer flies are most active in early to mid-summer, often during the same time as black fly and mosquito season—making them a triple threat. How Deer Flies Behave Deer flies are known for their persistent pursuit of blood. Unlike mosquitoes, which often go unnoticed until after they’ve bitten, deer flies are fast, aggressive, and not afraid to land repeatedly. They target large mammals—including humans, deer, horses, and dogs—and will circle non-stop. They like warm, humid days with little wind and are active mostly in the daytime, especially late morning through afternoon. You’ll find them in sunny, damp settings: wooded trails, wetlands, forest edges, and especially near water. Their bites are painful because they slice the skin open with scissor-like mouthparts, instead of piercing like mosquitoes. This causes a sharp sting, followed by bleeding and irritation. Some people have a strong reaction, with swelling, redness, or welts. What Attracts Deer Flies? To avoid deer flies, it helps to know what they’re looking for. Here’s what attracts them: What Repels Deer Flies? Deer flies are known to be difficult to deter, but certain repellents and strategies can help keep them at a distance. 1. DEET DEET-based repellents offer partial protection, especially when applied frequently. While not a guaranteed deterrent for deer flies, they can reduce bites, especially when combined with other methods. 2. Picaridin This is another common repellent with some effectiveness against deer flies. It has less odor and skin irritation potential than DEET. 3. Permethrin Permethrin-treated clothing is great defense. It repels and kills deer flies on contact. You can treat your gear at home or purchase pre-treated. 4. Essential Oils Some natural oils—like citronella, geranium, and eucalyptus—may provide limited relief, but they need to be reapplied often and are less effective than human made options. 5. Deer Fly Patches One of the most effective and unique tools is a deer fly patch—a sticky pad you place on the back of your hat. As the flies circle around your head to land, they get trapped on the adhesive patch. Many campers and hikers swear by this trick in heavily infested areas. How to Avoid Being Bitten by Deer Flies While Camping Avoiding deer fly bites requires a multi-pronged approach. Here are the best ways to protect yourself on your next camping trip: 1. Avoid Peak Season or Time of Day Deer flies are most active from late June through August, especially on warm, humid days. If possible, plan your camping trips for early spring or late summer. During the day, avoid hiking or lingering in wet, shady areas during late morning and early afternoon. 2. Choose Your Campsite Carefully Avoid camping near wetlands, streams, and low-lying damp forest. Deer flies breed near water and in swampy areas. Set up camp in higher, drier ground with more sunlight and a breeze—windy areas are naturally deer fly resistant. 3. Wear the Right Clothing We’re right in the middle of deer fly season here- long-sleeved, light-colored shirt and pants, a hat, and repellent with deet make the world of difference! 4. Stay on the Move—Or Stay Inside Deer flies are fast and follow movement. If you’re walking through an infested area, keep moving and avoid stopping. Once you pause, they zero in. When at camp, think about using screened shelters, tents with full bug netting, or mesh jackets to keep them out. 5. Build a Smoky Campfire Like other flying pests, deer flies dislike smoke. Keeping a smoky fire burning, especially near high-traffic areas like your kitchen or dining zone, can help create a buffer. 6. Use Fans or Breezes to Your Advantage Set up camp in a breezy area if possible. Flies have a harder time flying in wind. Portable battery-powered fans can also help protect areas from flying pests. 7. Avoid Strong Scents Deer flies aren’t as sensitive to scent as mosquitoes, but it’s still good to avoid scented lotions, shampoos, and soaps while camping. Stick to unscented or “bug-safe” products. Treating Deer Fly Bites Deer fly bites can cause immediate pain, followed by swelling and itching. Here’s how to deal with them: In rare cases, deer fly bites can lead to bacterial infections or transmit diseases like tularemia, although this is uncommon. If you develop a fever, chills, or unusual redness around a bite, seek medical attention. Natural Role of Deer Flies As unpleasant as they are, deer flies play a role in the natural world. They are a food source for birds, frogs, fish, and dragonflies. Their larvae live in aquatic soil or mud, where they help break down organic matter. While they may be the curse of campers and hikers, they’re part of the balance of their ecosystems. Final Thoughts Deer flies may be one of the more persistent and painful pests you’ll come across while camping, but they don’t have to ruin your trip. By understanding their behavior and using a combination of smart gear choices, repellents, and campsite strategies, you can significantly reduce your chances of getting bitten. With the right plan, you can enjoy the woods, lakes, and trails this summer—without becoming a moving buffet for deer flies.
How to Market Your Glamping Campsite: A Practical Guide to Attracting Nature-Loving Guests
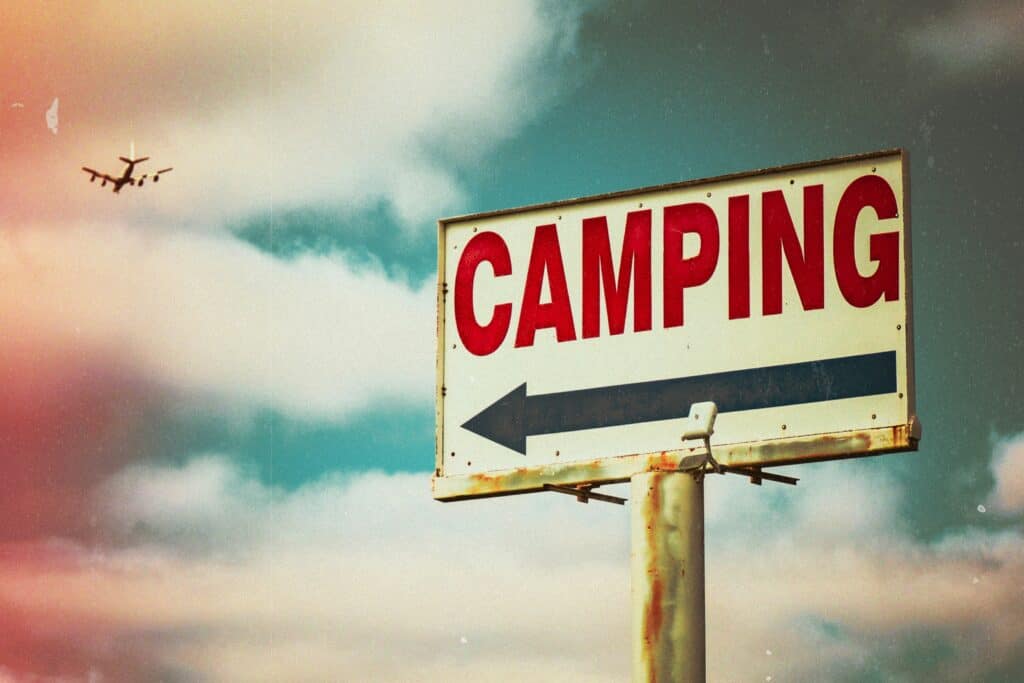
Introduction: Why Marketing Your Glampsite Matters Running a successful glamping campsite is more than building a great space surrounded by nature. It’s about sharing a story, creating an experience, and reaching the people who are looking for a unique getaway. It’s an incredible feeling to see what you’ve built – finishing projects, adding special touches, and seeing it all come together. Now it’s time to get the word out. Knowing how to market your glamping campsite can make the difference between an occasional booking and a thriving business. 1. Tell the Story of Your Land One of your greatest marketing assets is the story behind your glampsite. Guests don’t just book beds—they book experiences. If your land has a rich family history (like ours – we love that it was settled by our ancestors in 1858!), or if you built your cabins by hand, share that story. Post it on your website, in your welcome packet, and across your social media channels. This personal touch builds trust and emotional connection. 2. Know Your Ideal Guest Before you spend anything on advertising, take some time to define your ideal guest. Are they families looking to disconnect? Couples searching for romantic retreats? Solo travelers seeking peace and quiet? Knowing this will help shape your messaging, design, and outreach strategies. For example: 3. Use Stunning Visuals—Always Glamping is visual by nature. Potential guests want to imagine themselves in your space. High-quality photos and videos are key. Hire a professional if you can, or use your smartphone with attention to natural light and composition. Drone footage, sunrise shots, cozy interiors, and nighttime campfires all sell the dream. 4. Build a Strong Website Even if you’re listed on Airbnb or Hipcamp, your own website gives you more control. It’s the home base for your brand and a valuable long-term asset. Include: It was worth it to us to pay a website designer for the initial set up (Invicta in Rochester, NY does amazing work at a fair price btw). The site is built in WordPress and we can easily update photos and narratives when needed. 5. Grow Your Presence on Social Media Social platforms are where you show off your unique vibe. Instagram and TikTok are goldmines for visual content and organic reach. Facebook is great for community engagement and events. Pinterest is powerful for driving traffic to your site. Post regularly and engage with your followers. Share: 6. Leverage Reviews and Word of Mouth Encourage happy guests to leave reviews on Google, Airbnb, Hipcamp, and your Facebook page. Positive feedback not only builds trust but also boosts your visibility in search rankings. Consider offering a small thank-you (like a 10% discount on their next stay) for reviews or referrals. 7. Partner with Local Businesses Collaborations help everyone. Reach out to nearby wineries, bakeries, yoga instructors, or tour guides. Offer to cross-promote or create weekend packages. For example: These partnerships not only add value for your guests but also extend your reach to new audiences. Our favorite partnership is with the Birdsall Inn, a tavern, restaurant, and music venue less than a mile away. The owner rents our cabins for friends and family during live music events – we recommend the Inn to our guests (the food is amazing!). 8. Run Targeted Ads If you have a budget, Facebook and Instagram ads can be effective when targeting the right audience. Start with a small daily budget and run A/B tests to see which photos, captions, and calls-to-action perform best. Target people by: 9. Offer Special Promotions and Packages Create urgency and exclusivity with limited-time offers. Use them during slower months to increase bookings. Consider: Announce these offers via email, on your site, and through social posts. Use countdown timers or scarcity language like “Only 3 spots left!” to increase conversions. 10. Collect and Use Guest Data Use email sign-ups, booking info, and surveys to learn more about your guests. With their permission, you can create segmented mailing lists for better-targeted newsletters. Example emails: Conclusion: Grow with Intention Marketing your glamping campsite doesn’t have to feel overwhelming. Start with your story, focus on stunning visuals, and build authentic connections online and in your community. Over time, your glampsite won’t just be a place to stay—it will become a destination people are eager to share with friends and family. Whether you’re just getting started or looking to take your bookings to the next level, these steps will help you build a strong, lasting brand around your glamping experience. Photo by Campaign Creators on Unsplash Photo by Melanie Deziel on Unsplash Photo by Merakist on Unsplash Photo by Domenico Loia on Unsplash Photo by Bailey Anselme on Unsplash