How to Attract Fireflies Naturally at Your Campsite
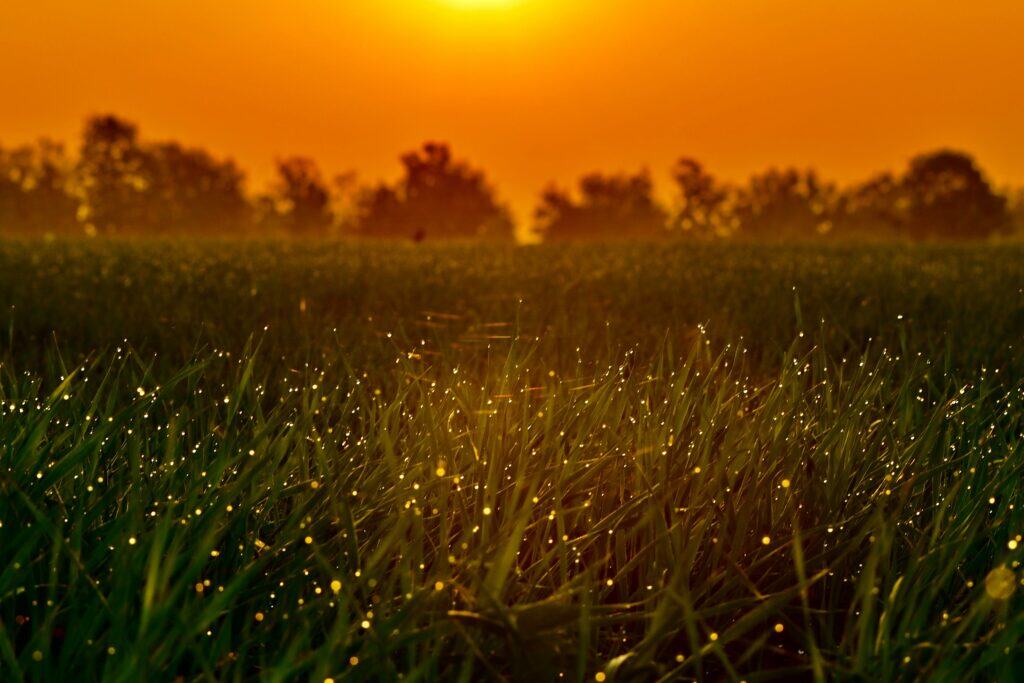
According to legend, when Great Great Uncle Mike arrived from Ireland and spent his first night in what is now McMahon Park, he saw fireflies for the very first time. Convinced they were fairies- the wee folk- he feared for his life and spent the night in a ditch. OK, maybe not to the extent that Uncle Mike thought, but there really is something magic about them. The sun sets, the air stays warm, then cue the frogs and crickets. And then one yellow green light appears. Then another. And before long, the whole place is twinkling. As we develop our campsite, we ask, what do we have to do to keep the cool little buggers coming back year after year. But what we found is, it’s less about what you do and more about what you don’t do that creates a favorite firefly hang out. They really are magic, but no worries, Uncle Mike. Here’s what fireflies are really all about. Firefly Magic Fireflies aren’t rare, but they seem like it sometimes. Maybe it’s because they only come out for a short stretch each year. Maybe it’s because they don’t bite and they keep nice and quiet. Just flickers of light decorating the country landscape. Around here, that window starts to open in late June. Then it’s fully in swing in early July. With the warmer nights, a little humidity in the air, the fields come alive with light. By late July, it slows but is still there. So, like Uncle Mike, we ask, what are those things anyway? Not flies. Not faeries. They’re actually beetles. And that light isn’t flashing at random. Each species has its own rhythm—slow pulses, quick flashes, sometimes even waves that move across a field like a heartbeat. It’s a conversation happening, easy to miss if you don’t know the language. Easy to see once you do. How They Light Up Inside a firefly is a simple reaction. A compound meets oxygen. An enzyme speeds things up. And instead of heat, it gives off light. No wasted energy. No heat. Just light. If you’ve ever caught a firefly and watched it light up in your cupped hand, you can truly appreciate how cool this trick is. What Attracts Fireflies to an Area What brought fireflies to our land in the first place was the mix of woods and fields, the creek running through, and the pockets of tall grass. Fireflies don’t need much, but they do need the right feel. They like it a little wild. A little damp. A little dark. The females tend to stay low, tucked into grass or along the edges, while the males drift above, flashing their patterns. Back and forth. Call and response. It’s quiet, but it’s constant. And if the conditions are right, they keep coming back. Letting Them Stay So how do you get fireflies to stick around and continue with their summer light shows? It’s in the things you don’t do. Not mowing every inch of grass. Letting some edges stay soft and natural. Leaving a bit of leaf cover in the woods instead of cleaning everything up. It’s in the way you handle light, too. Too much of it, and their signals disappear. What feels nicely lit to us can completely wash them out and make their signaling ineffective for mating. When things are kept a little darker, that’s when they really come alive. And then there’s chemicals. Or the lack of them. Fireflies spend most of their lives in the soil, long before we ever see them glowing. If the ground is alive and not toxic, they’ll be there. If it’s not, they won’t. Before the Light Show Saving the best for last, the light show is close to the ending of a firefly’s life. Most of a firefly’s life happens underground, sometimes for a couple of years. They’re active down there—feeding, growing, becoming what you eventually see drifting through the air on a summer night. You’re catching the final stage of something that’s been building for a long time. Not to be taken lightly. Firefly Trends Brighter lights. Cleaner (but emptier) landscapes. More chemicals than the land really needs. It all adds up, and there tends to be less fireflies these days. But thankfully this isn’t one of those things that has to be permanent. When you give them the right conditions again, fireflies come back. This happens gradually but it does happen. Fireflies and Nights to Remember It’s dusk. The quiet settles in. Dinner was amazing, and a fire is already going back at the firepit. A walk down the trail, along the water and along the forever wild long grass. And then they’re everywhere, flashing in waves and lighting up the night. Like stars on the ground. For visitors, this will be a memory to bring away with them. No financial investment, and no effort other than dimming the lights. So you were right after all, Uncle Mike. Those creatures lighting up the night truly are magic. . . . Photo by Tony Phan on Unsplash Photo by Jerry Zhang on Unsplash Photo by Rajesh Rajput on Unsplash Photo by Sabine Berzina on Unsplash Photo by Allison Oliphant on Unsplash
Adding a Workout Area to a Glampsite: Another Way to Stay Well in the Wilderness
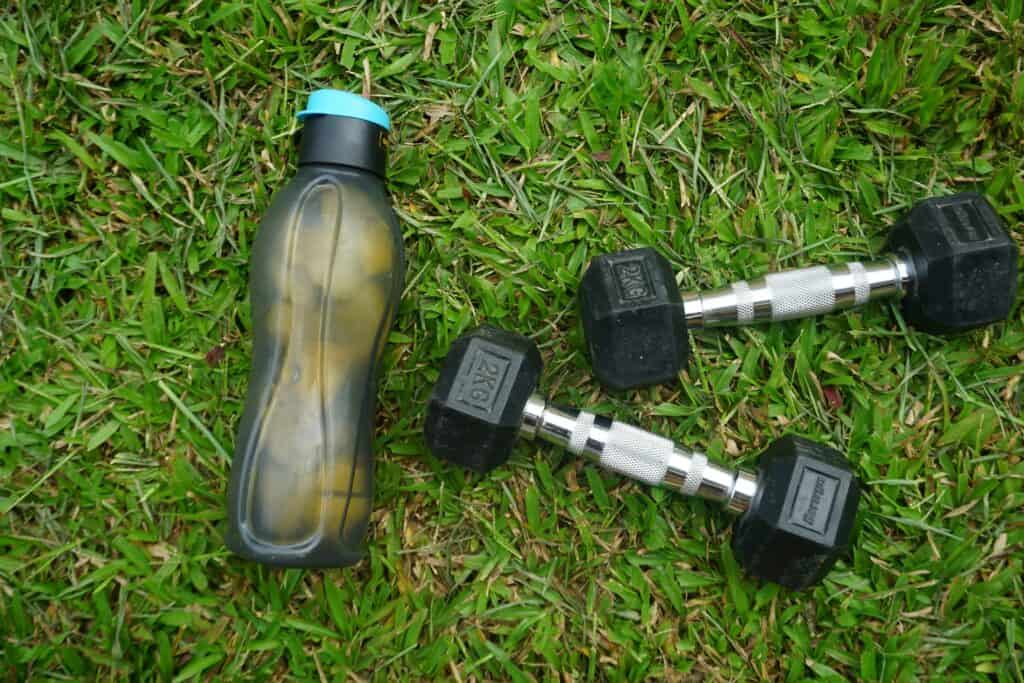
There’s something about getting up at the crack of dawn, having that first cup of coffee, and then getting a move on. At camp, trail hiking and building projects get the heart pumping, but there’s something about a lifting workout. Nothing crazy. Not a full gym, but what if….? There was a spot to get some reps in. Just a simple covered area with a bench and some dumbbells. A place to move a little and to feel good. The Plan There’s a perfect spot for a shed roof off one end of the water shed A 12’ x 14’ covered space would be easy to create – and the outside shower is already right there – it’s as if it were meant to be. Nothing complicated. Just: That’s all it would take to do the trick. Why This Could Be a Worthwhile Glampsite Amenity If guests are staying for a few days, they may like to: Not a full gym session—just enough to feel good. It’s a small thing, but it makes a difference. You feel better. Sleep better. Enjoy everything else more. So the idea is simple:Make that an option. (I know we’ll use it!) The Upside It’s Different Most glampsites don’t offer anything like this. It’s not a headline feature—but it’s memorable. Some Guests Will Love It Not everyone—but the right people will absolutely use it. And even if they don’t lift, it works for: It Supports Wellness (Without Being Over the Top) This isn’t about turning the place into a fitness retreat. It’s just about giving people a way to: For a lot of people, that matters more than you’d think. It’s a Relatively Low-Cost Add-On Compared to other upgrades, this is pretty manageable. You’re not adding a building—you’re adding a relatively inexpensive useful space. The Downsides Not Everyone Will Use It Some people will ignore it completely, and that’s ok. But it’s there if they want it. Weather and Bugs It’s outside. Hot days, humidity, and bugs are real. A big overhead fan can help a lot here. Wear and Tear Weights outside won’t stay perfect. You’ll get: Another reason to keep it simple. Liability (Keep It Basic) You don’t want a full gym setup. Stick with: It Could Feel Out of Place (If Overdone) Too much equipment and it starts to feel weird. This only works if it stays minimal. Things Worth Thinking Through Location Centralized but somewhat private. For us, this is connected to the water shed. It makes sense. People are already there. There’s already a shower if wanted. The Roof This feels like a must. For shade. For protecting equipment as well as exercisers from the elements. A roof creates real space at a relatively low price point. The Fan This could make all the difference. Air movement: Flooring Needs to handle: Gravel, pavers, or decking all could work. Keep It Simple Just:Useful. Clean. Easy. To prevent creating an odd and hard to maintain space. So… Worth It? We think so. Not because it’s going to instantly make more money. But because it adds even more opportunity to be well. Something that helps people feel good while they’re there. And something we can enjoy too. Worst case? It’s a covered space with a bench that doesn’t get used all the time. Easily repurposed. Best case? It becomes one of those small details people remember. And those are usually the things that make a place stand out. What are your thoughts? Would you use something like this? Leave a comment and let us know! . . . . Photo by Gia Duabav on Unsplash Photo by Alex Saks on Unsplash
The Comparison Trap: How To Avoid Getting Caught as a Glampsite Host
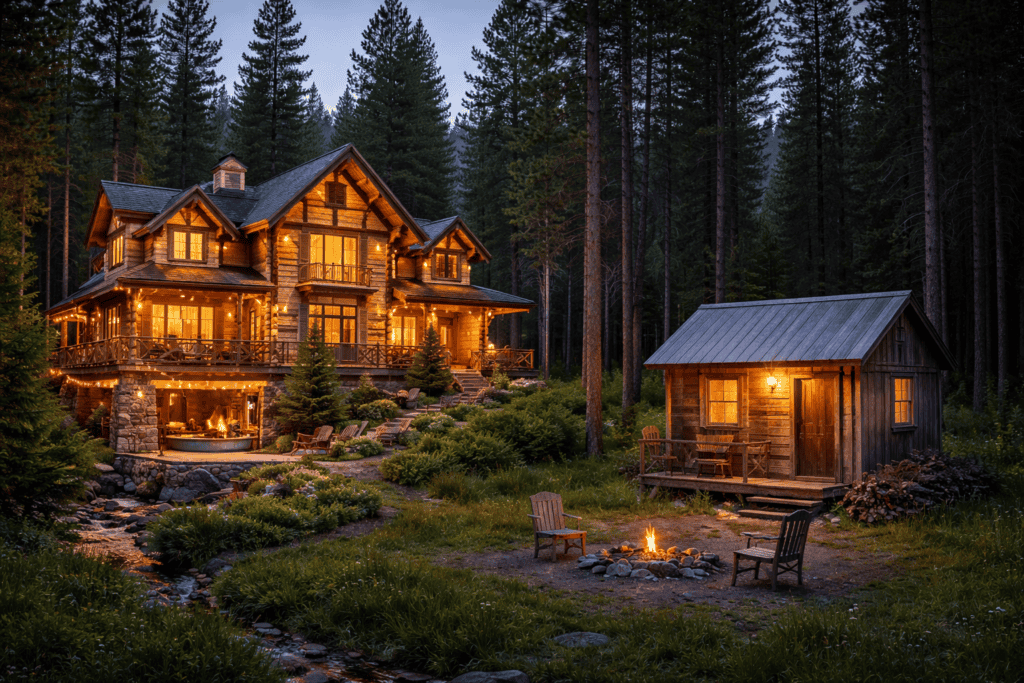
If you run a glampsite, or dream of building one, you’ve probably experienced this. You’re driving down the road, scrolling listings, or talking with another host, and your brain starts doing comparison math. They have five cabins.They have private bathrooms.They’ve got hot tubs, playgrounds, a pool.Their photos look incredible. And then you ask: Am I behind?Am I kidding myself?Is my place good enough? It’s a very natural reaction, but it can also be one of the biggest pitfalls in the glamping business. Recently I was reminded of this during a conversation at the gym. A guy I just met runs a cabin rental property. His cabins are beautiful. Each one has its own bathroom and shower. The place is professionally finished and clearly well built. Like a little development away from home. He also happens to own a construction company. Which means when he decides to build something, he already has equipment, tools, and a full crew ready to go. Meanwhile, I’m over here sketching ideas on scrap paper, hauling materials one pickup load at a time, and sometimes learning as I go. For a minute it was easy to think: How do I compete with this guy? But then I realized that we’re not playing the same game. Different Starting Lines One of the easiest mistakes glampsite hosts make is assuming everyone else started where they did. Not true. Some hosts start with: • Construction companies• Crews and equipment• Existing buildings• Large investment capital• Property that already has utilities installed Others start with: • A chainsaw• A shovel• A pickup truck• A dream It’s all relative, and you have to remember to be kind to yourself. And not every guest is looking for the same thing. Apples and Oranges Not long after the gym conversation, I passed another cabin rental property that I knew of while heading to the land. From the road you can see several cabins close together, lined up in rows and surrounded by lawn. There was a pool. A playground. Lots of visible amenities. It looks like an extremely fun place for families. And then the comparison voice said:. They’ve got so many more features. They can host so many more people. They’ve got a pool. And is that a tennis court, for crying out loud! But then I took a breath and thought: Some people want to be secluded, with not a ton of people around. They want a private firepit and want to walk along a creek and splash in the water. They want to feel like they’re at their own place. Grand is amazing, but sometimes you just want to get off the grid. Staying True to Your Vision The real danger of comparison isn’t just the feeling it creates. It can make you take your eyes off your own paper and start thinking: Maybe I need hot tubs.Maybe I should build faster.Maybe I need more cabins. All of that is great, but before long, the original vision that excited you can begin to shift. You’re no longer building the place you dreamed about. You’re building a reaction to someone else’s property. And that can lead you far away from what made your land special in the first place. The Truth About What Guests Actually Want When we first started hosting guests, I assumed people wanted as many amenities as possible. But something interesting kept happening. Guests rarely talked about the things I thought they would. Instead, they talked about: The quiet. The sound of the creek. The stars at night. The smell of the pines. Sitting by the fire. The things that mattered most were often the things that couldn’t be installed with a hammer or with cash. Nature was doing most of the work. Our job was simply to create a place where people could slow down enough to experience it. Every Property Has Its Own Personality Every piece of land has a personality. Some are open and sunny. Some feel like luxury hotels. Some feel like forests. Some feel like farms. Some feel like a hidden retreat. The mistake is trying to make your property act like someone else’s. If you try to turn a quiet woodland retreat into a loud resort experience, you might accidentally destroy the very thing that made the land special. A better question to ask is: What does this land want to be? For us, the answer feels pretty clear. Tall hemlocks. A winding creek. Fireflies in summer. Owls and frogs at night. A sky full of stars. We let the land decide, and leaning into that has made all the difference. Remember Why You Started Whenever comparison creeps in, it helps to remember why you started this journey. For many hosts, the goal wasn’t to compete with the biggest properties. It was to build something meaningful. A place where people can slow down. A place where families reconnect. A place where someone can sit by a fire and remember what quiet feels like. Those experiences don’t require the biggest cabins or the longest list of amenities. They require thoughtfulness, care, and patience. Excitement for Fellow Hosts Beats Envy Every Time If you’re building a glampsite right now, take it easy on yourself. It’s easy to look around and see what others have already built. But we all have our own starting point and our own road. It’s important to remember why you started this journey. Our wish for you is that you and to enjoy it every step of the way. Happy hosting! . . . Photo by Soyoung HAN on Unsplash Photo by Brett Wharton on Unsplash Photo by Evan Wise on Unsplash Photo by Ben Eaton on Unsplash
Reserving the Perfect Spot for the Perseids
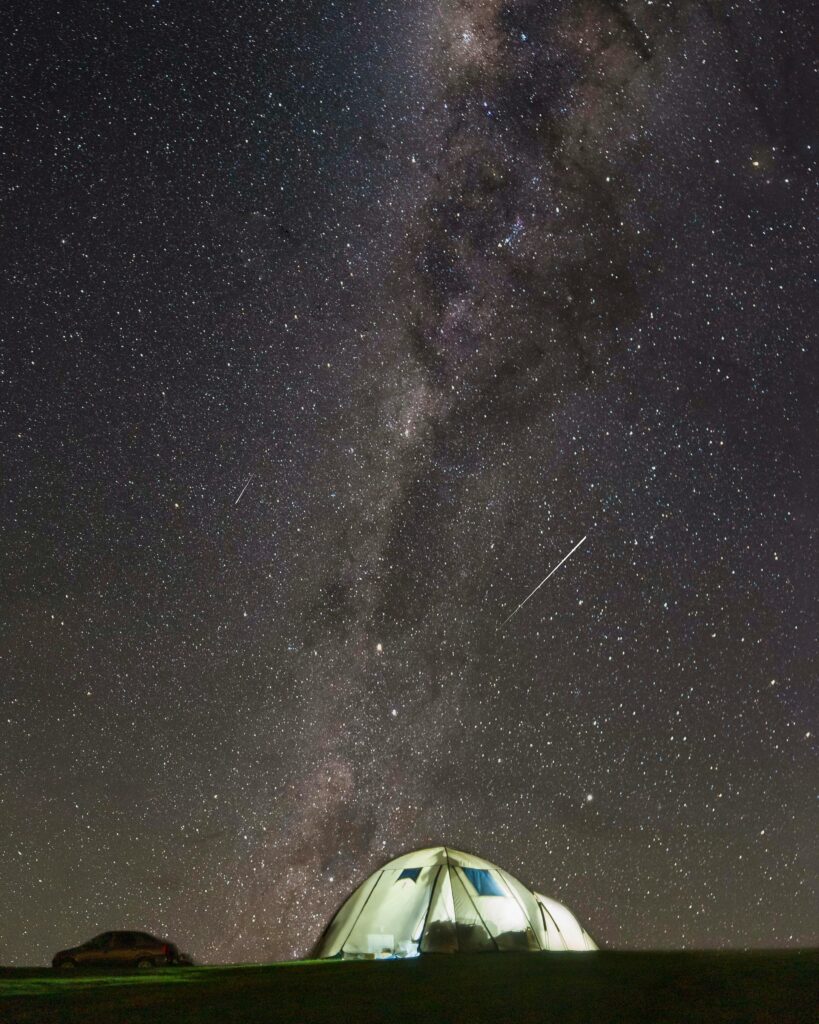
A Summer Viewing Series · Special Event · Three Nights Only Every August, for a handful of nights, the sky puts on a spectacular show: the Perseid Meteor Shower. And when you’re staying at a private park tucked into the rolling foothills of the Alleghenies—far from streetlights, close to deep woods, and surrounded by quiet—it’s an experience worth remembering. Here is an invitation to reserve the perfect place, at the perfect time, for one of summer’s most iconic celestial events. A three-night viewing window, designed for guests who want the full ritual: firelight, pine-scented air, a short walk into an open field, and the sky doing what it’s done for thousands of years. A Private Park, Perfectly Placed McMahon Park sits in the Allegany foothills, a landscape of soft ridges, open fields and valley horizons. It’s close enough for an easy trip and far enough removed that darkness still feels complete. Nearby landmarks like Letchworth State Park and Stony Brook State Park capture the night skies this region is known for—but at McMahon Park there are no crowds, no parking lots glowing in the distance, and no need to pack up and leave when the best part begins. When night falls, the park goes quiet in the way that only rural places can. The kind of quiet where you hear the fire settle, an owl call once, and then nothing at all. Then the sky takes center stage. The Perseid Meteor Shower: Summer’s Signature Event The Perseids mean nights filled with ‘shooting stars’. They are fast, bright, and often—leaving glowing trails that hang in the air for a second or two after they pass. On peak nights, under dark skies, you might see dozens per hour. The Perseids happen every year in mid-August, when Earth passes through a wide stream of debris left behind by Comet Swift–Tuttle. Tiny grains of comet dust slam into our atmosphere at incredible speeds, burning up in flashes of light we call meteors—or shooting stars. What makes the Perseids so beloved isn’t just their reliability. It’s their timing. This is the shower people remember seeing as kids, lying on blankets, counting streaks, making wishes. Some History The Perseids have been observed and written about for over 2,000 years. In medieval Europe, they were sometimes called the “Tears of St. Lawrence”, because their peak often falls near August 10th, the feast day of Saint Lawrence. Long before telescopes or scientific explanations, people noticed that this particular time of year brought fire in the sky year after year and generation after generation. Standing in an open field today, watching those same streaks of light, it’s an opportunity to feel connected to the long human tradition of looking up and connecting with the wonders of the Universe. McMahon Park Is an Ideal Place to Watch The park offers: Here, you’re part of a rural environment perfect for a star show summer night. A Perseid Night The evening begins at the fire pit. Dinner’s done. The flames are steady but low. Someone mentions the sky already looks different —darker, deeper. You hang out. You talk. You connect. Around 10 or 11 p.m., you notice the first one: a quick streak, gone almost before you’re sure it was really there. You grab a blanket. Maybe a flashlight held low. The path is familiar now—a short walk through the pines, needles soft underfoot, the air cool and clean. The trees open into a wide, grassy field, perfectly positioned for sky watching. You settle in. The stars sharpen as your eyes adjust. The Milky Way might appear as a pale, smoky band overhead. Then the show goes full tilt. Some meteors are quick slashes. Others are bright and slow. Time is irrelevant. It’s a moment you can sink into and take with you. A Three-Night Affair The Perseids take their time—they build, crest, and slowly taper off. The Summer Viewing Series spans three nights. Staying multiple nights means: Three nights makes it a life experience and gives the full story. What to Look For You don’t need to know constellations or own equipment for this one. Lie back. Look wide. Try not to look at your phone between streaks—your eyes need darkness to stay tuned in. Oh, and make a wish! The Kind of Experience People Talk About Years from now, you probably won’t remember what you streamed that week in August. But you will remember: That’s the power of the Perseids—especially when you give them the setting they deserve. Reserve the Sky The Perseids Summer Viewing Series. Three nights. A rare alignment of place and sky. Book early via the Contact page – book the Wheelhouse, the Shawmut, and, soon, our creek side glamping dome! And may you always remember to look up! Photo by Sanath Kumar on Unsplash Photo by benjamin lehman on Unsplash Photo by Chris Henry on Unsplash Photo by Idin Ebrahimi on Unsplash Photo by Dayne Topkin on Unsplash
How a Woodshed Built From Spare Materials Can Radically Improve Your Fire Pit Setup
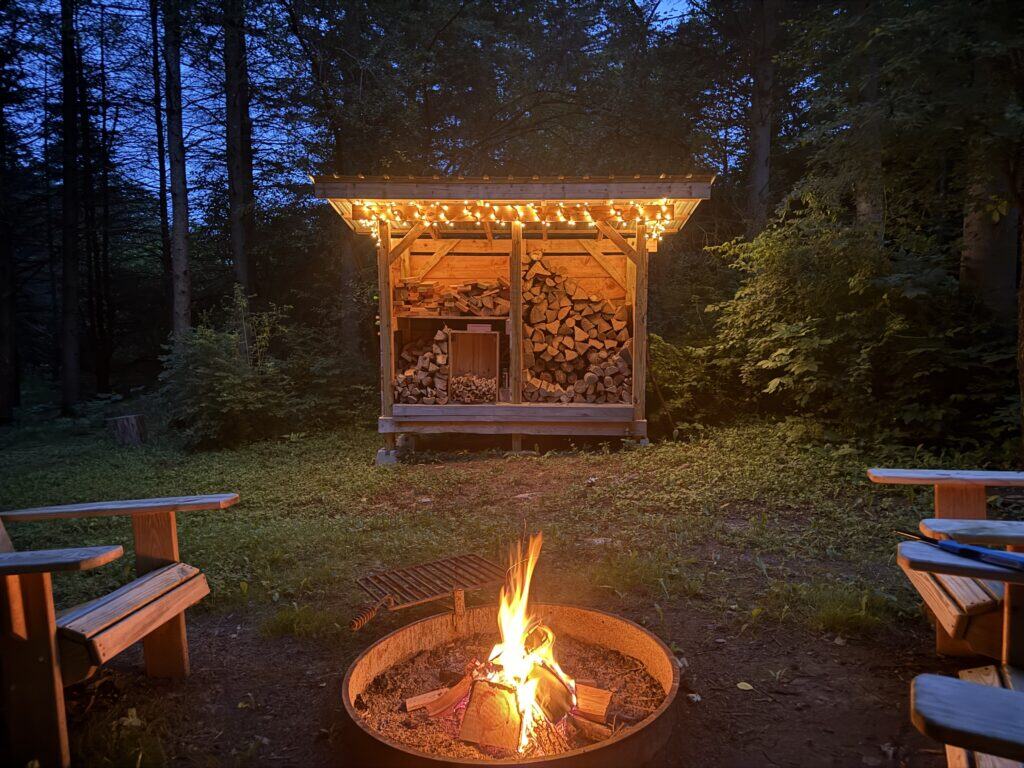
If you use a fire pit regularly, you’ve probably learned this the hard way: A great fire depends on dry wood.And dry wood depends on how you store it. Tarps, half-covered piles, and “I’ll deal with it later” stacks work until they don’t. Wet wood, smoky fires, and scrambling for dry pieces quietly take the joy out of what should be the best part of the evening. This is how we built a simple but effective woodshed using materials we had left over from other projects plus $150 in new lumber. (Please excuse the extra overhang on the ends – it works great and we’re going to finish it up in the spring). This method works when you’re on a hill, the ground is damp most of the year, you need something sturdy, and you want to keep cost down. The Problems a Woodshed Solves A woodshed is about alot more than storage. It’s about: Tarps fail because they trap moisture and need constant attention. A good woodshed solves that by doing three things well: Once those boxes are checked, everything about using your fire pit improves. Why Elevation Matters More Than Perfection Ground moisture is relentless — especially on sloped or wooded land. Even “dry” soil pulls moisture upward over time. Our site is hilly with inconsistent drainage, which makes it a good example for anyone dealing with: Instead of fighting the land, we elevated the entire structure using concrete deck blocks and 4×4 posts. This approach can have big advantages: You don’t need perfect ground to build something that works. A Foundation That Lets You Build Now Deck blocks aren’t fancy, but they’re ideal for small outdoor builds. They allow you to: A flexible foundation gives you the ability to quickly put together something that works. A Quick How To The size of the pallets we used as a floor determined the size of the frame we needed (@4′ by 8′). We made the rectangular frame with 2 x 6 PT. Setting the frame on the ground, it was simple to determine the location of the concrete foundation blocks. we leveled just where the blocks would sit, removing sod, stones, etc. Propped up the frame above the blocks about a foot or so (relatively level) then set 4 by 4s into the blocks and rested them against the inside of the frame. Leveled the frame. Small screwed, then construction screwed the frame to the 4 x 4s. Cross pieces were added for the roof support (see above) – front higher than the back to create the desired roof slant. Added diagonal braces and voila! The structure was solid. Added rough cut (pallet wood works for this too) and we had a well-ventilated and solid woodshed minus the roof. The Roof We already had the metal. If we hadn’t the sheets would have cost us about 60 bucks. A building supply store in your area that makes metal roofing will cut it to whatever length you need (in 36 inch widths that overlap and in a few colors to choose from). We cheated and made a template for the rafters by screwing a 2 by 6 to one end of the front and back supports. We marked the end cuts with a level and also marked the birds mouths (V cuts) so the 2 x 6 rafters would sit flush on the supports. Cut the rafter. Double check fit. Made the rest from the template. Next we added 2 by 4 purlins (horizontal pieces you screw the metal to) and we were ready for the metal. We put one piece of metal in place temporarily and marked where the screws should go at the center of each purlin. We took the piece down and marked all holes with a pencil then stacked the remaining metal under it (being careful to line the sheets up exactly). We drilled through all of the sheets at the pencil marks, giving us straight screw lines and a much easier install. Then we Screwed in place with roofing screws, letting the rubber washers squeeze a little but not too much. Once the roof went on, the shed started doing its job even unfinished. Not Quite Finished Yet But Getting the Job Done This woodshed still needs: But none of that affects performance. It’s the perfect place for a kindling box, a tin filled with firestarters and a lighter, split and whole pieces of dry firewood. How This Changes the Fire Pit Experience Once wood storage is solved: We added lights under the roof and mounted a dartboard on the side and it’s become an important part of the gathering space. A small, practical build with an outsized impact. What You Can Apply to Your Own Space We built with what we had and putting it together wasn’t an exact science but the principles are solid: Do that, and you’ll end up with a woodshed that quietly improves every fire you build without draining your budget or your energy. And on the nights when the fire burns clean and steady without a lot of hassle, you’ll be very glad you did. Enjoy!
Geodesic Dome Glamping: Phase One of an Exciting New Chapter
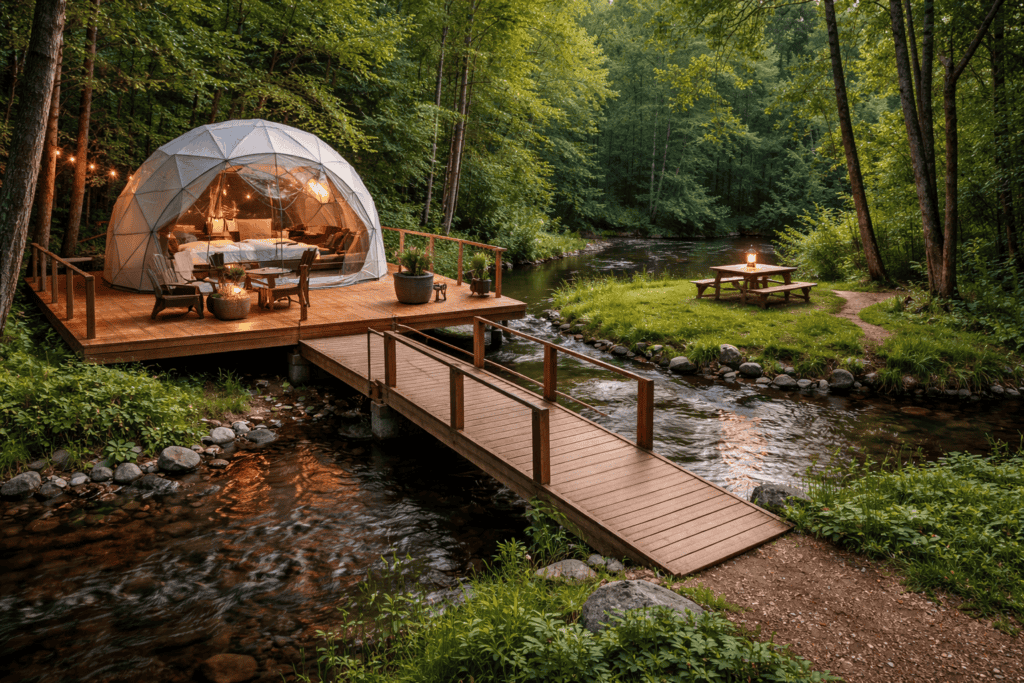
Another milestone last weekend. I pulled the trigger and put half down on a new geodesic dome! After the payment was confirmed, I received notice that the custom build would start soon and that the dome should arrive in time for the 2026 season. After that I took a ride to the land to see where it all will be happening. Kevin (of Dirty Work out of Belfast, NY-recommend highly!) had finished putting in a bit of road and new trails that lead to where the dome will be by the creek. This isn’t just a ‘wouldn’t be cool?’ idea anymore. This is happening. After two full and extremely successful seasons with our two glamping cabins, this feels like the right time to take the next big step. We are officially in Phase One of an exciting new chapter in our glamping journey. From Proof of Concept to Taking the Next Big Step The decision to add a geodesic dome glamping rental felt like a natural progression. The past two seasons with our existing cabins have been deeply validating. Guests responded consistently and enthusiastically. Weekends filled. Reviews were strong. The experience we set out to offer clearly resonated. 5-star reviews across the board let us know we were on to something. It gave us confidence that was built on real results. With ‘so far, so good’ established, the next question became what’s next? How do we expand in a way that enhances what already works, without losing the calm, nature-first feel that defines this place? The answer was a dome – a unique glamping accommodation that adds variety, curiosity, and longevity while still feeling deeply connected to the land. When Vision Meets the Land For a long time, this vision lived mostly in imagination. A geodesic dome overlooking the creek.Tall hemlocks rising high on the opposite bank, framing the view.A small bridge crossing the water.An island in the middle of the creek, with a simple picnic table — just enough space to sit with morning coffee or share a glass of wine as the day winds down. It was easy to picture. Harder to reach. Now, with the roadway in and the trail complete, that vision is no longer abstract. You can stand at the site and see how it all connects. The creek moves quietly through the landscape. The trees tower overhead. The space reveals itself. What once felt like a dream is beginning to feel inevitable. Infrastructure That Makes Growth Possible The roadway brings guests close without disrupting the land. From there, the trail gently slows the pace, guiding visitors toward the creek and the dome site in a way that’s intentional but not hurried. By the time guests reach the dome, they’ll already feel grounded, present, and connected to the surroundings. WiFi, outside and inside showers, and other amenities are a short walk away, but the dome and its surroundings will be a private world all its own. Setting the Foundation Putting half down on the geodesic dome, completing the roadway, and finishing the trail are foundational moves. They create access. They establish flow. They set the stage for everything that comes next. Future phases will bring the visible transformation:the arrival of the dome,the build days,the finishing touches,and eventually the first guests walking that trail for the very first time. And we will keep you looped in as the adventure continues. Realistic Optimism After two strong seasons, optimism is feeling more steady. The dome adds something new, but it also fits into what already exists. This creekside glamping retreat feels right, and we’re pretty certain that guests will love it. Moving forward feels natural. Each step has been taken deliberately, with respect for the land and the long-term vision. Looking Ahead As the season approaches, the excitement feels grounded rather than rushed. The big pieces are falling into place in the right order. The dome is on its way.The land is ready.Phase One is complete. This is the opening chapter of an exciting new phase — one we’re proud of and committed to seeing through. We’ll continue sharing updates as the build progresses and the vision becomes fully realized. We’ll keep you posted r/e lessons learned and about an availability schedule when the time comes. And comments and questions welcome! So stay tuned. This is only the beginning 🙂
How Glamping Hosts Can Use Winter to Build Momentum
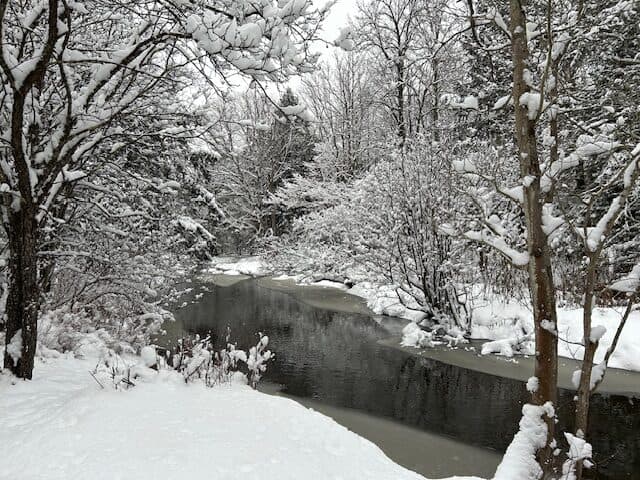
A few days ago, I received a last-minute invitation to attend an online seminar for glamping hosts. I almost skipped it. It was short notice, and winter has a way of making everything feel optional. I’m glad I didn’t. 400 hosts and would-be hosts attended from around the world. Different climates. Different regulations. Different scales of operation. Some were just getting started. Others were refining or rethinking established businesses. Listening to the conversations, I was reminded of two important things. First, these are people I can learn from, connect with, and potentially collaborate with — even if our properties are thousands of miles apart.Second, it got me thinking: In a few short months it will be spring. How should I be using these winter months to ensure success and momentum when the season returns? The ground might be frozen but that doesn’t mean my momentum has to be. Plenty of work can be done inside while there is time. Shifting From Physical Work to Thinking Work During the active glamping season, most decisions are reactive. Guests arrive. Weather changes. Something breaks. You adapt quickly and move on. There’s rarely time to step back and ask whether your systems, routines, or layout truly make sense — you’re too busy keeping things moving. Last season was so busy that a painting project that was started last spring is still on the to do list for this spring. Winter gives some distance. This is the season for: It’s a chance to prep for an efficient, sustainable and profitable season when the guests return. Some Time to Re-Evaluate the Guest Experience One of the hardest things to do during the season is to see the guest experience clearly. You’re too close to it. Emotionally invested. Always moving. Winter creates distance. This is a good time to mentally walk through a stay from start to finish: It’s time to ask yourself: This is a great time to improve clarity, communication, and framing — often with immediate positive impact once bookings resume. Learning and Networking During the Off-Season Online workshops (like the one I just attended), virtual meetups, and seminars with glamping experts can offer new perspective. They can expose you to new business models, different regulatory environments, and creative solutions you might not have come up with yet while working alone on your own property. They can also build a sense of community. Winter can be isolating for glamping hosts. The land is quiet. No guests. No feedback. It’s easy to feel disconnected from the bigger picture of the industry. Hearing hundreds of hosts ask questions that you may or may not already know the answers to can be very grounding. These new connections can spark new ideas and can restore momentum. Tidying Up the Business Side Winter is a great opportunity to organize the business side of things. Things like: Tending to these things now will make it that much easier when the season begins and things get hectic. Choosing One Skill to Polish Creating focus and choosing one skill to improve can make the next season smoother or more enjoyable. Things like: Small improvements made during winter are applied throughout the season — often in ways that are subtle but that you feel every day. Allowing for Winter Down Time We’re learning that using wintertime productively doesn’t always mean getting things done. It’s also about appreciating what you don’t have while you don’t have it. It’s a time out when you can: Do less.Think more.Let ideas mature.Allow energy to recover. If done right, winter can be a season of recovery and recalibration. Despite How It Feels, Winter Won’t Last Forever No matter how long it lasts or how cold it gets, winter’s days are numbered. Before you know it, spring will be here and you’ll be hitting the thawed ground running. Until it does, here’s to productive and restful times in the days ahead. Happy hosting!
Finding and Hiring a Property Manager for Your Glamping Campsite

How to Step Away During the Summer Without Sacrificing Guest Experience Running a glamping campsite has been incredibly rewarding but it can also be all consuming during camping season. Like many other hosts, we often feel chained to our property, tied to our phone, and unable to step away for more than a day or two. As we prepare for the season, we’re seeing that we’re at a crossroads. Balancing family time and hosting time is becoming more difficult. We’re realizing that if this business is going to be sustainable long term we’re going to need more help. Hiring a property manager for a glamping campsite can provide the freedom to travel, rest, visit family, or just enjoy the lifestyle you set out to create — without everything imploding while you’re gone. This blog is all about how to find, vet, hire, and manage the right person, specifically for the unique demands of a glamping operation. A Glamping Specific Property Manager A glampsite manager has more on their plate than a long-term rental or vacation home manager. Acting as your representative, they often need to: Because of this, working with the right person is a lot more important than working with whoever is the cheapest. What does “Being Away” Mean to You? Before you start looking for help, you’ll want to get clear on how much freedom you’re trying to buy back. Some owners start with partial coverage and still manage reservations and messaging themselves. Others want a boots-on-the-ground manager who runs daily operations entirely. Clarity here saves you from hiring the wrong person. Where to Look for a Glamping Property Manager 1. Your Local Community Some of the best glamping managers are: These candidates already understand the area, weather patterns, community dynamics and rural life — which is priceless. 2. Hospitality & Tourism Networks This is a place to look for people with experience as: Experience with guests matters more than experience that is strictly business. 3. Outdoor & Off-Grid Skill Sets People with backgrounds in: Often adapt extremely well to glamping operations and bring a high level of enthusiasm. Glamping Property Manager Responsibilities Being very clear about responsibilities makes things work better on both sides. Common duties could include: If your site includes extras like firewood, hot tubs, composting toilets, or solar systems, you’ll want to be sure those are included — or clearly excluded. Interviewing Situational questions work best for this. Examples: You’re looking for calm, practical thinkers, that don’t panic or over-promise. Pay: What’s Fair and Sustainable? There’s no single right answer, but common models include: Hourly Pay Best for: Per-Booking or Per-Turnover Fee Best for: Monthly Retainer Best for: Whatever you choose, it’s a good move to pay well (This has definitely been the case with our cleaning help). A dependable, detail-oriented manager is far cheaper than bad reviews, damaged property, or burned-out owners. Technology That Makes Remote Management Possible The right systems can reduce stress for everyone: These can be wonderful tools for everyone involved. Start Small Before Summer Before leaving for weeks at a time, it’s a good idea to: The phased approach prevents disasters and is an opportunity to build a positive working relationship. The Challenge of Letting Go For many glampsite owners, the hardest part isn’t logistics — it’s trust. You built this place with your hands. You care deeply about guest experience. Letting someone else represent your vision can feel uncomfortable. But here’s the truth:If your business can’t run without you, it owns you. Hiring the right property manager is about ensuring that it thrives even when you’re not there. It’s a way to experience freedom while still remaining true to your vision. Happy hosting and happy hiring! Photo by Oberon Copeland @veryinformed.com on Unsplash Photo by appshunter.io on Unsplash Photo by Carl Tronders on Unsplash Photo by Nathan Dumlao on Unsplash
Using Google Earth to Review and Plan Your Glamping Campsite

Google Earth updated the view of our property this week! It took a couple years but it was worth the wait. From far above, we can see the five buildings that we’ve built, driveways, parking areas, and trails heading toward the creek (see below). It’s the perfect tool to help us see how far we’ve come, as well as to see where we want to head. Building. Clearing. Mowing. Sunrise over the open field. Afternoons on the creek. Laying back and checking out the night sky. From the Google Earth view, we can see where it happens all at once. Whether you’re scouting new property, expanding an existing glampsite, or fine-tuning your trail map, Google Earth allows you to review terrain, sunlight, access, privacy, and surroundings without putting on your boots. It can save time and money and is completely free. This article is about using Google Earth strategically to review, design, and plan a successful glamping campsite. Google Earth As a Tool for Glamping Hosts Google Earth helps you: For new hosts, it’s a low-risk planning tool. For established glampsites, it’s a way to improve layouts and expand thoughtfully. Google Earth for Land Planning With Google Earth you can see: Note: Google Earth Pro (desktop) gives the best planning experience — it’s a lot better than the browser version for glampsite design. Step 1: Evaluating the Property Before You Buy or Build Before committing to land or major improvements, Google Earth gives you critical insights. Check Surrounding Land Use Zoom out and examine: A site that looks secluded on a listing may actually be bordered by a busy road or future development. Identify Noise and Light Pollution Using satellite view and zooming out helps you spot: This is especially important if your glamping experience focuses on stargazing, peace, or off-grid escapes. Step 2: Understanding Terrain, Slope, and Elevation One of Google Earth’s biggest strengths is terrain visualization. Use the Tilt Feature Tilt the map to view hills, valleys, and slopes. This helps determine: Avoid Costly Grading Placing units on steep slopes often means: Google Earth lets you identify the flattest areas before you invest in heavy equipment. Step 3: Planning Tent, Cabin, and Site Placement Thoughtful site placement improves both guest experience and operational efficiency. Spacing for Privacy Measure distances between proposed units to ensure: Guests expect solitude when they book glamping — Google Earth helps you confirm spacing before construction. Orientation Matters Rotate the map and look at: Facing tents toward scenic views — rather than parking areas or utility sheds — dramatically improves perceived value. Step 4: Using Sun Path to Improve Comfort Sun exposure plays a huge role in guest comfort. With Google Earth you can: This is especially important for: A unit with morning sun and afternoon shade will feel cooler and more inviting. Step 5: Mapping Access Roads, Parking, and Arrival Experience The guest’s first impression starts long before they reach their tent. Visualize the Arrival Route Use Google Earth to: Separate Parking From Sleeping Areas Guests appreciate: Google Earth helps you design a flow that feels intentional rather than improvised. Step 6: Planning Amenities and Shared Spaces Beyond sleeping units, glampsites need communal and functional areas. Use Google Earth to plan: Central but Not Intrusive Shared amenities should be: Seeing everything from above helps balance accessibility and privacy. Step 7: Studying Water, Drainage, and Natural Features Water is both a blessing and a risk. Identify Natural Water Flow By viewing elevation and terrain, you can: Highlight Natural Features Google Earth makes it easy to spot: These features often become your most marketable assets. Step 8: Using Historical Imagery One of the most overlooked tools in Google Earth is historical imagery. This allows you to: If an area is bare in some images and lush in others, that tells you a story worth paying attention to. Step 9: Marketing Benefits for Your Glamping Business Google Earth ca help with marketing too. Create Accurate Maps for Guests You can: Tell a Stronger Story Knowing your land deeply allows you to: This leads to better reviews and fewer complaints. Step 10: Planning for Expansion and Long-Term Growth Many glampsite owners outgrow their original layout. Google Earth helps you: Designing with growth in mind saves money and stress later. Common Mistakes Google Earth Helps You Avoid Using Google Earth early can prevent: A few hours of digital planning can prevent years of frustration. Planning With Intention Glamping is about delivering a unique experience in nature. Google Earth allows you to see your land another way and to get a feel for how your guests will experience it. Whether you’re building from scratch or refining an existing site, this free tool gives you clarity, confidence, and control. Combined with on-the-ground walks and professional input when needed, Google Earth becomes an extremely valuable planning resource. Before the actual physical work begins, Google Earth helps the land show what’s possible. Happy hosting! . . . Photo by NASA on Unsplash Photo by NASA on Unsplash Photo by Eric RDG on Unsplash Photo by Quentin Menini on Unsplash
The Hidden Dangers of Fire in a Pine Forest
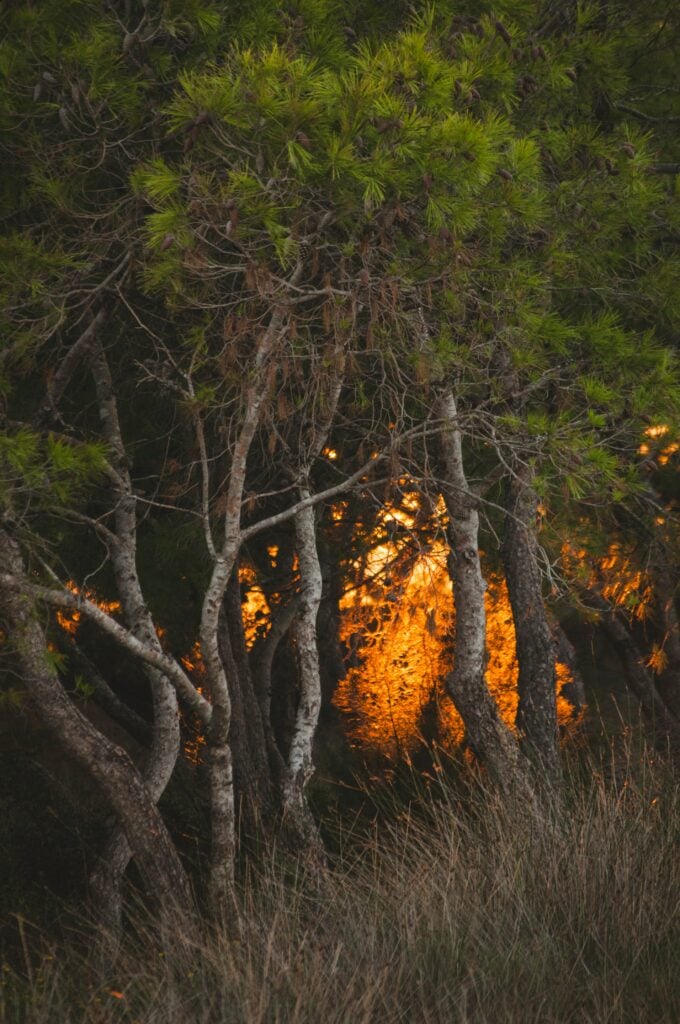
Of all the spots on entire property, the centuries old hemlock forest rising above Black Creek is our favorite. Pines one hundred feet high rise into the sky like a cathedral, with a soft carpet of needles beneath our feet. In so many ways it’s the perfect camping spot, but we learned about a hidden danger the hard way. After a weekend camping in the pines, we were extra careful to leave no trace. Several buckets of water were hoisted up from the creek to extinguish the last of the fire. And when all was drenched and cool, we added a few more buckets to be sure. But what looked like a completely extinguished fire ended up smoldering three feet below the pine needles, unseen and undetected, for nearly a full month. When it finally re‑emerged, it burned hot enough underground to kill four massive hemlock trees, destroying their roots from below. We were incredibly lucky to catch it before it turned into a full‑scale forest fire. This article explains why fires are so dangerous in pine forests, how underground fires happen, and what every camper, landowner, and outdoor enthusiast needs to know to prevent a disaster that can smolder silently for several weeks. Why Pine Forests Are Especially Vulnerable to Fire Pine forests are beautiful and smell great, but they are also extremely flammable. The characteristics that make them so pleasant are also what makes them dangerous. 1. Pine Needles Create a Perfect Fuel Bed Pine needles fall continuously and accumulate year after year, forming thick, springy mats on the forest floor. These needle beds: Unlike leaves that decompose quickly, pine needles can build up into layers several feet deep, especially in undisturbed areas. 2. Resin and Pitch Increase Fire Intensity Pine trees contain natural resins and pitch that are highly flammable. Once ignited, these compounds burn hotter and faster than many other forest fuels. Even a small spark can become a sustained ignition source. 3. Fire Can Travel Underground This is the most dangerous and least understood aspect of fires in pine forests. While flames may disappear on the surface, heat can continue moving underground through: These slow‑burning fires are often called ground fires or smoldering fires — and they are extremely difficult to detect. Our Story: The Fire Wasn’t Really Out By the end of our camping weekend in the pines, the campfire was properly contained, managed, and — as far as anyone could tell — completely extinguished. Water was poured on it, ashes were spread, and more water was poured, and the area was checked a final time before leaving. There were no visible embers, no smoke, no warmth. That we knew of. But One Month Later… A section of forest floor suddenly broke open, releasing smoke and heat from below. The fire had been smoldering roughly three feet underground, slowly consuming pine needles, roots, and organic matter. By the time it surfaced: Had this happened on a windy day — or gone unnoticed for a few more hours — the surrounding pine forest could have ignited rapidly. We were incredibly fortunate that a neighbor caught it when he did and alerted the town fire department. That experience created greater appreciation and respect – there’s a lot more to fire safety in the pines than we had realized. How Underground Fires Kill Trees Without Burning Them One of the most surprising outcomes of smoldering ground fires is how they kill large, healthy trees. Roots Burn Before Trunks Tree roots spread widely near the surface, especially in pine and hemlock forests. When fire burns through organic soil layers: A tree can appear perfectly fine above ground while its entire support system is destroyed below. Delayed Death Trees affected by underground fires may: This delayed damage makes ground fires particularly dangerous for long‑term forest health. Why Smoldering Fires Are So Hard to Detect Ground fires don’t act like typical campfires or wildfires. No Flames Smoldering fires often burn without visible flames, especially when buried under thick layers of needles or soil. Minimal Smoke Smoke may be faint, intermittent, or completely absent until the fire reaches oxygen. Long Lifespan These fires can persist for: Rain may slow them down but not extinguish them — especially if the fuel bed is deep. Weather and Time Many people assume rain or snow means a fire is fully out. Unfortunately, that’s not always true. Rain Isn’t Enough Light or moderate rain often fails to penetrate: Water may cool the surface while embers continue to glow below. Seasonal Danger Smoldering fires can survive: Only sustained saturation or complete fuel removal reliably stops them. Why One Escaped Fire Can Destroy an Entire Forest In pine forests, fire spreads vertically and horizontally. Ladder Fuels Low‑level ground fires can ignite: Once flames reach the canopy, fire behavior becomes explosive and uncontrollable. Wind Amplifies Everything A single gust can: This is how small, forgotten fires become national news. Best Practices: If You Must Have a Fire in a Pine Forest Ideally, avoid open fires entirely in pine forests unless in a designated fire ring. If fires are allowed, follow these precautions strictly. Choose the Right Location Dig and Clear More Than You Think You Need Extinguish Thoroughly When you’re done: If it’s warm, it’s not out. Never Bury Hot Ashes Covering embers with soil or needles traps heat and encourages smoldering. Lessons Learned the Hard Way That underground fire taught us something no sign or warning ever could: fire doesn’t follow our assumptions. Just because flames are gone doesn’t mean danger is. Just because time has passed doesn’t mean risk has. Four massive hemlocks died without ever catching fire above ground — silent proof of what was happening beneath our feet. Final Thoughts Fires in the great outdoors are special events, but fires anywhere near pine forests demand extra respect. The combination of flammable needles, hidden fuel, and underground spread creates a risk most people aren’t completely aware of. A fire you can’t see may be