How to Attract Fireflies Naturally at Your Campsite
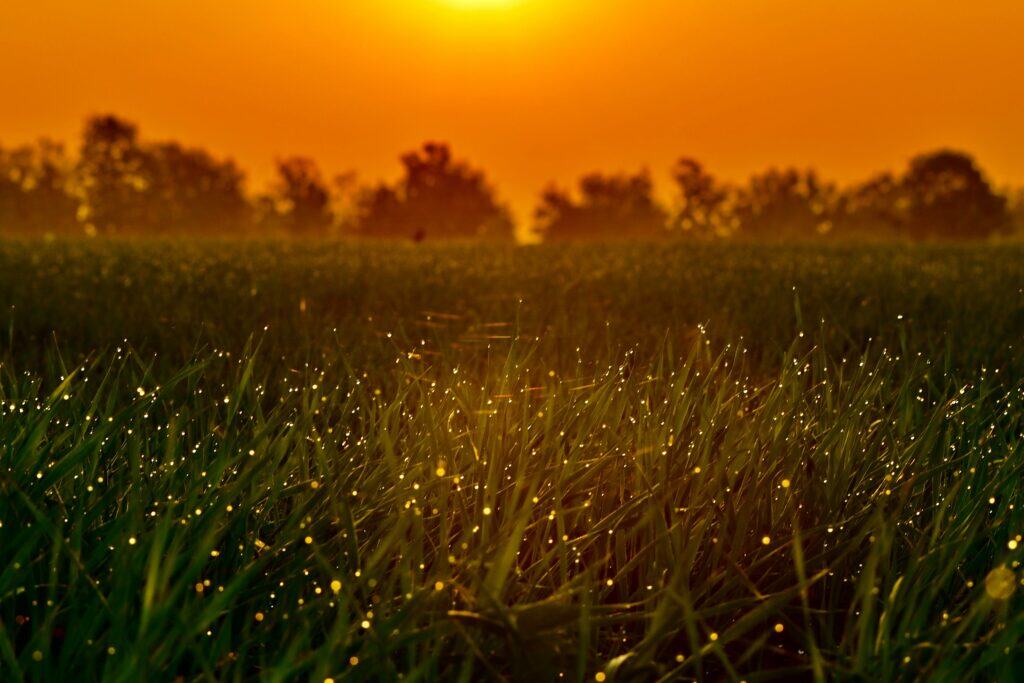
According to legend, when Great Great Uncle Mike arrived from Ireland and spent his first night in what is now McMahon Park, he saw fireflies for the very first time. Convinced they were fairies- the wee folk- he feared for his life and spent the night in a ditch. OK, maybe not to the extent that Uncle Mike thought, but there really is something magic about them. The sun sets, the air stays warm, then cue the frogs and crickets. And then one yellow green light appears. Then another. And before long, the whole place is twinkling. As we develop our campsite, we ask, what do we have to do to keep the cool little buggers coming back year after year. But what we found is, it’s less about what you do and more about what you don’t do that creates a favorite firefly hang out. They really are magic, but no worries, Uncle Mike. Here’s what fireflies are really all about. Firefly Magic Fireflies aren’t rare, but they seem like it sometimes. Maybe it’s because they only come out for a short stretch each year. Maybe it’s because they don’t bite and they keep nice and quiet. Just flickers of light decorating the country landscape. Around here, that window starts to open in late June. Then it’s fully in swing in early July. With the warmer nights, a little humidity in the air, the fields come alive with light. By late July, it slows but is still there. So, like Uncle Mike, we ask, what are those things anyway? Not flies. Not faeries. They’re actually beetles. And that light isn’t flashing at random. Each species has its own rhythm—slow pulses, quick flashes, sometimes even waves that move across a field like a heartbeat. It’s a conversation happening, easy to miss if you don’t know the language. Easy to see once you do. How They Light Up Inside a firefly is a simple reaction. A compound meets oxygen. An enzyme speeds things up. And instead of heat, it gives off light. No wasted energy. No heat. Just light. If you’ve ever caught a firefly and watched it light up in your cupped hand, you can truly appreciate how cool this trick is. What Attracts Fireflies to an Area What brought fireflies to our land in the first place was the mix of woods and fields, the creek running through, and the pockets of tall grass. Fireflies don’t need much, but they do need the right feel. They like it a little wild. A little damp. A little dark. The females tend to stay low, tucked into grass or along the edges, while the males drift above, flashing their patterns. Back and forth. Call and response. It’s quiet, but it’s constant. And if the conditions are right, they keep coming back. Letting Them Stay So how do you get fireflies to stick around and continue with their summer light shows? It’s in the things you don’t do. Not mowing every inch of grass. Letting some edges stay soft and natural. Leaving a bit of leaf cover in the woods instead of cleaning everything up. It’s in the way you handle light, too. Too much of it, and their signals disappear. What feels nicely lit to us can completely wash them out and make their signaling ineffective for mating. When things are kept a little darker, that’s when they really come alive. And then there’s chemicals. Or the lack of them. Fireflies spend most of their lives in the soil, long before we ever see them glowing. If the ground is alive and not toxic, they’ll be there. If it’s not, they won’t. Before the Light Show Saving the best for last, the light show is close to the ending of a firefly’s life. Most of a firefly’s life happens underground, sometimes for a couple of years. They’re active down there—feeding, growing, becoming what you eventually see drifting through the air on a summer night. You’re catching the final stage of something that’s been building for a long time. Not to be taken lightly. Firefly Trends Brighter lights. Cleaner (but emptier) landscapes. More chemicals than the land really needs. It all adds up, and there tends to be less fireflies these days. But thankfully this isn’t one of those things that has to be permanent. When you give them the right conditions again, fireflies come back. This happens gradually but it does happen. Fireflies and Nights to Remember It’s dusk. The quiet settles in. Dinner was amazing, and a fire is already going back at the firepit. A walk down the trail, along the water and along the forever wild long grass. And then they’re everywhere, flashing in waves and lighting up the night. Like stars on the ground. For visitors, this will be a memory to bring away with them. No financial investment, and no effort other than dimming the lights. So you were right after all, Uncle Mike. Those creatures lighting up the night truly are magic. . . . Photo by Tony Phan on Unsplash Photo by Jerry Zhang on Unsplash Photo by Rajesh Rajput on Unsplash Photo by Sabine Berzina on Unsplash Photo by Allison Oliphant on Unsplash
Using Google Earth to Review and Plan Your Glamping Campsite

Google Earth updated the view of our property this week! It took a couple years but it was worth the wait. From far above, we can see the five buildings that we’ve built, driveways, parking areas, and trails heading toward the creek (see below). It’s the perfect tool to help us see how far we’ve come, as well as to see where we want to head. Building. Clearing. Mowing. Sunrise over the open field. Afternoons on the creek. Laying back and checking out the night sky. From the Google Earth view, we can see where it happens all at once. Whether you’re scouting new property, expanding an existing glampsite, or fine-tuning your trail map, Google Earth allows you to review terrain, sunlight, access, privacy, and surroundings without putting on your boots. It can save time and money and is completely free. This article is about using Google Earth strategically to review, design, and plan a successful glamping campsite. Google Earth As a Tool for Glamping Hosts Google Earth helps you: For new hosts, it’s a low-risk planning tool. For established glampsites, it’s a way to improve layouts and expand thoughtfully. Google Earth for Land Planning With Google Earth you can see: Note: Google Earth Pro (desktop) gives the best planning experience — it’s a lot better than the browser version for glampsite design. Step 1: Evaluating the Property Before You Buy or Build Before committing to land or major improvements, Google Earth gives you critical insights. Check Surrounding Land Use Zoom out and examine: A site that looks secluded on a listing may actually be bordered by a busy road or future development. Identify Noise and Light Pollution Using satellite view and zooming out helps you spot: This is especially important if your glamping experience focuses on stargazing, peace, or off-grid escapes. Step 2: Understanding Terrain, Slope, and Elevation One of Google Earth’s biggest strengths is terrain visualization. Use the Tilt Feature Tilt the map to view hills, valleys, and slopes. This helps determine: Avoid Costly Grading Placing units on steep slopes often means: Google Earth lets you identify the flattest areas before you invest in heavy equipment. Step 3: Planning Tent, Cabin, and Site Placement Thoughtful site placement improves both guest experience and operational efficiency. Spacing for Privacy Measure distances between proposed units to ensure: Guests expect solitude when they book glamping — Google Earth helps you confirm spacing before construction. Orientation Matters Rotate the map and look at: Facing tents toward scenic views — rather than parking areas or utility sheds — dramatically improves perceived value. Step 4: Using Sun Path to Improve Comfort Sun exposure plays a huge role in guest comfort. With Google Earth you can: This is especially important for: A unit with morning sun and afternoon shade will feel cooler and more inviting. Step 5: Mapping Access Roads, Parking, and Arrival Experience The guest’s first impression starts long before they reach their tent. Visualize the Arrival Route Use Google Earth to: Separate Parking From Sleeping Areas Guests appreciate: Google Earth helps you design a flow that feels intentional rather than improvised. Step 6: Planning Amenities and Shared Spaces Beyond sleeping units, glampsites need communal and functional areas. Use Google Earth to plan: Central but Not Intrusive Shared amenities should be: Seeing everything from above helps balance accessibility and privacy. Step 7: Studying Water, Drainage, and Natural Features Water is both a blessing and a risk. Identify Natural Water Flow By viewing elevation and terrain, you can: Highlight Natural Features Google Earth makes it easy to spot: These features often become your most marketable assets. Step 8: Using Historical Imagery One of the most overlooked tools in Google Earth is historical imagery. This allows you to: If an area is bare in some images and lush in others, that tells you a story worth paying attention to. Step 9: Marketing Benefits for Your Glamping Business Google Earth ca help with marketing too. Create Accurate Maps for Guests You can: Tell a Stronger Story Knowing your land deeply allows you to: This leads to better reviews and fewer complaints. Step 10: Planning for Expansion and Long-Term Growth Many glampsite owners outgrow their original layout. Google Earth helps you: Designing with growth in mind saves money and stress later. Common Mistakes Google Earth Helps You Avoid Using Google Earth early can prevent: A few hours of digital planning can prevent years of frustration. Planning With Intention Glamping is about delivering a unique experience in nature. Google Earth allows you to see your land another way and to get a feel for how your guests will experience it. Whether you’re building from scratch or refining an existing site, this free tool gives you clarity, confidence, and control. Combined with on-the-ground walks and professional input when needed, Google Earth becomes an extremely valuable planning resource. Before the actual physical work begins, Google Earth helps the land show what’s possible. Happy hosting! . . . Photo by NASA on Unsplash Photo by NASA on Unsplash Photo by Eric RDG on Unsplash Photo by Quentin Menini on Unsplash
The Hidden Dangers of Fire in a Pine Forest
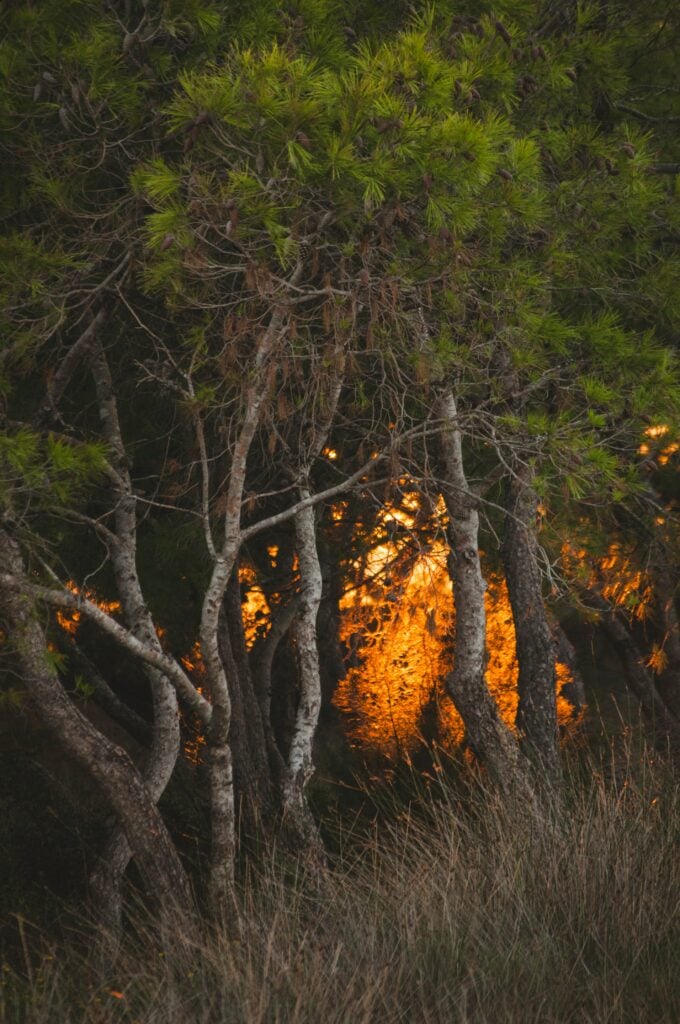
Of all the spots on entire property, the centuries old hemlock forest rising above Black Creek is our favorite. Pines one hundred feet high rise into the sky like a cathedral, with a soft carpet of needles beneath our feet. In so many ways it’s the perfect camping spot, but we learned about a hidden danger the hard way. After a weekend camping in the pines, we were extra careful to leave no trace. Several buckets of water were hoisted up from the creek to extinguish the last of the fire. And when all was drenched and cool, we added a few more buckets to be sure. But what looked like a completely extinguished fire ended up smoldering three feet below the pine needles, unseen and undetected, for nearly a full month. When it finally re‑emerged, it burned hot enough underground to kill four massive hemlock trees, destroying their roots from below. We were incredibly lucky to catch it before it turned into a full‑scale forest fire. This article explains why fires are so dangerous in pine forests, how underground fires happen, and what every camper, landowner, and outdoor enthusiast needs to know to prevent a disaster that can smolder silently for several weeks. Why Pine Forests Are Especially Vulnerable to Fire Pine forests are beautiful and smell great, but they are also extremely flammable. The characteristics that make them so pleasant are also what makes them dangerous. 1. Pine Needles Create a Perfect Fuel Bed Pine needles fall continuously and accumulate year after year, forming thick, springy mats on the forest floor. These needle beds: Unlike leaves that decompose quickly, pine needles can build up into layers several feet deep, especially in undisturbed areas. 2. Resin and Pitch Increase Fire Intensity Pine trees contain natural resins and pitch that are highly flammable. Once ignited, these compounds burn hotter and faster than many other forest fuels. Even a small spark can become a sustained ignition source. 3. Fire Can Travel Underground This is the most dangerous and least understood aspect of fires in pine forests. While flames may disappear on the surface, heat can continue moving underground through: These slow‑burning fires are often called ground fires or smoldering fires — and they are extremely difficult to detect. Our Story: The Fire Wasn’t Really Out By the end of our camping weekend in the pines, the campfire was properly contained, managed, and — as far as anyone could tell — completely extinguished. Water was poured on it, ashes were spread, and more water was poured, and the area was checked a final time before leaving. There were no visible embers, no smoke, no warmth. That we knew of. But One Month Later… A section of forest floor suddenly broke open, releasing smoke and heat from below. The fire had been smoldering roughly three feet underground, slowly consuming pine needles, roots, and organic matter. By the time it surfaced: Had this happened on a windy day — or gone unnoticed for a few more hours — the surrounding pine forest could have ignited rapidly. We were incredibly fortunate that a neighbor caught it when he did and alerted the town fire department. That experience created greater appreciation and respect – there’s a lot more to fire safety in the pines than we had realized. How Underground Fires Kill Trees Without Burning Them One of the most surprising outcomes of smoldering ground fires is how they kill large, healthy trees. Roots Burn Before Trunks Tree roots spread widely near the surface, especially in pine and hemlock forests. When fire burns through organic soil layers: A tree can appear perfectly fine above ground while its entire support system is destroyed below. Delayed Death Trees affected by underground fires may: This delayed damage makes ground fires particularly dangerous for long‑term forest health. Why Smoldering Fires Are So Hard to Detect Ground fires don’t act like typical campfires or wildfires. No Flames Smoldering fires often burn without visible flames, especially when buried under thick layers of needles or soil. Minimal Smoke Smoke may be faint, intermittent, or completely absent until the fire reaches oxygen. Long Lifespan These fires can persist for: Rain may slow them down but not extinguish them — especially if the fuel bed is deep. Weather and Time Many people assume rain or snow means a fire is fully out. Unfortunately, that’s not always true. Rain Isn’t Enough Light or moderate rain often fails to penetrate: Water may cool the surface while embers continue to glow below. Seasonal Danger Smoldering fires can survive: Only sustained saturation or complete fuel removal reliably stops them. Why One Escaped Fire Can Destroy an Entire Forest In pine forests, fire spreads vertically and horizontally. Ladder Fuels Low‑level ground fires can ignite: Once flames reach the canopy, fire behavior becomes explosive and uncontrollable. Wind Amplifies Everything A single gust can: This is how small, forgotten fires become national news. Best Practices: If You Must Have a Fire in a Pine Forest Ideally, avoid open fires entirely in pine forests unless in a designated fire ring. If fires are allowed, follow these precautions strictly. Choose the Right Location Dig and Clear More Than You Think You Need Extinguish Thoroughly When you’re done: If it’s warm, it’s not out. Never Bury Hot Ashes Covering embers with soil or needles traps heat and encourages smoldering. Lessons Learned the Hard Way That underground fire taught us something no sign or warning ever could: fire doesn’t follow our assumptions. Just because flames are gone doesn’t mean danger is. Just because time has passed doesn’t mean risk has. Four massive hemlocks died without ever catching fire above ground — silent proof of what was happening beneath our feet. Final Thoughts Fires in the great outdoors are special events, but fires anywhere near pine forests demand extra respect. The combination of flammable needles, hidden fuel, and underground spread creates a risk most people aren’t completely aware of. A fire you can’t see may be
Where Do Mosquitoes and Biting Flies Go in the Winter—And Do They Survive Freezing?

As winter settles in, we’re already prepping for next glamping season. Shopping on-line for the coolest glamping tents and screen houses for our new creek side site we begin to wonder: where are those nasty mosquitos and biting flies now anyhow? Do they die? Do they freeze? Or are they just chillin until the warm weather returns? Unfortunately, mosquitoes, black flies, deer flies, and other biting insects have extremely effective strategies for surviving winter—out of sight in hidden corners of forests, wetlands, and your backyard. They’ll be back, but understanding their winter survival tactics can help you manage them a little better when warm weather returns. Mosquitoes in Winter: Surviving the Biting Cold Mosquitoes have been around for over 100 million years, and they’ve evolved with brilliant methods to endure brutal season changes. Their method depends on the species, but all mosquitoes fall into one of a few survival strategies. 1. Some Mosquitoes Hibernate as Adults Certain species—like those in the Culex group—hibernate through the cold months. How it works: The males, however, die off before winter (the poor guys). Only the females survive to lay the next generation of eggs in the spring. These overwintering females are usually the first to bite in early spring, especially on the rare warm day in March or April. If you’ve ever been surprised by a lone mosquito way too early in the year—this is why. 2. Some Mosquitoes Survive as Eggs Other species, like floodwater mosquitoes (Aedes), survive winter as eggs. These are some of the toughest eggs in the insect world. What makes the eggs so tough? When the spring thaw brings standing water, the eggs finally hatch—leading to a sudden boom in mosquito populations. This is why cleaning gutters, removing buckets, and reducing standing water in early spring is extrtemely effective. You’re not preventing adult mosquitoes—you’re stopping eggs that could have been sitting there all winter. 3. Some Mosquitoes Survive as Larvae Under Ice A smaller number of species overwinter as larvae. They live in water that doesn’t completely freeze to the bottom—ponds, springs, slow-moving streams, or marshy pools. Even when the surface is frozen, life is still happening below: This is part of why early-spring wetlands can be surprisingly mosquito-heavy: those larvae have been preparing for months. Do Mosquitoes Die When They Freeze? This answer depends on the life stage. Adult mosquitoes: They cannot survive freezing. If an adult mosquito is exposed to temperatures below freezing for long enough, its body fluids form ice crystals and it dies very quickly. That’s why hibernating mosquitoes don’t hide outside—they shelter in places that stay above freezing. Eggs: Mosquito eggs are the toughest stage, and many species’ eggs survive being frozen solid. They’re designed this way, especially in northern climates. The egg doesn’t rupture the way an adult’s soft tissue would. Larvae: Larvae generally survive cold but not freezing. They need to be in a heated pocket of water deep enough to avoid complete freezing. Black Flies in Winter: Hidden in Streams Black flies plague campers, hikers, and anyone living near moving water in the spring. Their life cycle is tied closely to streams and rivers—and that shapes how they handle winter. Where Black Flies Go in the Winter Black flies survive the winter primarily as larvae attached to rocks in running water. Unlike mosquitoes, black flies need oxygen-rich, moving water, so they don’t overwinter as eggs in dry areas. They use silk-like anchor threads to cling to submerged stones even through snowmelt and freezing temperatures above the waterline. Do They Freeze? Black fly larvae typically do not freeze, because: Larvae remain dormant or slow-moving until spring. What Happens Next? As water temperatures rise: This is what creates the notorious “black fly season” in May and June. Because they overwinter as live larvae, they are ready to explode in numbers very early in the season, often before mosquitoes even get started. Deer Flies and Horse Flies: Buried Alive! Deer flies and horse flies are inland cousins of black flies—larger, louder, and equally annoying. Their winter strategy is one of the most interesting. How Deer Flies Overwinter These flies survive the cold as large larvae buried in mud, often in: They can burrow deep enough to avoid lethal freezing temperatures. These larvae are carnivorous and may continue to feed slowly through winter, depending on the temperature. Can They Survive Freezing? If the soil freezes too deeply, larvae near the surface die. But in most climates: So most larvae survive. In early summer, they pupate and emerge as the biting deer flies that circle your head in humid weather. Why Don’t They Just Freeze to Death, For Goodness Sake? Many insect species have evolved natural antifreeze compounds—glycerol and similar chemicals—that reduce freezing inside their bodies. But this protection only works for: Adult mosquitoes and adult biting flies lack this protection. That’s why you can’t freeze a mosquito in your garage and expect it to survive. But the eggs sitting in a dried-up bucket outside? They’ll be just fine until spring. Why Understanding Winter Survival Helps With Control Knowing where biting insects go in the winter gives you power to reduce their numbers around your campsite, backyard, or homestead. 1. Remove Standing Water in Fall and Early Spring You’re destroying eggs before they hatch. 2. Clean Out Gutters Mosquito eggs love it up there. 3. Manage Marshy Areas Fill depressions, improve drainage, or add small-scale aeration to ponds. 4. Control Compost and Manure Piles This impacts stable flies more than mosquitoes, but still helps. 5. Protect Stream Edges if You Want to Reduce Black Flies Trimming heavy vegetation can reduce larval hiding spots, though moving-water insects are much harder to control without affecting ecology. 6. Use Early-Season Treatments (like BTI) BTI dunks placed in standing water in early spring target larvae that survived winter. So Are They Really Gone in Winter? Not exactly. They’re just waiting. Mosquitoes and biting flies don’t roam around in the cold, but they’re still very much alive in some
Building a safe, legal walking bridge over a 30-foot creek — what you actually need to get started
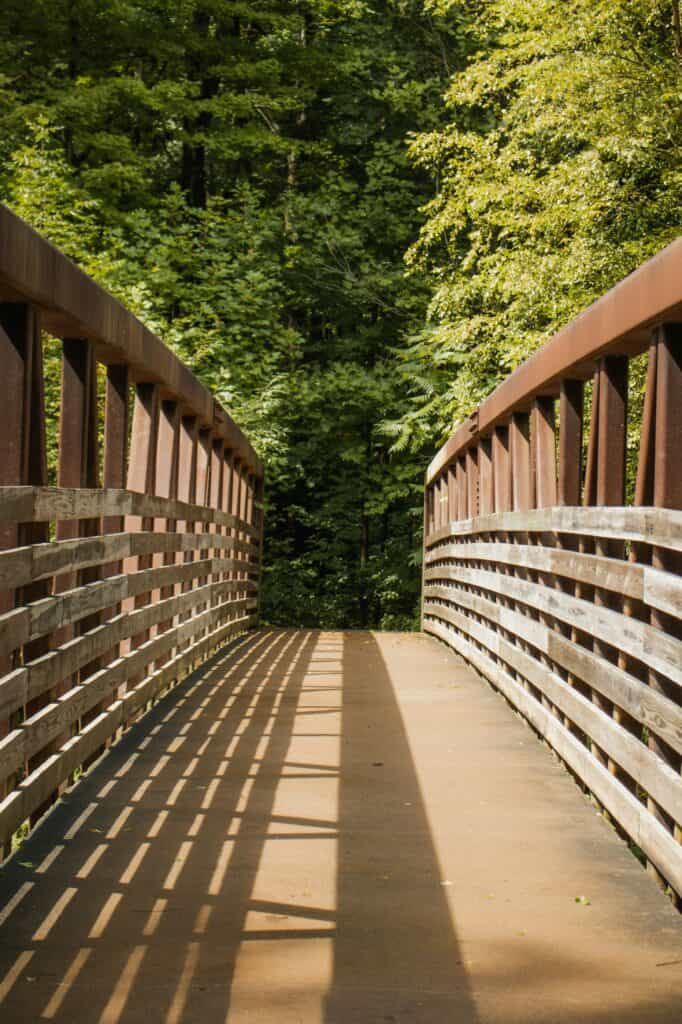
With the glamping season all but over, it’s time to set our sites on plans for the future. And on the top of our wish list is to finally build a walking bridge across Black Creek. On the other side of the creek (we call it the ‘crick’ out here in the country)is a beautiful Hemlock forest and the perfect spot for treehouses! But to build a bridge that will be safe and in compliance with a ton of regulations, where do we learn what is really needed to get started? We’re envisioning a simple footbridge across a 30-foot creek, but between stream rules, structural safety, site conditions, and local building rules there are a lot of pieces to get right. This blog is a practical overview of what you need to start— permits, professional help, design basics, and construction considerations. As a bonus, there are links to relevant government web pages for your convenience (specifically for Allegany County NY, but many regulations are universal). 1) First step: decide scope (private vs public, temporary vs permanent) Before anything else, decide whether the bridge will be: That matters because public or municipal projects have stricter accessibility, insurance, and permitting requirements. Even on private land, many environmental and federal/state permits still apply if you work in or near the stream. 2) Permits & approvals you must consider a. NYSDEC — stream/stream crossing permits.Any work in or that disturbs a stream bed or stream banks in New York usually needs NYSDEC authorization. DEC issues general permits that cover typical stream-crossing work but you have to confirm whether your project fits the general permit or requires an individual permit. You don’t want to assume a small bridge is exempt — the rules apply to “work in any stream” and there are specific stream-crossing guidance documents. Department of Environmental Conservation+1 b. Freshwater wetlands and wetland mapping.If your footprint touches mapped freshwater wetlands, you may need a freshwater wetlands permit as well. DEC has informational wetland maps and the permitting thresholds depend on how much wetland is affected. Department of Environmental Conservation c. U.S. Army Corps of Engineers (Section 404/“waters of the U.S.”).If the creek or area is considered waters of the United States, the Army Corps may require a permit (dredge/fill permits) or you may qualify for a regional/general permit. You will want to check the New York District regulatory pages. nan.usace.army.mil+1 d. Local building permits & design professional stamp.In many towns, plans for bridges or substantial structures must be prepared or stamped by a registered New York design professional (engineer) before submitting. It’s a good idea to contact your town’s building & zoning office early. Town & Village of Allegany, NY+1 e. Floodplain / FEMA / county rules.If the proposed bridge or abutments are in a mapped floodplain, you’ll need to follow floodplain development rules; the DEC general permit documents and county planning materials tie into flood risk guidance. There are often additional siting or structural requirements in flood zones. Ext Apps DEC NY+1 3) Who should you involve 4) Design basics for a 30-foot pedestrian bridge A typical small walking bridge has these design choices and issues: Span & geometry Loads Deck width Guardrails and handrails Foundations and scour Materials Erosion control 5) Environmental & seasonal considerations 6) DIY vs hiring a pro 7) Cost drivers (what will eat your budget) Rather than quote a hard number, get 2–3 contractor estimates once you have stamped plans. 8) Practical checklist before you start 9) Where to look for official guidance & help Final thoughts A 30-foot creek crossing is very doable and can be an attractive, long-lasting addition to a private glampsite trail — but not a project where you want to “wing it.” The most common trouble spots are inadequate foundations, neglecting permits (which can stop a job or require removal), and failing to design for scour and floods. Start with a survey, talk to your town and NYSDEC, get an engineer’s stamped plans if required, and then price installation options (prefab span vs site-built timber). That approach keeps you legal, safe, and much less likely to have a bridge you need to rebuild after the first big storm. Any ideas or suggestions? Comments are always welcome! . . . Photo by Sydney Moore on Unsplash Photo by Brice Cooper on Unsplash Photo by Globelet Reusable on Unsplash Photo by Kiriakos Verros on Unsplash
Should I Get a Side-by-Side for My Campground?
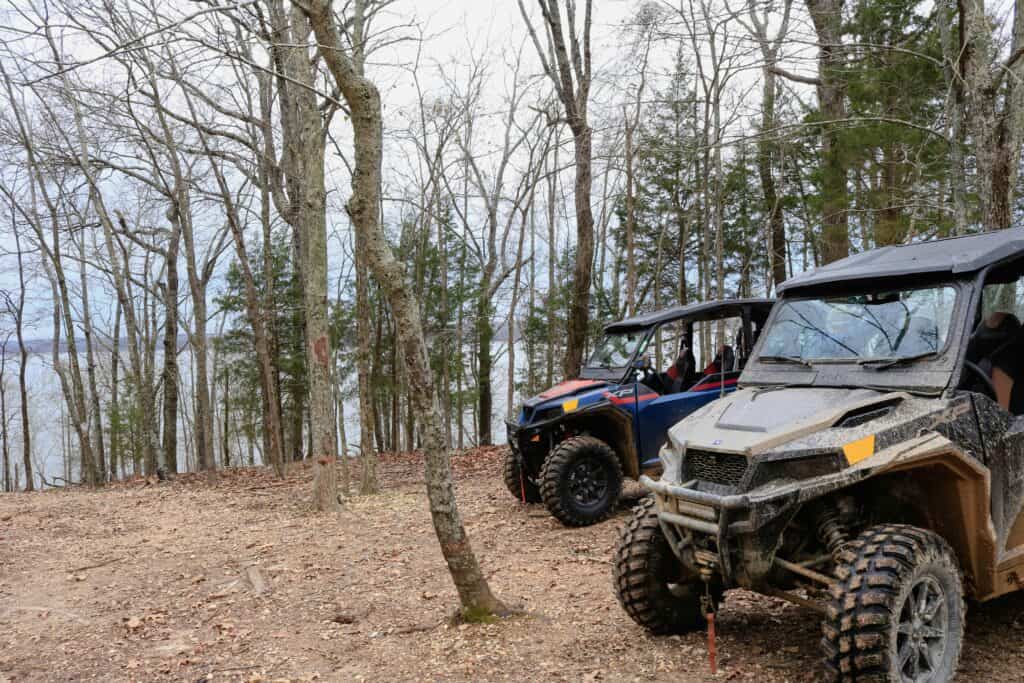
A few weekends ago we went to a side by side poker run (sponsored by the Birdsall Inn, a watering hole and restaurant a mile from our campsite – we highly recommend it!). Almost 500 machines thundered over dirt roads, meeting up at designated spots and raising money for childhood cancer research. An incredible day and so much fun! Now we’re sold on the idea of finding a machine that can thrash on trails but also be a practical and useful addition when managing our campsite. Hauling firewood, checking on guests, accessing parts of the property that are far off and hard to get to on foot (side by sides love mud!). So we’ve been riding with friends, doing research, and deciding if a side-by-side (UTV) will make our campsite management life easier. Side-by-sides (aka utility terrain vehicles or UTVs) are rugged, many use machines meant for both work and play. But are they really worth the investment for a campground owner? In this post, we’ll go over the pros, cons, and considerations when deciding. What Is a Side-by-Side? A side-by-side is an off-road vehicle with seating for two to six people, usually with a roll cage, cargo space, and four-wheel drive. Unlike ATVs (which usually have one rider sitting on a straddle seat), side-by-sides have a steering wheel, seat belts, and often have a small bed for hauling. They’ve become popular among hunters, farmers, and outdoor workers because they can handle rough terrain while carrying tools, supplies, or passengers. For campgrounds, they can serve as both a workhorse as well as a fun perk. The Benefits of a Side-by-Side for a Campground 1. Efficiency in Daily Operations If you have several acres to manage, walking everywhere isn’t always realistic. A side-by-side lets you: They save time and energy, especially during peak season when you’re constantly moving. 2. Hauling Power Many models come with a small dump bed or towing capability. That means you can move gravel, woodchips, trash, or construction materials without needing a full-sized truck. For campsite improvements—like building trails, maintaining roads, or setting up new units—a UTV is a huge help. Add a winch and it becomes even more useful. 3. Access to Rough Terrain If your campground has steep hills, muddy trails, or wooded areas, a side-by-side can get you places a standard truck can’t. This makes it a good fit for: 4. Emergency Response In case of a medical emergency or a guest stranded in a remote part of your campground, a UTV lets you to reach them quickly. Some campgrounds outfit their side-by-sides with first-aid kits or stretchers for safety. 5. Fun Factor (With Boundaries) A side-by-side can add some fun for your family or staff after hours. It’s also possible to build guest experiences around them, like guided tours of your property—but you will want to know and follow local laws, know your liability coverage, and know your insurance requirements. The Downsides of Owning a Side-by-Side 1. Cost A new side-by-side can range anywhere from $10,000 to $30,000 or more, depending on the brand and features. Even used models tend to hold their value, so this is not a small investment. 2. Maintenance and Repairs Like any vehicle, a UTV requires fuel, oil changes, new tires, and occasional repairs. If it breaks down mid-season, you’ll need access to a mechanic familiar with off-road vehicles, which may not always be nearby. 3. Fuel Use Most side-by-sides run on gas, and frequent use can add up. If you’re driving it daily across your property, fuel costs might be noticeable compared to just walking or using a smaller ATV. 4. Noise Side-by-sides are louder than golf carts or electric utility vehicles. If you drive one around while guests are enjoying nature, it could interrupt their peace. You’ll want to be mindful of when and where you use it. 5. Safety and Liability With any motorized vehicle, there’s a risk of accidents. You’ll need to ensure only trained staff (or yourself) operate it. Allowing guests to drive it is usually a bad idea—your insurance provider might not even allow it. Alternatives to a Side-by-Side Before investing, consider other options that may fit your campground better: Key Questions to Ask Yourself Before making the purchase, you’ll want to think about: Tips for Choosing the Right Side-by-Side If you decide it’s worth it, here are a few features to consider: Final Thoughts So, should you get a side-by-side for your campground? If you have alot of acreage, rough terrain, and frequent hauling or maintenance tasks, a UTV is almost definitely worth the investment. It saves time, energy, and stress—especially during peak season. But if your campground is smaller, mostly flat, and easier to manage on foot or with a golf cart, a side-by-side may be overkill. You could put that money into guest experience upgrades instead. Like most campground investments, it comes down to your specific property, budget, and long-term plans. A side-by-side isn’t a must-have for every owner—but for the right campground, it can be a game-changer. Have you used a side-by-side at your campground or while camping? Share your experience in the comments below—we’d love to hear how it worked for you! . . .Photo by Nathaniel Hutcheson on Unsplash ✅ Word count: ~1,540
Knowing When It’s Time to Expand at Your Glamping Campsite

Running a glamping campsite is a rush but it’s also a lot of work. Bringing hospitality and comfort into the great outdoors draws adventurous travelers looking for something beyond a traditional hotel or tent site. For many owners, the project starts small. But as your business grows, you might start to wonder: is it time to expand? Expansion is one of the biggest decisions a campsite owner will make. It involves careful planning, financial investment, and an understanding of your market. Expand too soon, and you risk straining resources and burn out. Wait too long, and you may lose potential revenue and momentum. This article explores some signs that it’s time to expand your glamping campsite, factors to consider before taking the leap, and strategies to expand wisely. 1. Your Occupancy Rate Is Consistently High A sign that it may be time to expand is when your existing accommodations are consistently full. If you find yourself turning guests away regularly during peak season—or, better yet, throughout much of the year—it means demand is exceeding supply. Add in consistently high reviews, and you know you’re on the right track. A consistently high occupancy rate indicates two important things: If you notice that your accommodations are booked out months in advance, that’s a strong business signal. Expansion can help you capture those missed opportunities and grow revenue without drastically changing your business model. 2. You’re Getting Frequent Requests for Something You Don’t Offer Sometimes, guests tell you exactly what you should consider adding. Maybe they keep asking if you have family-sized cabins, a pet-friendly option, or a hot tub. Maybe they want activities like kayaking, fishing, or stargazing decks. If you repeatedly hear similar requests, it might be worth exploring expansion in that direction. This doesn’t always mean building more units right away—it could mean diversifying your offerings. For example, if you only provide couple-sized tents, adding one or two larger family yurts might increase your guest base. Guest feedback is extremely important because it highlights gaps in your current setup. Expansion should always serve a real demand, not just what you think guests want. 3. Your Revenue Is Steady and Profitable Expanding your glamping campsite takes money—sometimes a lot of it. Before considering building more units or adding facilities, it’s important to check your financial health. Here are some good financial indicators: Expansion should be done from a position of strength. If your current operation is already financially sustainable, then scaling up becomes far less risky. 4. You Have Repeat Guests and Strong Word-of-Mouth Glamping thrives when there is customer satisfaction. If people are returning year after year, that’s a powerful sign that your site has lasting appeal. Likewise, if new bookings often come from referrals, friends, or family of past guests, it suggests your brand is strong. Repeat customers don’t just show loyalty—they also validate that your experience is memorable enough to invest in. If your current setup has already created a loyal base, expanding gives those same guests new reasons to return and spend more. 5. You’ve Outgrown Your Infrastructure Sometimes, the need to expand is less about adding new accommodations and more about upgrading your supporting systems. For instance, you might notice: In this case, expansion isn’t just about growth—it’s about sustainability. Improving infrastructure ensures that your current and future guests continue to have a smooth, comfortable experience. Without these upgrades, even adding one or two new glamping units could overwhelm your operations. 6. The Local Market Supports Growth Your expansion decision shouldn’t be based only on your property’s success—it also depends on the broader market. Some questions to ask include: If tourism is growing in your region and there’s demand for unique stays, your campsite may be well positioned for expansion. On the other hand, if the market is stagnant or shrinking, it may be wiser to hold back. 7. You’re Personally Ready for the Next Step Expanding isn’t just a business decision—it’s a lifestyle decision. More accommodations mean more responsibilities: more cleaning, maintenance, marketing, and guest relations. Ask yourself honestly: Many campsite owners value the personal connection with guests. Expansion may change that dynamic. Think carefully about whether growth aligns with your personal goals as much as your financial ones. How to Expand Wisely If you’ve weighed the signs and feel confident it’s time, here are some smart approaches to expanding: Start Small and Test Instead of doubling your capacity overnight, consider adding just one or two more accommodations. This lets you test whether demand holds steady without taking on too much risk. Diversify Accommodations Adding a different type of glamping unit—like a treehouse, dome, or cabin—can attract a wider variety of guests. Diversity also creates repeat business, as people return to try something new. Upgrade Infrastructure First If your bathrooms, kitchens, or septic systems are already near capacity, address those first. Expanding without improving infrastructure can hurt your guest experience. Focus on Quality Over Quantity It’s better to have a smaller number of high-quality units than a large number of poorly maintained ones. Glamping guests expect comfort, cleanliness, and a good vibe. Market Expansion Strategically It’s smart to avoid just building more space—you also have to make sure people know about it. Announce new units with professional photos, early booking discounts, or social media campaigns to create excitement. Potential Risks of Expanding Too Soon Expansion can be exciting but there are also risks involved: Understanding these risks helps you make a balanced decision and avoid expanding just for the sake of growth. Conclusion Knowing when to expand your glamping campsite is a delicate balance between demand, financial readiness, and personal goals. Signs like high occupancy rates, frequent guest requests, steady revenue, and repeat customers suggest that you may be ready for the next step. At the same time, it’s extremely important to assess infrastructure, market trends, and your own capacity to handle growth. Expansion, when done wisely, can take your campsite from a small passion project to a thriving destination. The key is to
Is Adding a Treehouse to My Glamping Campsite Worth It?
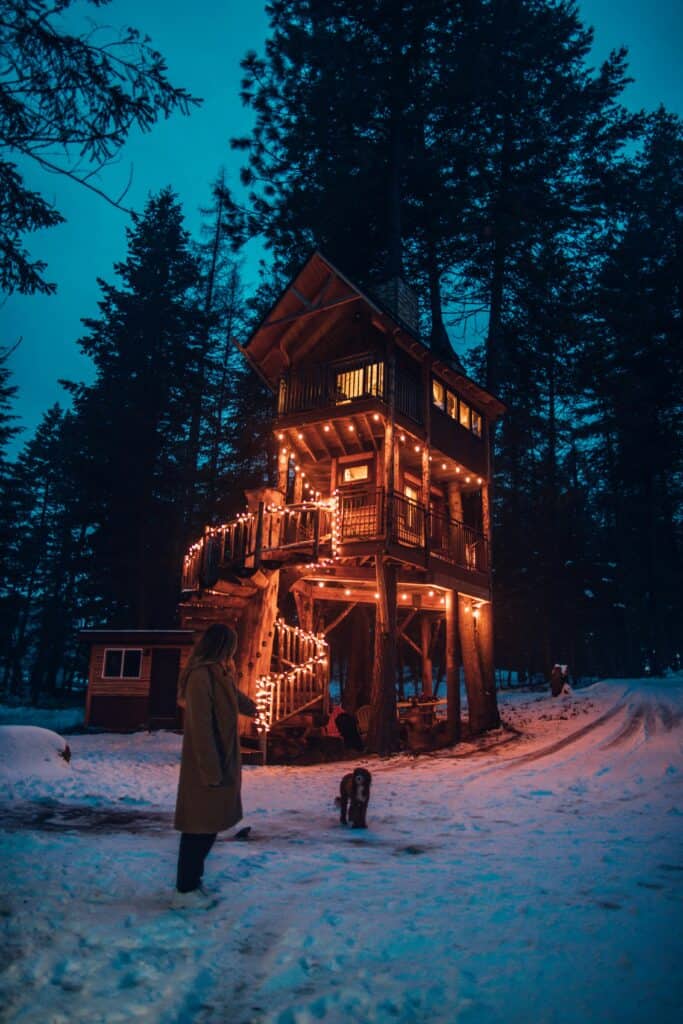
Treehouses have a magic about them for certain. They stir up childhood memories, spark the imagination, and create an instant “wow” factor for guests. Everyone we talk to lights up when we tell them that treehouses are coming soon to the campsite (this blog is the first of many on this topic ). In the glamping world, a treehouse can be the ultimate Instagram-worthy accommodation — and the ultimate investment. But before you start hauling lumber up into the branches, it’s worth asking: Is adding a treehouse to my glamping campsite really worth it? The answer depends on your budget, location, market demand, and how you plan to use it as part of your overall guest experience. Let’s look at the pros, cons, costs, and considerations so you can decide if a treehouse is the right move for your site. 1. The Attraction of the Treehouse Experience A well-built treehouse can be more than just a place to sleep — it can be the centerpiece of your glamping business. Guests often choose glamping for its uniqueness, and few things are more unique than a night in the trees. Treehouses appeal to: If your goal is to stand out from other glamping sites in your area, a treehouse can be a great move. 2. The Potential Benefits of Adding a Treehouse Higher Nightly RatesTreehouses can command higher rate because of their novelty and limited availability. If your average cabin rental is $150 per night, a treehouse might easily bring in $200–$300 per night, depending on amenities and location. Free PublicityA unique structure like a treehouse can naturally attract media coverage, social media shares, and word-of-mouth buzz without extra advertising spend. Guests love posting about unique stays, which can mean free marketing for you. Repeat GuestsEven if someone has stayed at your campsite before, a new accommodation type gives them a reason to return. Loyal customers love seeing you add new features. 3. The Challenges and Risks High Upfront CostsBuilding a safe, sturdy, and guest-friendly treehouse is not cheap. Even a small one can cost $20,000–$50,000 (or more) when factoring in design, permits, materials, and labor. Custom luxury treehouses with plumbing and electricity can run over $100,000. Permits and RegulationsTreehouses may be subject to strict local building codes. In some places, they require the same permits as traditional structures — plus additional inspections for safety. If your land is zoned for certain types of accommodations, a treehouse may or may not be allowed. Accessibility LimitationsTreehouses generally require climbing stairs or ladders, which may exclude some guests (older visitors, people with mobility challenges, or families with very young children). This can limit your booking market. MaintenanceTrees grow, sway, and shed leaves. A treehouse requires ongoing inspection and upkeep — more so than a standard cabin. You’ll need to watch for rot, shifting supports, pest issues, and weather damage. 4. Cost Breakdown Example Let’s take our developing project as an example – a mid-range treehouse for two guests, with a porch vaulting over the cliff above the creek. A wood burning fireplace, no electricity or plumbing. Bathrooms and showers are available in the common access Water Shed. (Sounds amazing, doesn’t it!). Keep in mind this varies from region to region- this is a pretty close ball park where we are located. Expense Estimated Cost Design & Engineering $3,000 Permits & Fees $300 Lumber & Materials $10,000 Professional Labor $10,000 (we’re doing a lot of the work ourselves but still need to hire some out) Interior Furnishings/ wood burning stove $5,000 Landscaping/Access Path $2,000 (building in a Hemlock forest in a remote area across the creek) Total $30,300 If you charge $250/night and book 120 nights a year, you’d bring in $30,000 annually — meaning we could recoup your investment in a year under strong occupancy. Not bad. 5. Treehouse Styles to Consider Your style choice will affect both the cost and your target audience. 6. Marketing a Treehouse When you add a treehouse it can become a pivot point attraction – what catches the eye and makes you stand out. A few marketing ideas: 7. Real-World Guest Considerations Before committing, think about your actual guests: If most of your guests book for comfort and accessibility, a ground-level luxury tent might be a better investment. If your guests love novelty and the outdoors, a treehouse could be a perfect fit. 8. Ways to Maximize ROI If you decide to build, here’s how to make the most of your investment: 9. Pros and Cons Summary Pros: Cons: 10. Is It Worth It? A treehouse can absolutely be worth the investment — if your market demands unique, photo-worthy accommodations and you have the budget and time to maintain it. It’s not a small undertaking, but when done well, it can become your signature attraction and a major revenue booster. We are beyond excited, and so is anyone we have told about our treehouse project. If you already have a strong guest base and want to add something that gets people talking, a treehouse could be the crown jewel of your glamping site. If you’re just starting out and have a tight budget, it might be wiser to first focus on lower-cost accommodations that build steady income, then reinvest in a treehouse later. That’s what we did, starting with a base camp and building from there. We’d love to hear your thoughts on moving your glamping campsite project into the trees. Happy building!
One of Those Beaver Dam Days– When Beavers Love Your Property and You Want Them to Love it a Little Less
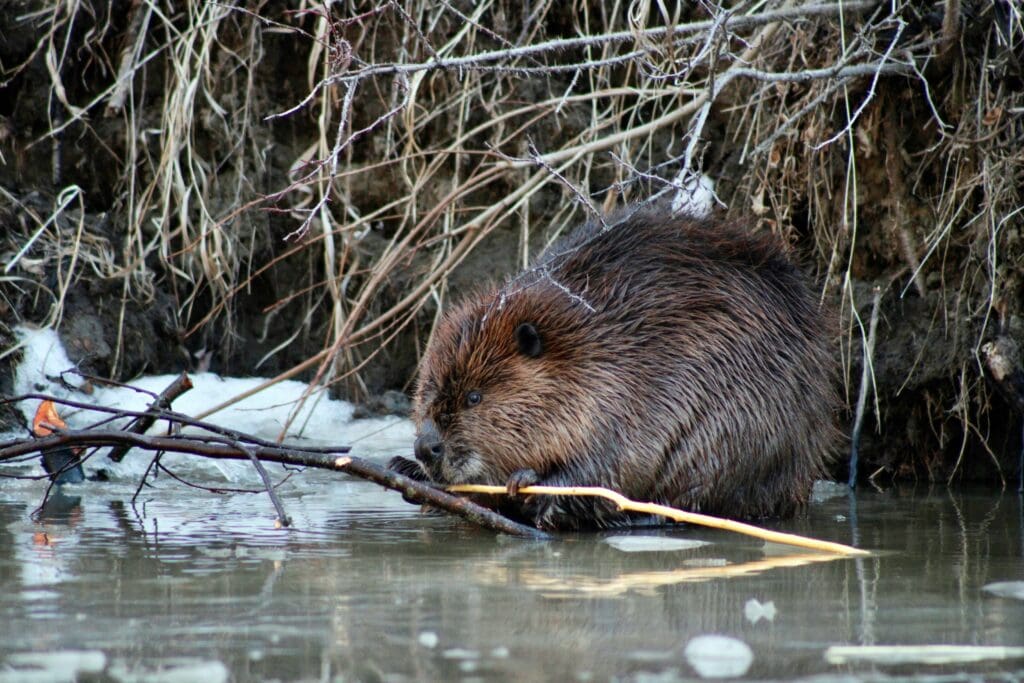
This blog is about the pros and cons of owning property that beavers find attractive. A beaver dam has been built on our creek almost every fall recently. Beavers are fascinating creatures and beaver dams can have their benefits, but they can also be very destructive. Here are some things we’ve learned about beavers and about how to make them feel a little less welcome. What attracts beavers to the property? Beavers build dams across streams so that they can make a pond. The pond and a beaver lodge become home and give protection from natural predators. When picking a dam site for their new neighborhood, beavers love certain features of our property: -Plenty of trees and woody vegetation for building materials and for food. – Manageable water flow that they can easily dam up -A cove perfect for building a lodge – Limited human disturbance and noise for uninterrupted work -unprotected creek banks next to wooded areas Beavers are hard working How quickly beavers can build a beaver dam is impressive. Last season, they built a forty-foot-long dam about a foot high across the creek in less than three days. They gnaw down trees for building material for dams and lodges and also for a food source. They eat the bark and the layer right below it (called the inner cambium layer). They prefer certain species of trees – like aspen (because of how it is), poplar, cottonwood, willow and birch. We have plenty of these to choose from on our property, many trees in sapling form and easy for beavers to manage. Our beavers start working at dusk and can be heard cutting and building throughout the night if left alone. They build more and cut and store more trees in the fall to be ready for winter. . Beavers are family oriented Other than the problems they can cause, beavers have a lot of positive qualities. They mate for life and have a strong family bond, centered around the mother, father, and the kids (called kits). Both parents help raise the kits and older siblings may also help with daycare. The kits leave home after their second or third spring. They travel long distances by land and by water to find a mate and to start a new colony. Beavers live about 10 to 12 years (if all goes well). They can live as long as 19 years in captivity. But before you invite Bucky home, you’ll want to keep in mind that owning a beaver is against the law in most states. First the good news Beaver dams can offer a lot of benefits to the ecology of an area. Dams can act like filters, slowing down water flow and letting sediment and pollutants settle out of the water. Dams can help with flood control. They can serve as natural buffers and store extra water after heavy rains. Water can then be released more gradually and sent downstream. Dams also store water in the ponds they make and in groundwater. This can be very helpful during drier seasons. Beaver dams can make or expand wetlands, which creates an important habitat for various plants, animals, creepy crawlies and insects. They also create deadwood habitats by taking down trees. This makes more homes and food for an even bigger variety of plants and wildlife. Wetlands can also preserve and protect an area if there are wildfires. They can act as a fire buffer and also might protect some species of plants from being wiped out. Now the bad news: How a beaver dam can change the lay of the land Beavers can quickly disrupt the ecosystem by changing waterflow of a creek and by stripping away trees and other vegetation. They can quickly raise the water level upstream and can flood large areas. On our property, it took about a week for an acre of forest floor to be underwater. Dammed water can also become stagnant, which can lead to algae and the spread of disease. Beavers take down a ton of trees to give them something to build with and for food. They also peel bark and the layer underneath (cambium layer) for food, possibly damaging much larger and more valuable trees. If given time they can do A LOT of damage to a wooded area. A dammed stream or creek can also put a stop to fish migration. The creek that runs through our property is regularly stocked by the state with trout so this is a real concern for us. How much wood would a beaver chuck…. How much wood would a woodchuck chuck If a woodchuck could chuck wood? A woodchuck would chuck as much as a woodchuck could chuck if a woodchuck could chuck wood. I didn’t understand this riddle when I was a kid. I took shuck to mean peal away layers. And I never understood why they were asking about woodchucks and not asking about beavers. Because I knew the answer to that one. They’d chuck a lot!! How much damage could a beaver really do? Beavers have extremely strong teeth and jaw muscles and are tree chewing machines. They can take down a 5 inch tree in a matter of minutes and can take down a medium size tree in a single night. A pair of beavers can gnaw down 400 trees in a year! They prefer smaller trees (two to six inches) but can take down a tree with a thirty-three- inch diameter if they want to. That’s a lot of wood chucked! How big can a beaver dam get anyway? Beaver dams are usually on the smaller side but can range from 9 or 10 feet long all the way up to 330 feet long. They can also get up to six feet high. Beavers also build canals that can be as long as 1600 feet. They use them to transport food and building materials to deeper water. The world’s longest
Creek Camping – Making an Eco-Friendly Camping Space by the Water

This blog is about creek camping and how we created access to our creek without having a negative impact on the environment. Creek camping and spending time at the water in the wilderness is a special experience. It takes some planning and some insight to keep vegetation and wildlife impact to a minimum. This blog shares the steps we took to turn our gorgeous but almost inaccessible creek into a favorite destination for our visitors. The Adventure of going to the creek We’re very lucky to have Black Creek running through the middle of our property. For as long as I can remember it’s been a favorite place to be. Long afternoons splashing in the water. Moving rocks on the creek bed to deepen a swimming hole. Piling them in a line in the shallows to make a dam. Time with friends and family. It’s a place to make memories that last a lifetime. Creek camping The sound of the water, trillions of stars, the scent of the hemlock forest, all in a private and safe space, make the creek a perfect place to camp. It’s beyond peaceful. And although they’re scarce when people are around, wildlife regularly come to the creek for water. Protecting their habitat and preserving the fragile beauty of the property is a top priority. Making a usable and eco- friendly camping space is extremely important and it takes some work. Access is a challenge Banded by wetlands, cutgrass, and thorn brush, getting to the creek once felt next to impossible. The mud loved to grab onto sneakers and rain boots and a few pair are still buried in the soggy ground. After making it to the creek bank, there was another few feet of mud – more stinky quicksand to devour shoes. Walks next to the creek were cut off in all directions by more mucky areas caused by runoff. As a result, visits to the creek became few and far between and large portions of the most beautiful part of the property went unused. Tuning into the property When we dove into developing our private park and campsite a few years ago, creating easier access to the water was key. We wanted to be eco-friendly as we put in trails, made the western bank walkable, and established camping spots. The first step was to stop thinking about where we wanted things and to start thinking about where the land and the creek wanted things. In knee- height rubber boots and long sleeves, we explored the property leading to the water and along its banks. Luckily, some of the highest and driest areas were right at the water, created by hundreds of years of Spring sediment dumps. The creek runs deep and fast when Winter snow makes way for Spring. This ridge was cut off at a few points, where run off from the wetlands poured into the creek. Focusing more on the soil instead of how hard it was to get through berry bushes and thorn brush, we were able to determine where the higher ground lay and the best paths for the trails to take. Appreciating the changes with each season It was very important to be familiar with how things change from season to season and from year to year. In dry months, portions of the creek are only a few inches deep. In the Spring, the same areas are four feet deep, with a current strong enough to carry logs and tons of sediment downstream. Run off paths also shift from being a low place in the grass to becoming creeks themselves during the rainy season. This was important to think about when putting in walkways and bridges. It also meant that certain areas would only be accessible in the dry season. A trail system that gives access with very limited impact The bulk of our paths are mowed trails, about the same width as a riding mower’s cutting deck for ease of maintenance. They follow the higher ground, just outside of the thick of the wetland. The longer they are maintained, the more the trails dry out and act like any other lawn. This reminds us of how important it is to leave the majority of the wilderness alone. We also trimmed back briars and brush where needed. An arms-length away from untouched nature The trails give access to flora and wildlife that many people have never seen before. Grasses, plants and flowers are inches away, and a well-kept trail system keeps visitors on the beaten path. This greatly limits any negative impact on the soil and on the environment. Bridging run off routes It’s extremely important to maintain a route for stormwater runoff. Rainwater and melting snow flow over the ground, pick up pollutants and other debris, and then flow into the creek. Ephemeral streams only run after it rains or when snows melt and are an important part of the creek ecology. After the Spring, some of these streams turn into several feet of unpassable muck along the creek. We were able to bridge these areas with raised walkways. To minimize impact and realizing that Mother Nature’s designs are subject to change, everything is movable. 6 by 6 s were laid on the ground (with a little digging and adding stone for leveling and drainage). Walkways were built on top of them with 2 by 10 supporting joists. This has made a user-friendly creek path possible with no negative effects. A way through muddy banks This solution happened by accident. In some places it’s easy to step off the bank and onto the stones in the creek bed. But, in many others, moving from the creek bank into the water means climbing through a few feet of mud. What started out as a swim float (picture below) now doubles as an easy step from the bank to a floating deck at the creek edge. For longer visits, it can