How to Build the Perfect Glampsite for Stargazing
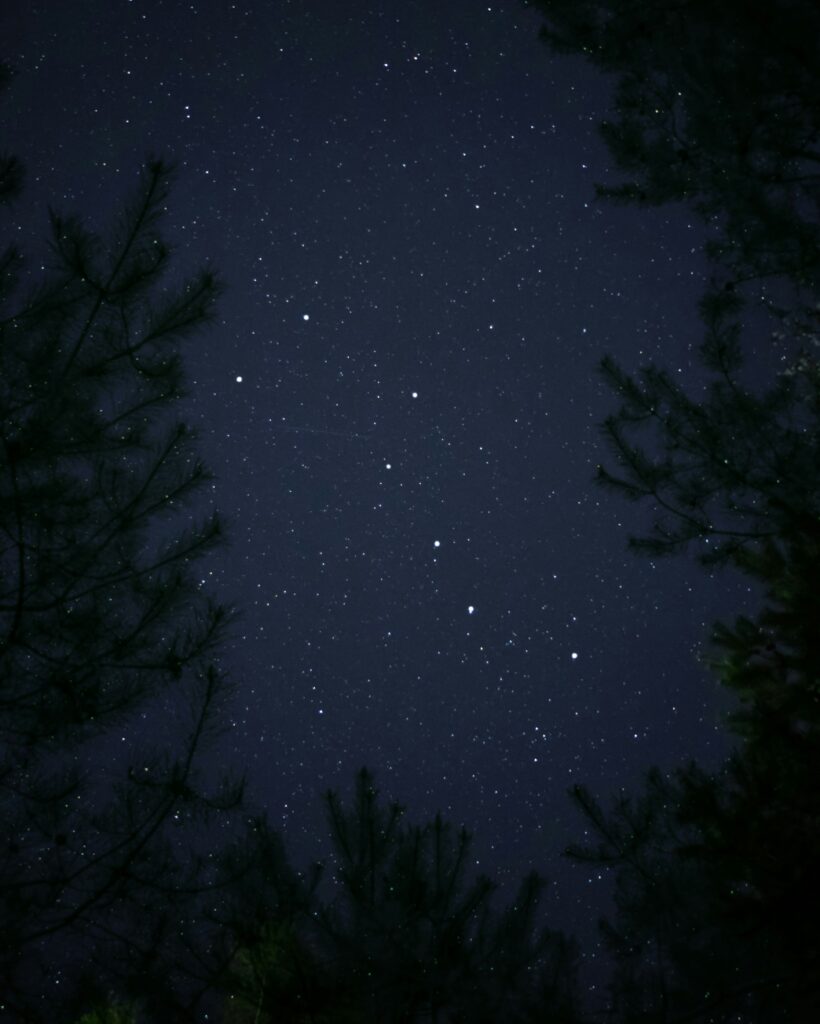
There’s something magic about staring up at a sky full of stars. Whether you’re watching the Perseids streak across the night or just tracing constellations in peaceful silence, stargazing taps into something deep and calming. The Northern Lights. The moon cresting over the hill looking close enough to touching with a ladder. Billions of stars to remind us that our problems are nothing in the eternal scheme of things. That’s why creating a glamping site designed with the stars in mind is such a meaningful way to offer your guests something unforgettable—and it doesn’t require a lot to pull off. In this post, I’ll walk you through how to create a glampsite that’s perfect for stargazing: from choosing the right location and reducing light pollution, to offering cozy, thoughtful touches that make guests want to lie back and stay a while. 1. Start With a Stellar Location The most important part of any stargazing setup is the sky itself. That means your first task is to find a location with minimal light pollution. Use a Dark Sky MapWebsites like LightPollutionMap.info can help you locate dark sky areas. The further you are from cities or industrial areas, the clearer the view. Elevation MattersIf your property includes any hills or ridges, higher elevations may offer wider, more open skies with less atmospheric haze. With that said. our campsite is located in a valley – and the planetarium-like view. with very little ambient light, is breathtaking. If you are going to designate a star gazing area, you will want to focus on accessibility—especially for guests who might be arriving at night. Tree CoverageSome tree cover is fine—and even cozy—but you’ll want at least one or two open-sky zones that give a panoramic view of the heavens. Clearings, meadows, or the edge of a forest line work beautifully. Walking away from a tree covered firepit area into a field revealing a sea of stars overhead is something to be remembered. 2. Design for Darkness Without Sacrificing Comfort The key to an excellent stargazing site is creating comfort without lessening the experience with artificial light. Low-Light PathwaysInstall low-level solar path lights with downward-facing bulbs or motion-activated LEDs. Warm-toned lights are best, and amber or red hues preserve night vision. No White Light ZonesConsider designating a “dark zone” near your stargazing area where bright lights are discouraged. Provide guests with red-lens flashlights or lanterns they can borrow during their stay. At our camp, every dusk til dawn light can also be turned off with an easy to access switch – that way guests can experience more darkness and an ultimate star gazing experience. Blackout Options in Cabins or TentsEnsure that interior lights don’t spill out into the night unnecessarily. Heavy curtains or blackout shades let guests enjoy the night sky without light bleed. Turning off cabin interior and outside lights also does the trick, with decorative low-amp lighting to show the way. 3. Create a Stargazing Lounge or Deck Once your guests find the stars, they’ll want to stay awhile—and comfort makes all the difference. Essential Features: Bonus: Add a small side table or stump for placing drinks, a thermos, or a stargazing guidebook. 4. Offer Stargazing Kits or Rentals A little extra equipment can turn a good night into a magical one. What to Include in a Stargazing Kit: Make it easy to check out a kit, or even better, leave one in each tent or cabin. You might also offer rentals of telescopes or guided stargazing experiences during peak viewing nights. 5. Time Your Bookings With Celestial Events Keep an eye on the astronomical calendar and highlight key events for your guests. You can use this as a marketing boost too. Big Nights to Promote: Mention these events in your booking calendar or blog. Some sites even offer “astro-cations”—you can market a few special weekends this way, especially if you offer extras like guided viewings or themed s’mores nights. 6. Decor That Echoes the Sky You don’t need a space theme to suggest starry night beauty—but a few special touches go a long way. Ideas for Atmosphere: You can even name cabins after constellations to weave the night sky into your branding. 7. Educate, Inspire, and Connect Part of what makes a stargazing site special is helping guests connect with the vast Universe above them. Offer a Simple Star GuideInclude a printed guide or QR code to an app so guests can identify constellations and planets. You could even include a star log where they can record what they saw. Host Occasional Sky Talks or Night WalksEven if you’re not an astronomer, you can read up on a few highlights of the sky and lead a short moonlight walk. Some local astronomy clubs might be willing to partner for seasonal events. Encourage ConnectionThe stars have a way of sparking reflection. Suggest that guests put phones away for part of the evening. Provide a stargazing “playlist” or invite them to just sit in silence. It doesn’t have to be high-tech—it just has to be heartfelt. 8. All-Weather Stargazing: Think Ahead Not every night is clear, so it’s worth having a backup plan that still honors the theme. Ideas for Cloudy Nights: You can even provide access to live telescope feeds online or recorded sky tours for rainy days. Final Thoughts: Magic Happens When You Look Up A glamping site designed with stargazing in mind offers something rare and deeply moving: the chance to unplug, slow down, and connect with the universe. Whether you’re building from scratch or adding thoughtful touches to an existing campsite, these simple strategies can turn an ordinary stay into an unforgettable night under the stars. And don’t forget to look up yourself—enjoy what you’ve accomplished along with the vastness of the night sky. Enjoy!!
Cooking With Cast Iron While Camping: Benefits, Tips, and 7 Delicious Meal Ideas
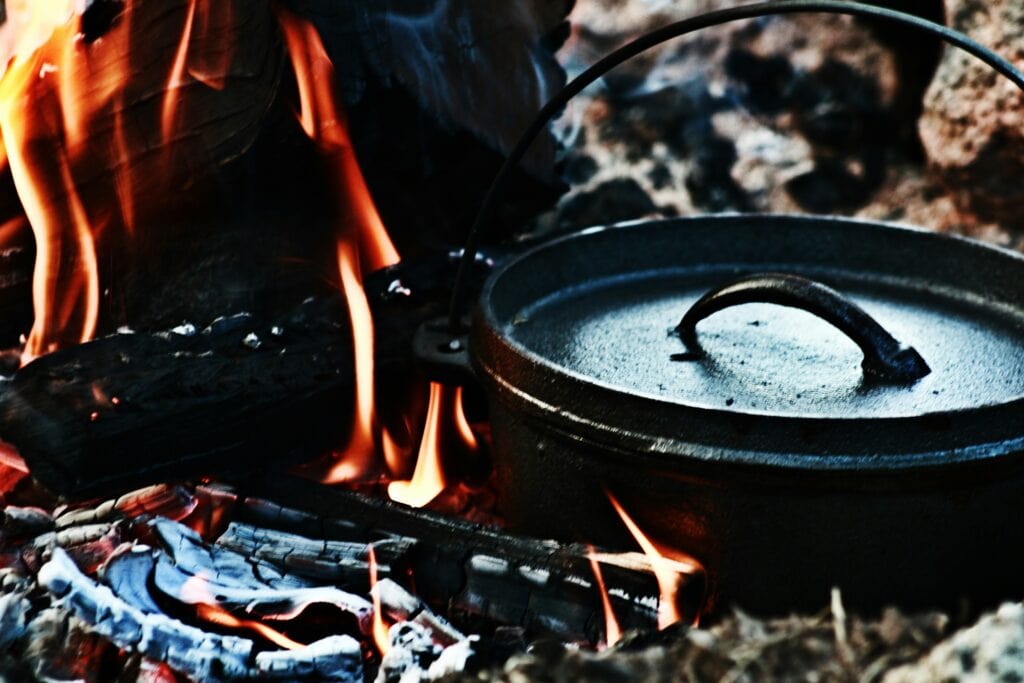
When you’re out in the woods or enjoying the peace and quiet of your favorite glamping site, there’s something special about cooking over an open flame. And no piece of equipment captures the spirit of campfire cooking better than the cast iron skillet. It’s rugged, reliable, and versatile—everything you want while you’re camping. Coming in handy for breakfast, lunch, and dinner, a well-seasoned skillet makes the perfect piece of campfire cookware. In this post, we’ll look at the benefits of using cast iron while camping, offer some tips for getting the most out of it in the wild, and share seven camp-friendly meals you can add to your camping menu. Why Use a Cast Iron Skillet When Camping? There are many reasons experienced campers swear by cast iron. Such as… 1. Durability Cast iron is practically indestructible. It doesn’t warp over high heat like some thin aluminum pans, and it stands up to the trials of cooking over a fire, on a grill grate, or on camp stove. 2. Even Heat Retention Once hot, cast iron holds heat extremely well. That’s key when you’re cooking outdoors, where heat sources can be unpredictable. 3. Versatility You can sauté, bake, fry, simmer, roast, and even cook directly in the coals. From bacon and eggs in the morning to pizza at night (see below!) the sky’s the limit. 4. No Need for Special Utensils Unlike nonstick pans, cast iron doesn’t mind if you use metal spatulas, tongs, or forks. 5. Natural Non-Stick Surface With proper seasoning, cast iron becomes nearly non-stick—without synthetic coatings. Things to Keep in Mind When Camping With Cast Iron Cast iron may be tough, but it does need a little attention, especially in the outdoors. 1. Weight Cast iron is heavy. A smaller 8–10 inch skillet is a lot more portable, or a 12-inch for group cooking if not hiking to far in. 2. Seasoning Matters Before your trip, coat your pan lightly with oil and bake it at 400°F for an hour. On the trail, wipe it down with oil after cleaning. 3. Avoid Soap Scrub your skillet with coarse salt and water, not soap, which can strip your seasoning. 4. Don’t Let It Stay Wet Always dry thoroughly after cleaning to prevent rust. A light coating of oil helps protect the surface. 5. Be Cautious With Acidic Foods Tomatoes or vinegar can strip your seasoning if cooked too long. Use with care unless your skillet is well seasoned. 7 Campfire Meals You Can Make in a Cast Iron Skillet Here are seven easy, hearty meals ideas that can be cooked on a campfire in cast iron. 1. Campfire Breakfast Hash Fry diced potatoes, onions, and peppers in oil or bacon fat. Add sausage or bacon, then crack eggs over the top. Cover until eggs are done. Tip: Boil potatoes at home to reduce cook time. 2. Skillet Cornbread Preheat your greased skillet, pour in your batter, and bake with foil on top. Surround with coals or place coals on the lid. 3. Sizzling Skillet Fajitas Marinate chicken or steak with lime and spices. Cook in the skillet, then add sliced onions and peppers. 4. One-Pan Lemon Herb Trout Season fresh-caught trout with lemon, garlic, and herbs. Sear skin-side down until cooked. 5. Cast Iron Pizza Oil your skillet, press in dough, and top with sauce, cheese, and extras. Cover and cook near coals until done. 6. Bacon-Wrapped Asparagus or Veggie Medley Cook bacon-wrapped asparagus in foil or sear veggies in the skillet with bacon drippings. 7. Skillet Apple Crisp Cook apples with sugar and cinnamon. Add oat topping and cook until golden and bubbly. Final Thoughts A cast iron skillet is more than just a piece of cookware—it’s a campfire legend. With it, you can make delicious and memorable meals and great camping memories. The more a skillet is used, the better it gets. And a special thanks to FG, a member of the Glampsite Joe tribe, for requesting the cast iron while camping topic. Keep the suggestions coming, and happy campfire eating! . . . Photo by Melody Ayres-Griffiths on Unsplash Photo by Blake Carpenter on Unsplash Photo by Kaylin Pacheco on Unsplash Photo by Shelby Cohron on Unsplash Photo by eduardo froza on Unsplash
How We Installed a Bathroom at Our Glampsite (From Well to Leach Field)
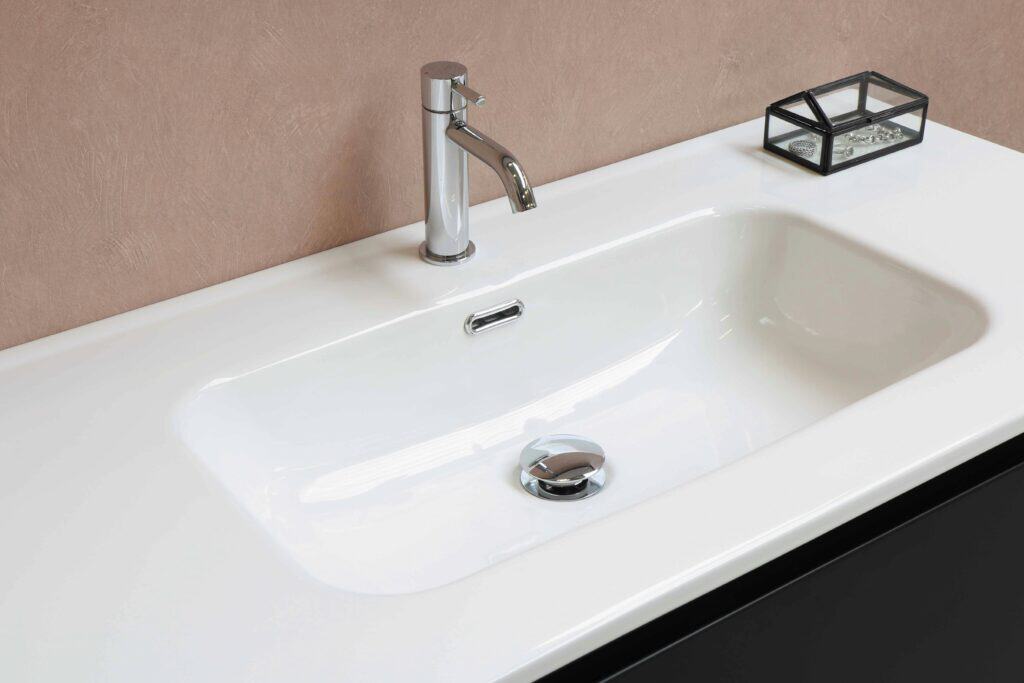
When we first started our glampsite, we focused on the basics: making a beautiful spot in nature, adding trails, making the perfect campfire area, and building two camping cabins with all the creature comforts. But over time, it became clear that one upgrade would take things to the next level—not just for guests, but for us too. That upgrade? A fully functioning bathroom. Not just a porta jon (I own one!) or outdoor shower from a sun heated bag(though those can be great too), but a real bathroom with running water, a flushing toilet, a sink, and even an indoor and an outdoor hot shower. We wanted something rustic but with all the amenities. After our first full season, we knew that, if we were going to grow and host seriously, real bathrooms were a must. If you’re thinking about doing the same, this post is for you. I’ll walk you through how we built a bathroom from scratch at the glamping campsite, including: Let’s dig in (literally). 🔧 Step 1: Planning, Permits, and Research Adding plumbing to a rural property isn’t something you can do on a whim—especially if you’re hosting paying guests and need to be 100% certain there are no health risks. We had to start with permits and planning, which turned out to be a learning curve in itself. What was Needed: 💬 Pro tip: Call your local health department first. Every region has different rules, and it’s much easier to get clarity up front than to backtrack later. This phase took a few weeks, to coordinate schedules and have permits drawn up. Code changes quite a bit when more overnight guests are a possibility. We went with the larger leach field, giving room for additional guests, and maybe even a crowd if used as an event space in the future. 💦 Step 2: Digging the Well Once we had approval, it was time to get water on-site. Root Water Well came highly recommended and we weren’t disappointed. The foreman seemed almost as happy as I was when they hit water at forty feet. I stood behind the rig and let the water from the well hit my face. It was an amazing feeling! The Details: The pump and pressure tank were buried well below the frost line. The system was designed for water to drain back into the well when not in use, helping a ton with any freezing issues. 🚽 Step 3: Installing the Septic System & Leach Field Next came the leach field. This is basically a network of perforated pipe. A large pit is dug and pipes are added along with stone. Excess water is piped away to a drainage mound, where the filtered water returns to the environment. Supposedly this water is clean enough to drink, but… yuck. Installation Breakdown: 📸 If you’re documenting your own journey, take plenty of photos during this step—you’ll thank yourself later for insurance and records. 🏡 Step 4: Building the Bathroom Structure With the well and the leach field in place, next on the list was a place to put it all in. We put up a 16 by 24 building, opting to have it on piers for speed of build and for ease of plumbing installation. The building is divided into three sections. One is a lockable shower room. Another is a bathroom with two toilets and a sink (all of which are requires when overnight guests exceed 25 people). The third section is being used for storage but will be easily convertible to another bathroom when the time comes. Materials & Design: Plumbing Setup: vents in each room💬 (photo -still under construction!) 🪵 Step 5: The Finishing Touches This is what makes the bathroom go from “functional” to “special.” What I Included: 💬 A game changer The bathroom changed everything. I took my first real shower at the glamping campsite not long ago and it was spectacular! Flushing toilets also feel like such a luxury. There is still some finish work to do, but the amenities are ready to go for the season. We will keep the porta jon for use during the winter months. 🔁 What We’d Do Differently Even though we’re thrilled with the results, there are a few things we’d change if we were starting over: 1. Bargain Hunt We bought everything new, but with a little more planning we could have been on the lookout for bargains. The price tag added up very quickly, and every dollar saved would have mattered. 2. Build a Larger Structure The Water Shed is brand new but we’re already wishing it was bigger. Eventually we will add on-maybe an outside covered area- but that will be a next year project. 2. We would have done it sooner The Water Shed came with a pretty big price tag but it is totally worth it! These new amenities will make all the difference as we forge ahead with our hosting adventures! ✅ Final Thoughts Installing a bathroom at our glamping campsite wasn’t easy or cheap—but it was one of the most transformational investments we’ve made in the property. It elevates the guest experience, improves hygiene and convenience, and allows us to market our site as a more luxurious getaway. If you’re thinking of adding a bathroom to your off-grid or rural property, here’s my advice: Want to do this yourself? I created a free checklist you can download below that covers every step I took. And if you have questions, feel free to reach out—we love helping other glampsite owners build and grow! 📝 Download the Free Bathroom Build Checklist: [📥 Click here to get the printable PDF] Photo by Sanibell BV on Unsplash
Foiled Again! Campfire Cooking in Aluminum Foil Packets
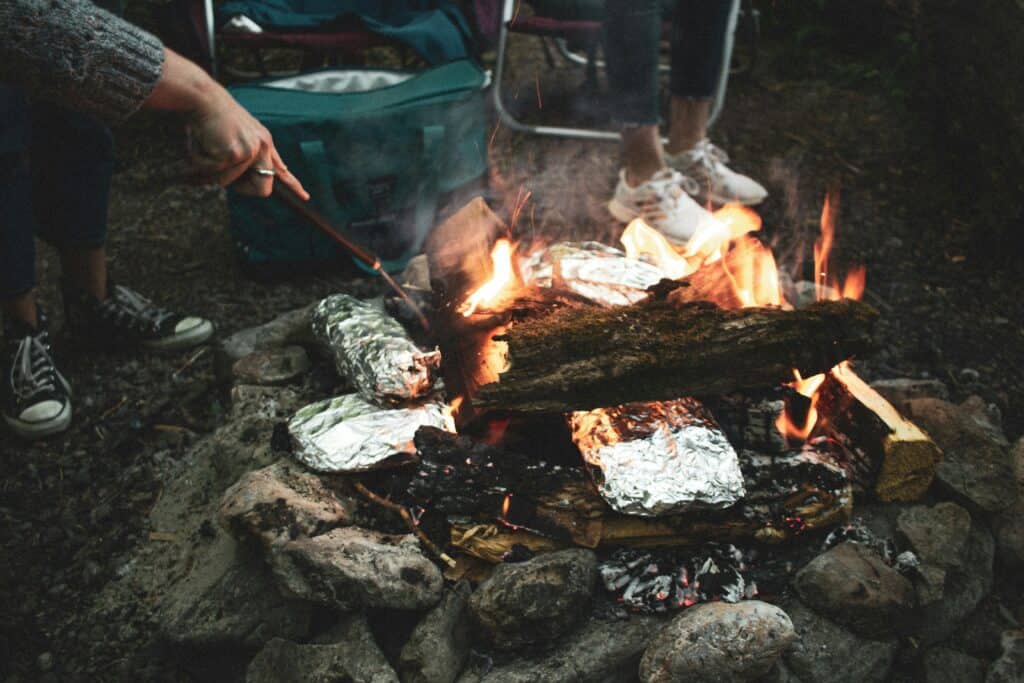
This blog is about adding to your camping menu by cooking in aluminum foil on an open fire. Do you love good food but your idea of camping food prep is stopping on the way to camp for a pizza or a sub? Do you make great plans for amazingly delicious camping meals but always leave the most important ingredient at home in the kitchen cabinet? Do you appreciate a great campfire meal but you’re a far cry from Guy Fiore? If so, this blog’s for you. Here are some cooking in foil basics along with 5 dishes to put in your campfire chef bag of tricks. Using aluminum foil for campfire cooking Aluminum foil isn’t just something to wrap yourself in or something to make a hat out of to kill some time. Cooking in aluminum foil packets is also a great way to prepare meals on a campfire or grill. Cooking this way adds to more even and controlled cooking compared to grilling directly over an open flame. It makes cleaning up A LOT easier. And everyone in the family can make their own packet to suit their tastes. The basics Here’s what’s needed: Heavy duty aluminum foil. Tongs or fire gloves A metal knife to cut open the packet Here’s what’s recommended: Unsalted butter Wine for flavor and moisture (plus you can drink what’s left) Broth Salt, pepper, and whatever seasonings you like Oh, and whatever food you want to cook! Here’s a quick walk- through of the process Prep ingredients Cut vegetables, meats, and whatever else you might like into pieces (bite size works well). Doing this at home and bringing everything along in Tupperware or Ziplocs can make things even easier. Season to taste. It’s best to avoid acidic or salty foods – cooking with aluminum foil is generally safe but acidic or salty foods being cooked at high temperatures can add to the potential for aluminum leaching. That’s a wrap Put your ingredients in the center of a large sheet of aluminum foil (go big or go home!). For regular aluminum foil it doesn’t matter if the shiny side is on the inside or the outside. For non-stick, the duller side goes toward the food (which makes the food more attractive from the outside anyway). Fold the edges of the foil upward and add broth, wine, or butter if you’d like. Fold the edges the rest of the way – cover the food and seal the packet tightly. Double-wrap the packet with another sheet of foil for a little more protection and leak avoiding. Campfire time! Your fire should be going long enough to have a bed of hot coals. Place the packets on the coals with the tongs or fire gloves you remembered to bring. You can also put the packets above the coals on a grill grate if you have one (for grate results :/). Flip every 10-20 minutes to ensure even cooking. Cooking times depend on the size of the ingredients and the heat of the coals. If it takes a while at least you’re sitting by a campfire with friends! Open the packet and check for doneness. It can always be resealed and cooked more if needed. Pretty easy, right? And delicious! Now here are five aluminum foil dishes to get you started: Corn on the cob What do you need to bring? Corn on the cob Optional: butter, olive oil, salt, pepper, and whatever other spices you dig. Remove all the husks, silks, and leaves. Rinse under cool water and pat dry. Place an ear of corn on a double layer of foil. Drizzle melted butter or oil over the corn (in case you didn’t bring a butter warmer with you camping, just rub the end of a stick of butter on it!). Season the corn with salt and pepper or your favorite spices, like chili powder, garlic powder, or paprika. Wrap each ear of corn in the foil, securing the sides and ends tightly to create a sealed package. Place the corn packets on the grill over medium heat. Turn often while cooking for even grilling. Cook until the corn is tender and slightly charred, about 15-20 minutes. Remove the corn with the tongs that you remembered to bring and put it on a plate that won’t melt. Let the packets rest for about 5 minutes (they’ve had a long day!) Carefully vent the foil to let any steam escape and then unwrap it. Serve with more butter, oil, seasonings, or anything else that sounds good to you. Grilled Nachos! What do you need to bring? Nacho Chips Shredded cheese (Cheddar, Monterey Jack, or a Mexican cheese blend are all great options) Optional, but amazing: Precooked chicken cubes or browned hamburger or pulled pork Jalapenos, green onions And then as toppings to add after it’s warmed up: sour cream, guacamole, salsa Directions Lay down an 18-inch piece of foil Make a pile of chips in the center of the foil, leaving 2 inches chipless around the edges. Add cheese and any other ingredients you want heated up. Put another piece of foil over it and crimp the edges all the way around. Put the packet over medium heat. It doesn’t need to be flipped and should take about 8 to 10 minutes. Check for doneness. Reseal and put back on heat if it isn’t there yet. When it is, add the other toppings and enjoy! Smoked sausage and potatoes! What do you need to bring? 1 pound of kielbasa sausage 6 small red potatoes 2 ears yellow corn shucked 2 tablespoons unsalted butter ½ teaspoon salt ¼ teaspoon black pepper ½ cup colby-jack cheese shredded Directions Make two foil packets for the food on this ingredients list. Cut the sausage and the potatoes into 1-inch pieces Cut each ear of corn into 3 pieces Divide evenly between the two foil squares Top with the butter, salt and pepper Close up the packet Cook on one side
DIY Metal Roofing
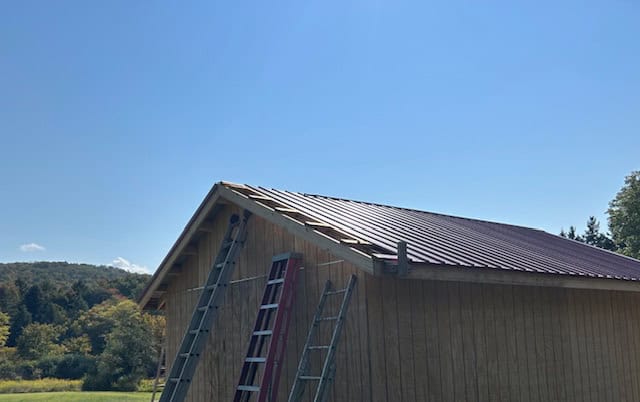
This blog is about installing metal roofing. More complicated metal roofing jobs – of a residence, with a lot of peaks and valleys, at a great height- are jobs for qualified professionals. But putting a simple metal roof on a one- story building is very doable for the handy and the relatively sure- footed. Here’s a walk- through project, sharing some basics and tricks that a non-pro can use to get more professional looking results. First, a disclaimer Installing metal roofing can be risky. Anything on a ladder and more than a foot above ground can mean danger and isn’t for everyone. Add in handling sheets of 3-foot-wide metal and the danger factor can grow even more. DIYers proceed at your own risk. But with all that said, installing a metal roof on small and medium-sized buildings is a project that we know we can tackle and that we’re getting pretty good at. A metal roofing example: The water shed The water shed is what we affectionately call a 16 by 24-foot building that houses our cabin cluster bathrooms and showers. It will eventually be expanded to include an outside kitchen and additional facilities but for now it’s big enough for the basics. This is a walkthrough of how we roofed it. (Note: We decided to keep the overhang and the interior of the building wide open. A few well-placed vents and closing the water shed down in winter months make condensation and vapor barriers a non-issue for this roofing project.) Installing rafters There is a ton to know about calculating, cutting, and installing rafters. Here are some quick basics we needed to know for the water shed project: Fascia board When the rafters were in place we fastened a 2 by 6 along their ends as a fascia board. It was important to remember the downward slope of the roof so the metal didn’t ride up on the fascia. We temporarily screwed 2 by 4 scraps to the tops of a few rafter ends to install the fascia at the perfect height. We also made sure that the fascia boards extended past the rake sides of the building by sixteen inches. This gave more than enough material to work with when it came time to add the overhang to the rake sides. Purlins! This was our favorite part! This was when a very cool checkerboard pattern was created and when everything became sturdier. We used 2 by 4s for our purlins. They ran horizontal with the peak, two feet o.c. except for at the peak and at the eaves. Proper spacing of purlins and of rafters is extremely important for roof integrity – to prevent sagging and structural issues. Starting at the bottom, we attached the first purlin to the top of the fascia board. We let it hang over by ¾ of an inch (to extend the roof beyond the fascia board just a little more). Like the fascia, purlins needed to extend beyond the rake walls by 16 inches. The longer the purlins the better things tied together so we used 16 footers and 12 footers where we could. We also didn’t use any short lengths at the ends of rows. The next purlin went directly above the outside wall right above the rafter spacers. Building the purlin ladder Cutting a few 2 by 4 spacers 20 ½ inches long (to have purlins that were 24 inches o.c), we installed row after row until we were less than 2 feet from the peak. This was an important time to think about eventually installing the metal ridge cap. Our cap was 10 inches wide, so the top purlins center need to be 5 inches from the peak in order to have something to screw the edges into. Building the rake overhang To create a 10-inch overhang we cut 8 1/2” lengths of 2 by 6 and added them to the bottom of the overhanging purlins (making a T shape). We used screws to make assembling easier and tighter. Then we chalk lined the top of the purlins 10 inches from wall and cut them off. After that we added 2 by 6s as fascia. (8 ½” plus the 1 ½ “ wide fascia gave us our 10”). Installation tip: Fascia took a few trial runs. We cut the angle for the lower ends, butted them against the eaves fascia, then held the rake fascia in place with a couple of screws. We marked the top length at the exact center of the peak and used a torpedo level to mark the perfect angle. A pro might not have needed to do this, but there were a lot of variations and we wanted things to line up exactly. We held up and marked the fascia on the other side and ended up with a perfect fit. We cut off the long eaves fascia and went on to the next step. Time to buy the metal roofing We’re always glad we’ve put off ordering our metal until this point. We can get a final measurement of the framework and know exact lengths. Sheets come in standard widths (we use the 36 inch wide) and are cut to custom length. We measured from a couple inches down from the peak to the outside edge of the purlin above the fascia. Then we added 1 1/2 inches for overhang. Our shopping list: (Shout out to Armor Building Supply in Canandaigua NY and Hornell NY. They’ve always been great to work with!) Metal roof panel install – step by step Step 1 – picked a side and put on the first drip edge – a few roofing nails to hold it in place. Step 2 – lined up the first sheet – Took our time to get it right with a 1 ½ overhang on the eaves and the edge lined up with the rake. Remembered long edges of sheets aren’t the same – one side
One of Those Beaver Dam Days– When Beavers Love Your Property and You Want Them to Love it a Little Less
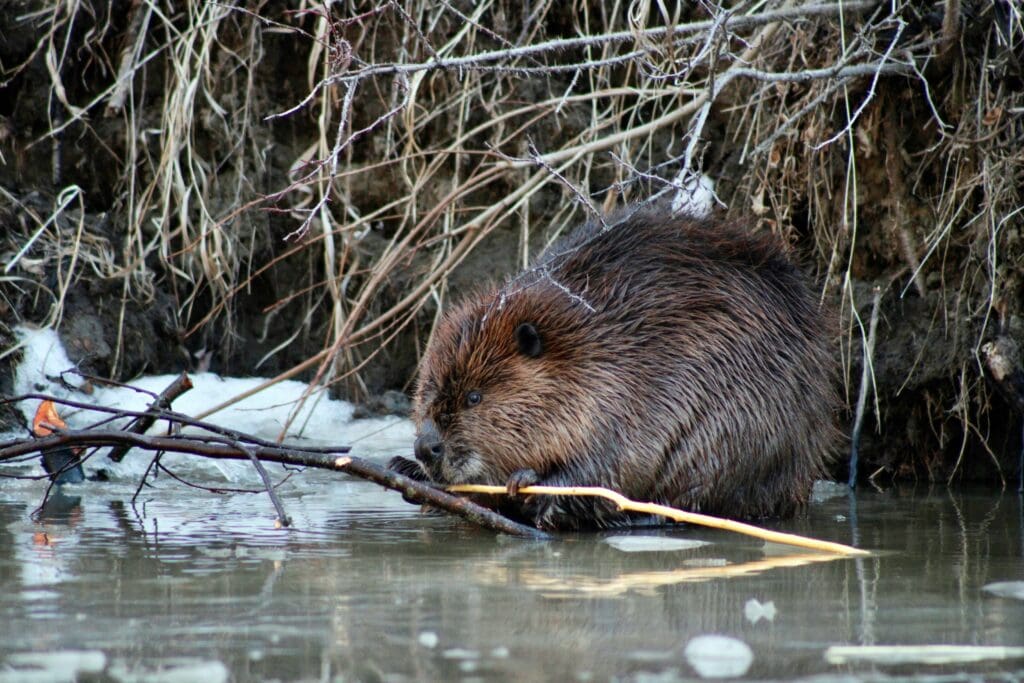
This blog is about the pros and cons of owning property that beavers find attractive. A beaver dam has been built on our creek almost every fall recently. Beavers are fascinating creatures and beaver dams can have their benefits, but they can also be very destructive. Here are some things we’ve learned about beavers and about how to make them feel a little less welcome. What attracts beavers to the property? Beavers build dams across streams so that they can make a pond. The pond and a beaver lodge become home and give protection from natural predators. When picking a dam site for their new neighborhood, beavers love certain features of our property: -Plenty of trees and woody vegetation for building materials and for food. – Manageable water flow that they can easily dam up -A cove perfect for building a lodge – Limited human disturbance and noise for uninterrupted work -unprotected creek banks next to wooded areas Beavers are hard working How quickly beavers can build a beaver dam is impressive. Last season, they built a forty-foot-long dam about a foot high across the creek in less than three days. They gnaw down trees for building material for dams and lodges and also for a food source. They eat the bark and the layer right below it (called the inner cambium layer). They prefer certain species of trees – like aspen (because of how it is), poplar, cottonwood, willow and birch. We have plenty of these to choose from on our property, many trees in sapling form and easy for beavers to manage. Our beavers start working at dusk and can be heard cutting and building throughout the night if left alone. They build more and cut and store more trees in the fall to be ready for winter. . Beavers are family oriented Other than the problems they can cause, beavers have a lot of positive qualities. They mate for life and have a strong family bond, centered around the mother, father, and the kids (called kits). Both parents help raise the kits and older siblings may also help with daycare. The kits leave home after their second or third spring. They travel long distances by land and by water to find a mate and to start a new colony. Beavers live about 10 to 12 years (if all goes well). They can live as long as 19 years in captivity. But before you invite Bucky home, you’ll want to keep in mind that owning a beaver is against the law in most states. First the good news Beaver dams can offer a lot of benefits to the ecology of an area. Dams can act like filters, slowing down water flow and letting sediment and pollutants settle out of the water. Dams can help with flood control. They can serve as natural buffers and store extra water after heavy rains. Water can then be released more gradually and sent downstream. Dams also store water in the ponds they make and in groundwater. This can be very helpful during drier seasons. Beaver dams can make or expand wetlands, which creates an important habitat for various plants, animals, creepy crawlies and insects. They also create deadwood habitats by taking down trees. This makes more homes and food for an even bigger variety of plants and wildlife. Wetlands can also preserve and protect an area if there are wildfires. They can act as a fire buffer and also might protect some species of plants from being wiped out. Now the bad news: How a beaver dam can change the lay of the land Beavers can quickly disrupt the ecosystem by changing waterflow of a creek and by stripping away trees and other vegetation. They can quickly raise the water level upstream and can flood large areas. On our property, it took about a week for an acre of forest floor to be underwater. Dammed water can also become stagnant, which can lead to algae and the spread of disease. Beavers take down a ton of trees to give them something to build with and for food. They also peel bark and the layer underneath (cambium layer) for food, possibly damaging much larger and more valuable trees. If given time they can do A LOT of damage to a wooded area. A dammed stream or creek can also put a stop to fish migration. The creek that runs through our property is regularly stocked by the state with trout so this is a real concern for us. How much wood would a beaver chuck…. How much wood would a woodchuck chuck If a woodchuck could chuck wood? A woodchuck would chuck as much as a woodchuck could chuck if a woodchuck could chuck wood. I didn’t understand this riddle when I was a kid. I took shuck to mean peal away layers. And I never understood why they were asking about woodchucks and not asking about beavers. Because I knew the answer to that one. They’d chuck a lot!! How much damage could a beaver really do? Beavers have extremely strong teeth and jaw muscles and are tree chewing machines. They can take down a 5 inch tree in a matter of minutes and can take down a medium size tree in a single night. A pair of beavers can gnaw down 400 trees in a year! They prefer smaller trees (two to six inches) but can take down a tree with a thirty-three- inch diameter if they want to. That’s a lot of wood chucked! How big can a beaver dam get anyway? Beaver dams are usually on the smaller side but can range from 9 or 10 feet long all the way up to 330 feet long. They can also get up to six feet high. Beavers also build canals that can be as long as 1600 feet. They use them to transport food and building materials to deeper water. The world’s longest
Creek Camping – Making an Eco-Friendly Camping Space by the Water

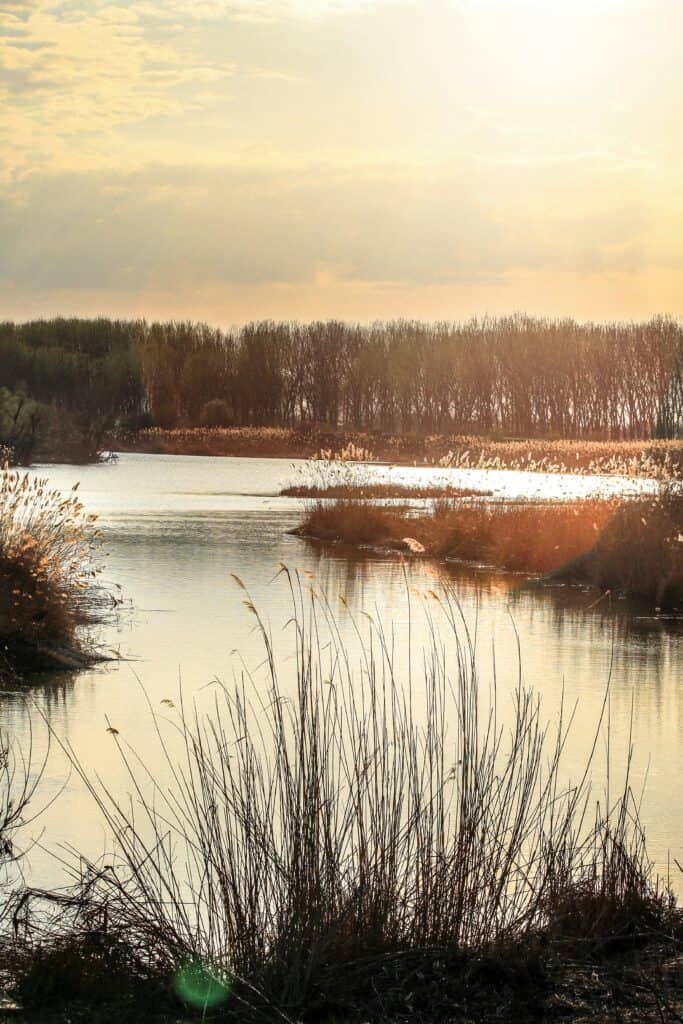
This blog is about creek camping and how we created access to our creek without having a negative impact on the environment. Creek camping and spending time at the water in the wilderness is a special experience. It takes some planning and some insight to keep vegetation and wildlife impact to a minimum. This blog shares the steps we took to turn our gorgeous but almost inaccessible creek into a favorite destination for our visitors. The Adventure of going to the creek We’re very lucky to have Black Creek running through the middle of our property. For as long as I can remember it’s been a favorite place to be. Long afternoons splashing in the water. Moving rocks on the creek bed to deepen a swimming hole. Piling them in a line in the shallows to make a dam. Time with friends and family. It’s a place to make memories that last a lifetime. Creek camping The sound of the water, trillions of stars, the scent of the hemlock forest, all in a private and safe space, make the creek a perfect place to camp. It’s beyond peaceful. And although they’re scarce when people are around, wildlife regularly come to the creek for water. Protecting their habitat and preserving the fragile beauty of the property is a top priority. Making a usable and eco- friendly camping space is extremely important and it takes some work. Access is a challenge Banded by wetlands, cutgrass, and thorn brush, getting to the creek once felt next to impossible. The mud loved to grab onto sneakers and rain boots and a few pair are still buried in the soggy ground. After making it to the creek bank, there was another few feet of mud – more stinky quicksand to devour shoes. Walks next to the creek were cut off in all directions by more mucky areas caused by runoff. As a result, visits to the creek became few and far between and large portions of the most beautiful part of the property went unused. Tuning into the property When we dove into developing our private park and campsite a few years ago, creating easier access to the water was key. We wanted to be eco-friendly as we put in trails, made the western bank walkable, and established camping spots. The first step was to stop thinking about where we wanted things and to start thinking about where the land and the creek wanted things. In knee- height rubber boots and long sleeves, we explored the property leading to the water and along its banks. Luckily, some of the highest and driest areas were right at the water, created by hundreds of years of Spring sediment dumps. The creek runs deep and fast when Winter snow makes way for Spring. This ridge was cut off at a few points, where run off from the wetlands poured into the creek. Focusing more on the soil instead of how hard it was to get through berry bushes and thorn brush, we were able to determine where the higher ground lay and the best paths for the trails to take. Appreciating the changes with each season It was very important to be familiar with how things change from season to season and from year to year. In dry months, portions of the creek are only a few inches deep. In the Spring, the same areas are four feet deep, with a current strong enough to carry logs and tons of sediment downstream. Run off paths also shift from being a low place in the grass to becoming creeks themselves during the rainy season. This was important to think about when putting in walkways and bridges. It also meant that certain areas would only be accessible in the dry season. A trail system that gives access with very limited impact The bulk of our paths are mowed trails, about the same width as a riding mower’s cutting deck for ease of maintenance. They follow the higher ground, just outside of the thick of the wetland. The longer they are maintained, the more the trails dry out and act like any other lawn. This reminds us of how important it is to leave the majority of the wilderness alone. We also trimmed back briars and brush where needed. An arms-length away from untouched nature The trails give access to flora and wildlife that many people have never seen before. Grasses, plants and flowers are inches away, and a well-kept trail system keeps visitors on the beaten path. This greatly limits any negative impact on the soil and on the environment. Bridging run off routes It’s extremely important to maintain a route for stormwater runoff. Rainwater and melting snow flow over the ground, pick up pollutants and other debris, and then flow into the creek. Ephemeral streams only run after it rains or when snows melt and are an important part of the creek ecology. After the Spring, some of these streams turn into several feet of unpassable muck along the creek. We were able to bridge these areas with raised walkways. To minimize impact and realizing that Mother Nature’s designs are subject to change, everything is movable. 6 by 6 s were laid on the ground (with a little digging and adding stone for leveling and drainage). Walkways were built on top of them with 2 by 10 supporting joists. This has made a user-friendly creek path possible with no negative effects. A way through muddy banks This solution happened by accident. In some places it’s easy to step off the bank and onto the stones in the creek bed. But, in many others, moving from the creek bank into the water means climbing through a few feet of mud. What started out as a swim float (picture below) now doubles as an easy step from the bank to a floating deck at the creek edge. For longer visits, it can
Know Your Wetlands! How to Know Where Your Wetlands Begin and End and What it Means for Recreational Property Development
This blog is about wetlands and working with the Department of Environmental Conservation (DEC) to learn where your wetland boundaries are. By taking this step, we were able to protect our wetlands. We were also able to follow regulations, avoid fines, and avoid the DEC permitting process. With structures to build, roads to put in, and utilities to run, it was extremely important to know exactly where our wetlands began and ended. Once we did, we were able to avoid the wetlands as well as their 100- foot buffer zone. This helped us protect the wetlands on our property as we developed our camping facilities. Having a DEC biologist delineate our wetlands is a step we are very glad we took. Planning Around Wetlands There’s a lot to consider when planning a cabin cluster and campsite. Finding a way to bring guests into a beautiful natural setting while providing creature comforts and modern conveniences can be tricky. This gets a bit trickier when there are wetlands nearby. A stocked stream runs through the center of our property and wetlands surround it. Portions of the wetland are unwalkable but the vegetation and wildlife that it supports make it amazing. We wanted to protect the area and also be in compliance with regulations put in place to protect it. Learning About Wetland Regulations We had big plans. We wanted to bring in utilities, put in roads, and put up buildings to make our park a comfortable place to stay – all while maintaining and protecting the natural beauty of the wetlands and the rest of the property. But we had a lot to learn about our wetlands and the regulations that protect them before we could move forward. Finding Information There are a ton of useful resources and information about wetlands available online. After researching, we realized that it made sense to have a Department of Environmental Conservation (DEC) biologist walk the property and map out the exact location of the wetlands. What are wetlands? By definition, wetlands are transition areas between uplands and aquatic habitats. Standing water is one clue that a wetland might be present. Wetlands can also be identified by vegetation. Certain types of plants outcompete other types when they’re growing in wet soil. Around every wetland, the 100 feet adjacent to it are also protected. This provides a buffer for wetland conservation. Why are wetlands important? Wetlands provide a lot of benefits for the environment. They’re important for flood protection, water quality improvement, as fish and wildlife habitat, and as an environment for wetland vegetation. Regulation and protection of wetlands According to the information packet that the DEC sent us – “To protect the wetlands and their benefits, activities that could have a negative impact are regulated. Regulated activities include draining, dredging, filling, building structures and polluting. In the wetland and in a buffer zone (100 feet from the wetland boundary) these activities require a permit. The presence of freshwater wetlands and/or its associated 100-foot adjacent area on a property may affect where and to what extent, development can occur on a property, if at all. If wetlands are present, you may need to obtain a state and/or federal wetland permit and/or local authorization before commencing your project.” Not all wetlands are equal Different wetlands provide different functions and benefits in varying degrees. DEC ranks wetlands into four classes. Class I represents the greatest benefits and is most restrictive, to class IV which is least restrictive. Exempt activities Certain activities are exempt from regulation and don’t require a permit. Exempt activities include: Regulated activities Regulated activities can have minor or major potential impact on wetlands. This influences the likelihood of being granted a permit. Regulated activities with minor impact Regulated Activities with major impacts Wetland Boundary Surveys: A DEC survey of a wetland boundary line is usually required for permits. There is no cost for the DEC Biologist to delineate the wetlands and review the map. Information about state-regulated wetlands is available from many sources. But final and official wetland delineations, verifications, and permit requirement decisions are made by the DEC. This is true in New York State – other states may vary. Walking the Property with a DEC Biologist After submitting a written request for a wetland delineation, we were contacted by Chuck, a DEC Biologist. We scheduled a day to meet at the property. I carried Chuck’s shovel and spool of plastic ribbon and followed along. Chuck knew what vegetation to look for. He also dug into the muck to examine the soil. Delineating the Wetland When he was satisfied that he found the edge of the wetland, Chuck would mark the point with a plastic ribbon (tying it to a stake or to a shrub). Then he would enter the point into a handheld GPS. After marking 21 points along the west side of the creek, Chuck was able to officially delineate the wetland for that portion of our property. Making Delineation Points More Permanent and More Visible Once Chuck sent the official map (in the photo above) we marked the ribboned points with metal posts. We wrapped the posts in blue, white, and green duct tape to indicate that these were points determined by the DEC. After that, we were able to measure 100 feet from the delineation line to see if we were beyond the wetland buffer zone. Anything built or developed beyond 100 feet wouldn’t require a DEC permit. Being able to show this boundary came in very handy when applying for local building permits. After the first couple projects, the building inspector learned our wetland boundary markers well. This greatly sped up the process. Easier and Cheaper to Move a Building than to Get a Permit in a Wetland Buffer Zone We had one do-over as a result of the DEC delineation. When Chuck marked the wetlands, we had already built a small camping cabin – more than 200 feet from the creek so we thought we were safe.
Beginner’s Guide to Amish Rough-Cut Lumber
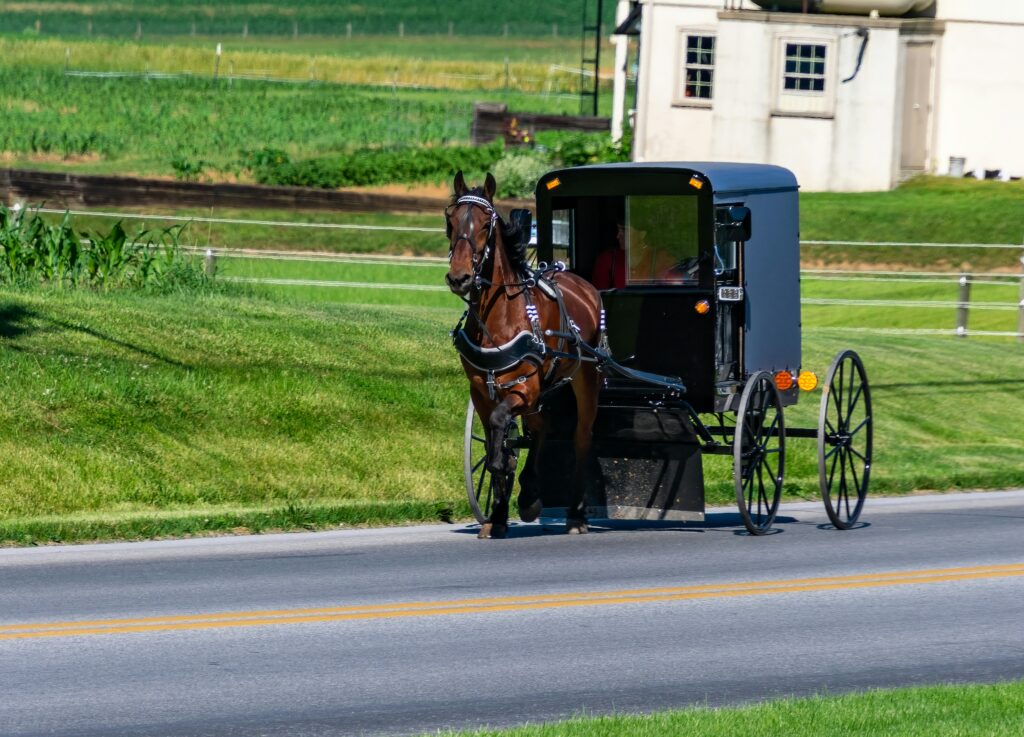
Amish Rough-Cut Lumber This post is all about Amish rough-cut lumber – what makes it different from big box lumber, how to find it, what to know when ordering, and some things to know when doing business with the Amish. Because of its rustic appearance and much more reasonable price tag, rough cut lumber has been the perfect choice for quite a few projects around the camping cabin cluster. Amish sawmills are definitely not the only option when purchasing rough- cut – there are other amazing lumber mills out there – but for this post we’ll be focusing on our experiences with the Amish. Information in this post can help you decide if Amish rough- cut lumber is the right choice for your project and how to get it if it is. What is rough cut lumber and how is it different from lumber from a big box store? Picture going into the woods, cutting down a live tree, and running it through a gas powered saw mill. One pass. No drying. No planing. It’s rough surface, with some pulliing and blade marks, can make it a rustic, very cool looking material choice. The boards you get from the big box stores are kiln dried, rated for strength and quality, planed, smooth finish and about three times the price. This can be a good choice when considering the ready-to-use ease, convenience, and finer finish. Personally, I love the way a rough-cut board and batten building looks, like it could have been built 200 years ago, but it isn’t my go-to for every project. Theres more to know when deciding if Amish rough-cut lumber is the best choice for what you’re working on. Amish rough-cut lumber price Price is a BIG plus when using rough-cut. This can vary from region to region and mill to mill, but rule of thumb for us has been Amish rough-cut being about one third of the price compared to what we would have spent in a big box lumber yard. Appearance Rough cut looks how it sounds. Pretty rough. Cut with a coarser saw and not planed, the surface is rough to the touch. The grain of the wood shows through well, but definitely not ideal for a fine finish look. It’s dimensions can also be a perk, especially for 2 by (two inches thick – more on that below). This can give a project a non-standard and unique feel (the bunks pictured below were made from rough-cut and took A LOT of sanding). For some projects I’ve combined pressure treated, KD lumber, and rough cut. This is to get a rustic effect, keep the price down somewhat, and to build a structure that will last a very long time. An example of this is the firewood shelter built in close proximity to the firepit (in the photo above). It’s not stained yet but gives us a perfect place to always have dry firewood ready! Dimensions Rough cut measurements are true. Meaning a 1 inch board is actually one inch thick, a 2 inch board is actually 2 inches thick, etc. A 1- inch board bought at a big box is actually ¾ inch thick. A 2- inch board is 1 and a half inches thick. The same goes for width. An 8 inch rough cut board is really 8 inches wide. An 8 inch board at a big box is 7 and a half inches wide. This is basic information for folks with wood buying experience but maybe not common knowledge across the board (see what I did there? 😊 ) 8 feet long means 8 feet long in both worlds, although you will see more variance with rough cut. Big box boards run just a little long (by an inch or so) giving a little leeway to square off ends if needed. Something else to keep in mind is that the dimensions of rough cut are close but not exact. You will want to measure to see if thickness and width are uniform. This can vary from one end of the board to the other by a considerable amount so it’s a good idea to double check. Moisture Content (and challenges it could cause) This is a big one. Rough cut lumber is cut from logs that have recently been living and growing. When boards and dimensional lumber are cut, the moisture content is usually extremely high. What does this mean? Rough cut lumber is A LOT heavier than kiln dried lumber. It also tends to warp and to crack more as it dries. If stacking before using, it’s a great idea to put spacing sticks between boards. This encourages air flow – which allows for drying and also cuts down on mold growth. Off the ground, stacked with spacers, and protected from rain and scorching sun is your best bet. We learned this one the hard way, when green and black mold began to grow in less than a week between boards we had stacked without spacing. The Amish are known to build with wet wood, with the trick being to assemble and secure with nails and joinery before wood has a chance to warp. Our two camping cabins were framed this way – a few boards cracked over time but nothing that couldn’t be fixed with a few extra nails and a tube of caulk. Not Graded A lot of rough cut lumber is up to the challenge of being build- worthy, but not all. Some lumber will be frail and will crack, depending on the tree and the portion of the log it was cut from. Buyer beware on this. Big box isn’t infallible but is graded, which indicates it’s suitable for building. Not Insect Resistant It’s amazing what a carpenter ant or a carpenter bee can do to a piece of rough cut. Especially prior to being stained or painted, rough cut can be a delicious snack for insects. Not thinking things