If you use a fire pit regularly, you’ve probably learned this the hard way:
A great fire depends on dry wood.
And dry wood depends on how you store it.
Tarps, half-covered piles, and “I’ll deal with it later” stacks work until they don’t. Wet wood, smoky fires, and scrambling for dry pieces quietly take the joy out of what should be the best part of the evening.
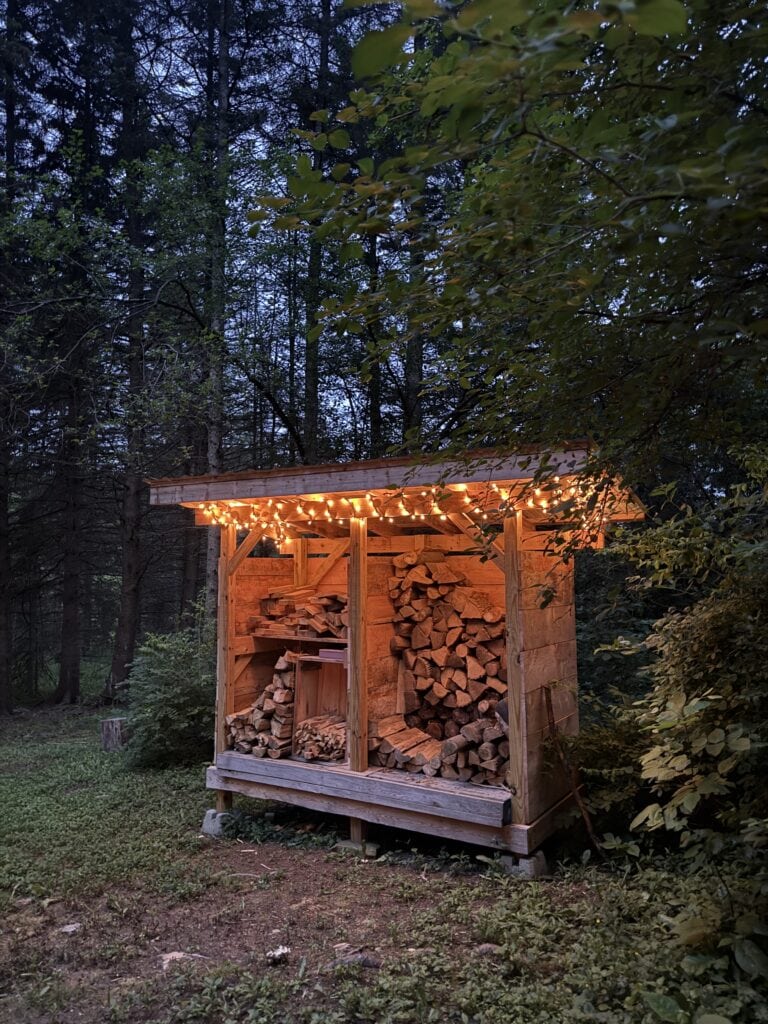
This is how we built a simple but effective woodshed using materials we had left over from other projects plus $150 in new lumber. (Please excuse the extra overhang on the ends – it works great and we’re going to finish it up in the spring).
This method works when you’re on a hill, the ground is damp most of the year, you need something sturdy, and you want to keep cost down.
The Problems a Woodshed Solves
A woodshed is about alot more than storage.
It’s about:
- Keeping wood dry
- Making fires easy
- Reducing friction in your outdoor space
Tarps fail because they trap moisture and need constant attention. A good woodshed solves that by doing three things well:
- Gets wood off the ground
- Allows airflow
- Keeps rain and snow off the top
Once those boxes are checked, everything about using your fire pit improves.
Why Elevation Matters More Than Perfection
Ground moisture is relentless — especially on sloped or wooded land. Even “dry” soil pulls moisture upward over time.
Our site is hilly with inconsistent drainage, which makes it a good example for anyone dealing with:
- Uneven terrain
- Woodland soil
- Seasonal wet spots
Instead of fighting the land, we elevated the entire structure using concrete deck blocks and 4×4 posts.
This approach can have big advantages:
- No digging or pouring concrete and still technically moveable
- Easy to adjust as the ground settles and easy to level
- Better airflow under the wood
- Doesn’t provide critters with hiding places underneath
- Works almost anywhere
You don’t need perfect ground to build something that works.
A Foundation That Lets You Build Now
Deck blocks aren’t fancy, but they’re ideal for small outdoor builds.
They allow you to:
- Build quickly
- Level easily
- Change things later
- Avoid over-committing too early
A flexible foundation gives you the ability to quickly put together something that works.
A Quick How To
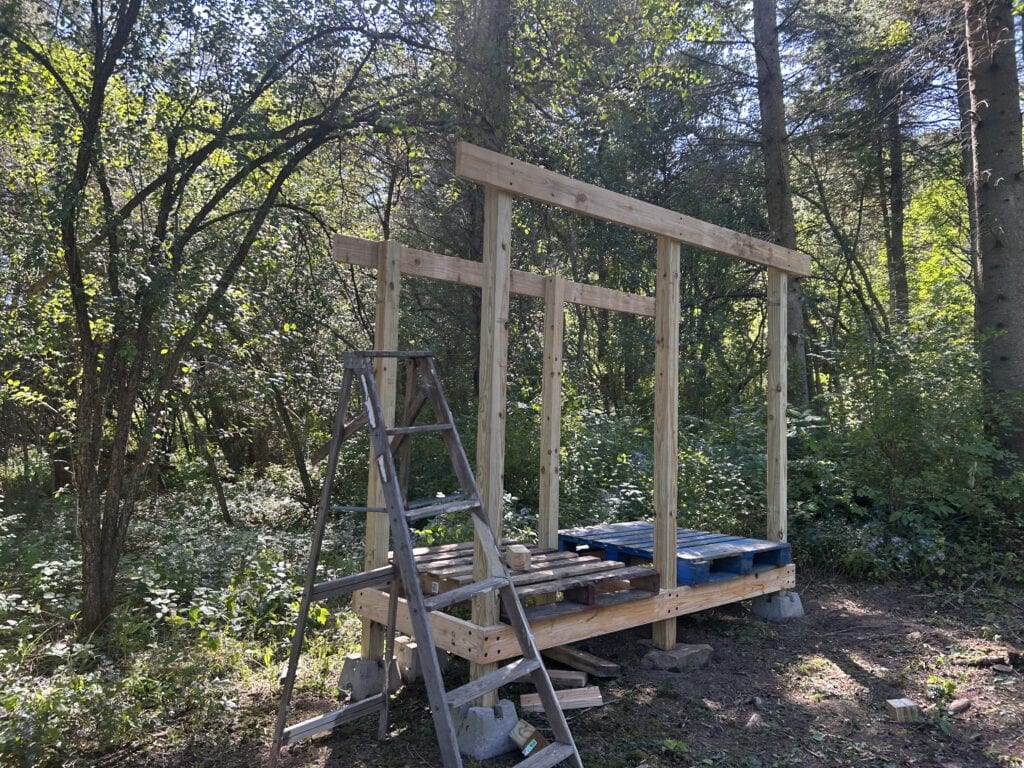
The size of the pallets we used as a floor determined the size of the frame we needed (@4′ by 8′). We made the rectangular frame with 2 x 6 PT.
Setting the frame on the ground, it was simple to determine the location of the concrete foundation blocks. we leveled just where the blocks would sit, removing sod, stones, etc.
Propped up the frame above the blocks about a foot or so (relatively level) then set 4 by 4s into the blocks and rested them against the inside of the frame. Leveled the frame. Small screwed, then construction screwed the frame to the 4 x 4s. Cross pieces were added for the roof support (see above) – front higher than the back to create the desired roof slant.
Added diagonal braces and voila! The structure was solid.
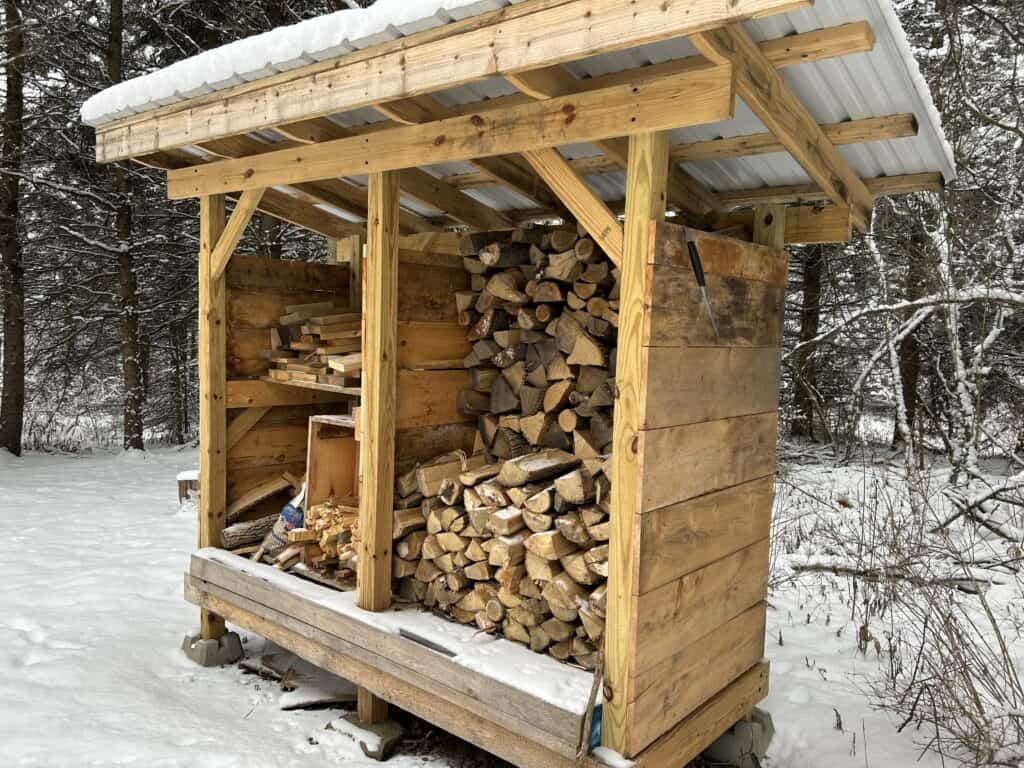
Added rough cut (pallet wood works for this too) and we had a well-ventilated and solid woodshed minus the roof.
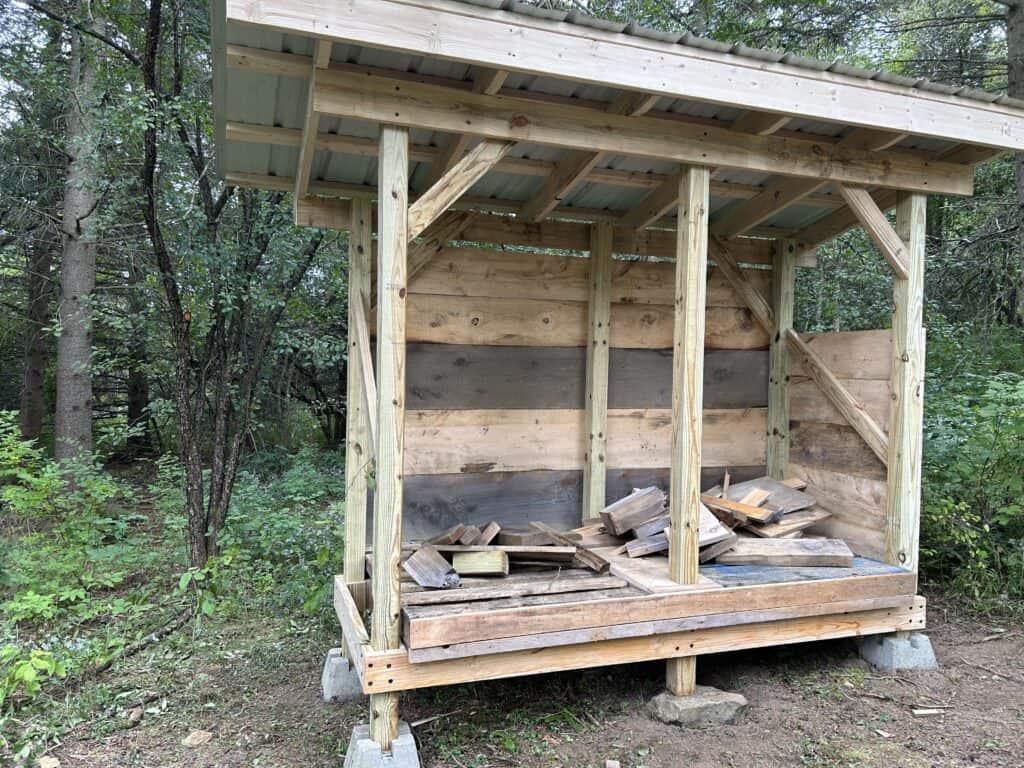
The Roof
We already had the metal. If we hadn’t the sheets would have cost us about 60 bucks. A building supply store in your area that makes metal roofing will cut it to whatever length you need (in 36 inch widths that overlap and in a few colors to choose from).
We cheated and made a template for the rafters by screwing a 2 by 6 to one end of the front and back supports. We marked the end cuts with a level and also marked the birds mouths (V cuts) so the 2 x 6 rafters would sit flush on the supports.
Cut the rafter. Double check fit. Made the rest from the template. Next we added 2 by 4 purlins (horizontal pieces you screw the metal to) and we were ready for the metal.
We put one piece of metal in place temporarily and marked where the screws should go at the center of each purlin. We took the piece down and marked all holes with a pencil then stacked the remaining metal under it (being careful to line the sheets up exactly). We drilled through all of the sheets at the pencil marks, giving us straight screw lines and a much easier install.
Then we Screwed in place with roofing screws, letting the rubber washers squeeze a little but not too much.
Once the roof went on, the shed started doing its job even unfinished.
Not Quite Finished Yet But Getting the Job Done
This woodshed still needs:
- Landscaping to hide or blend the blocks
- Stain
- Roof trim
But none of that affects performance.
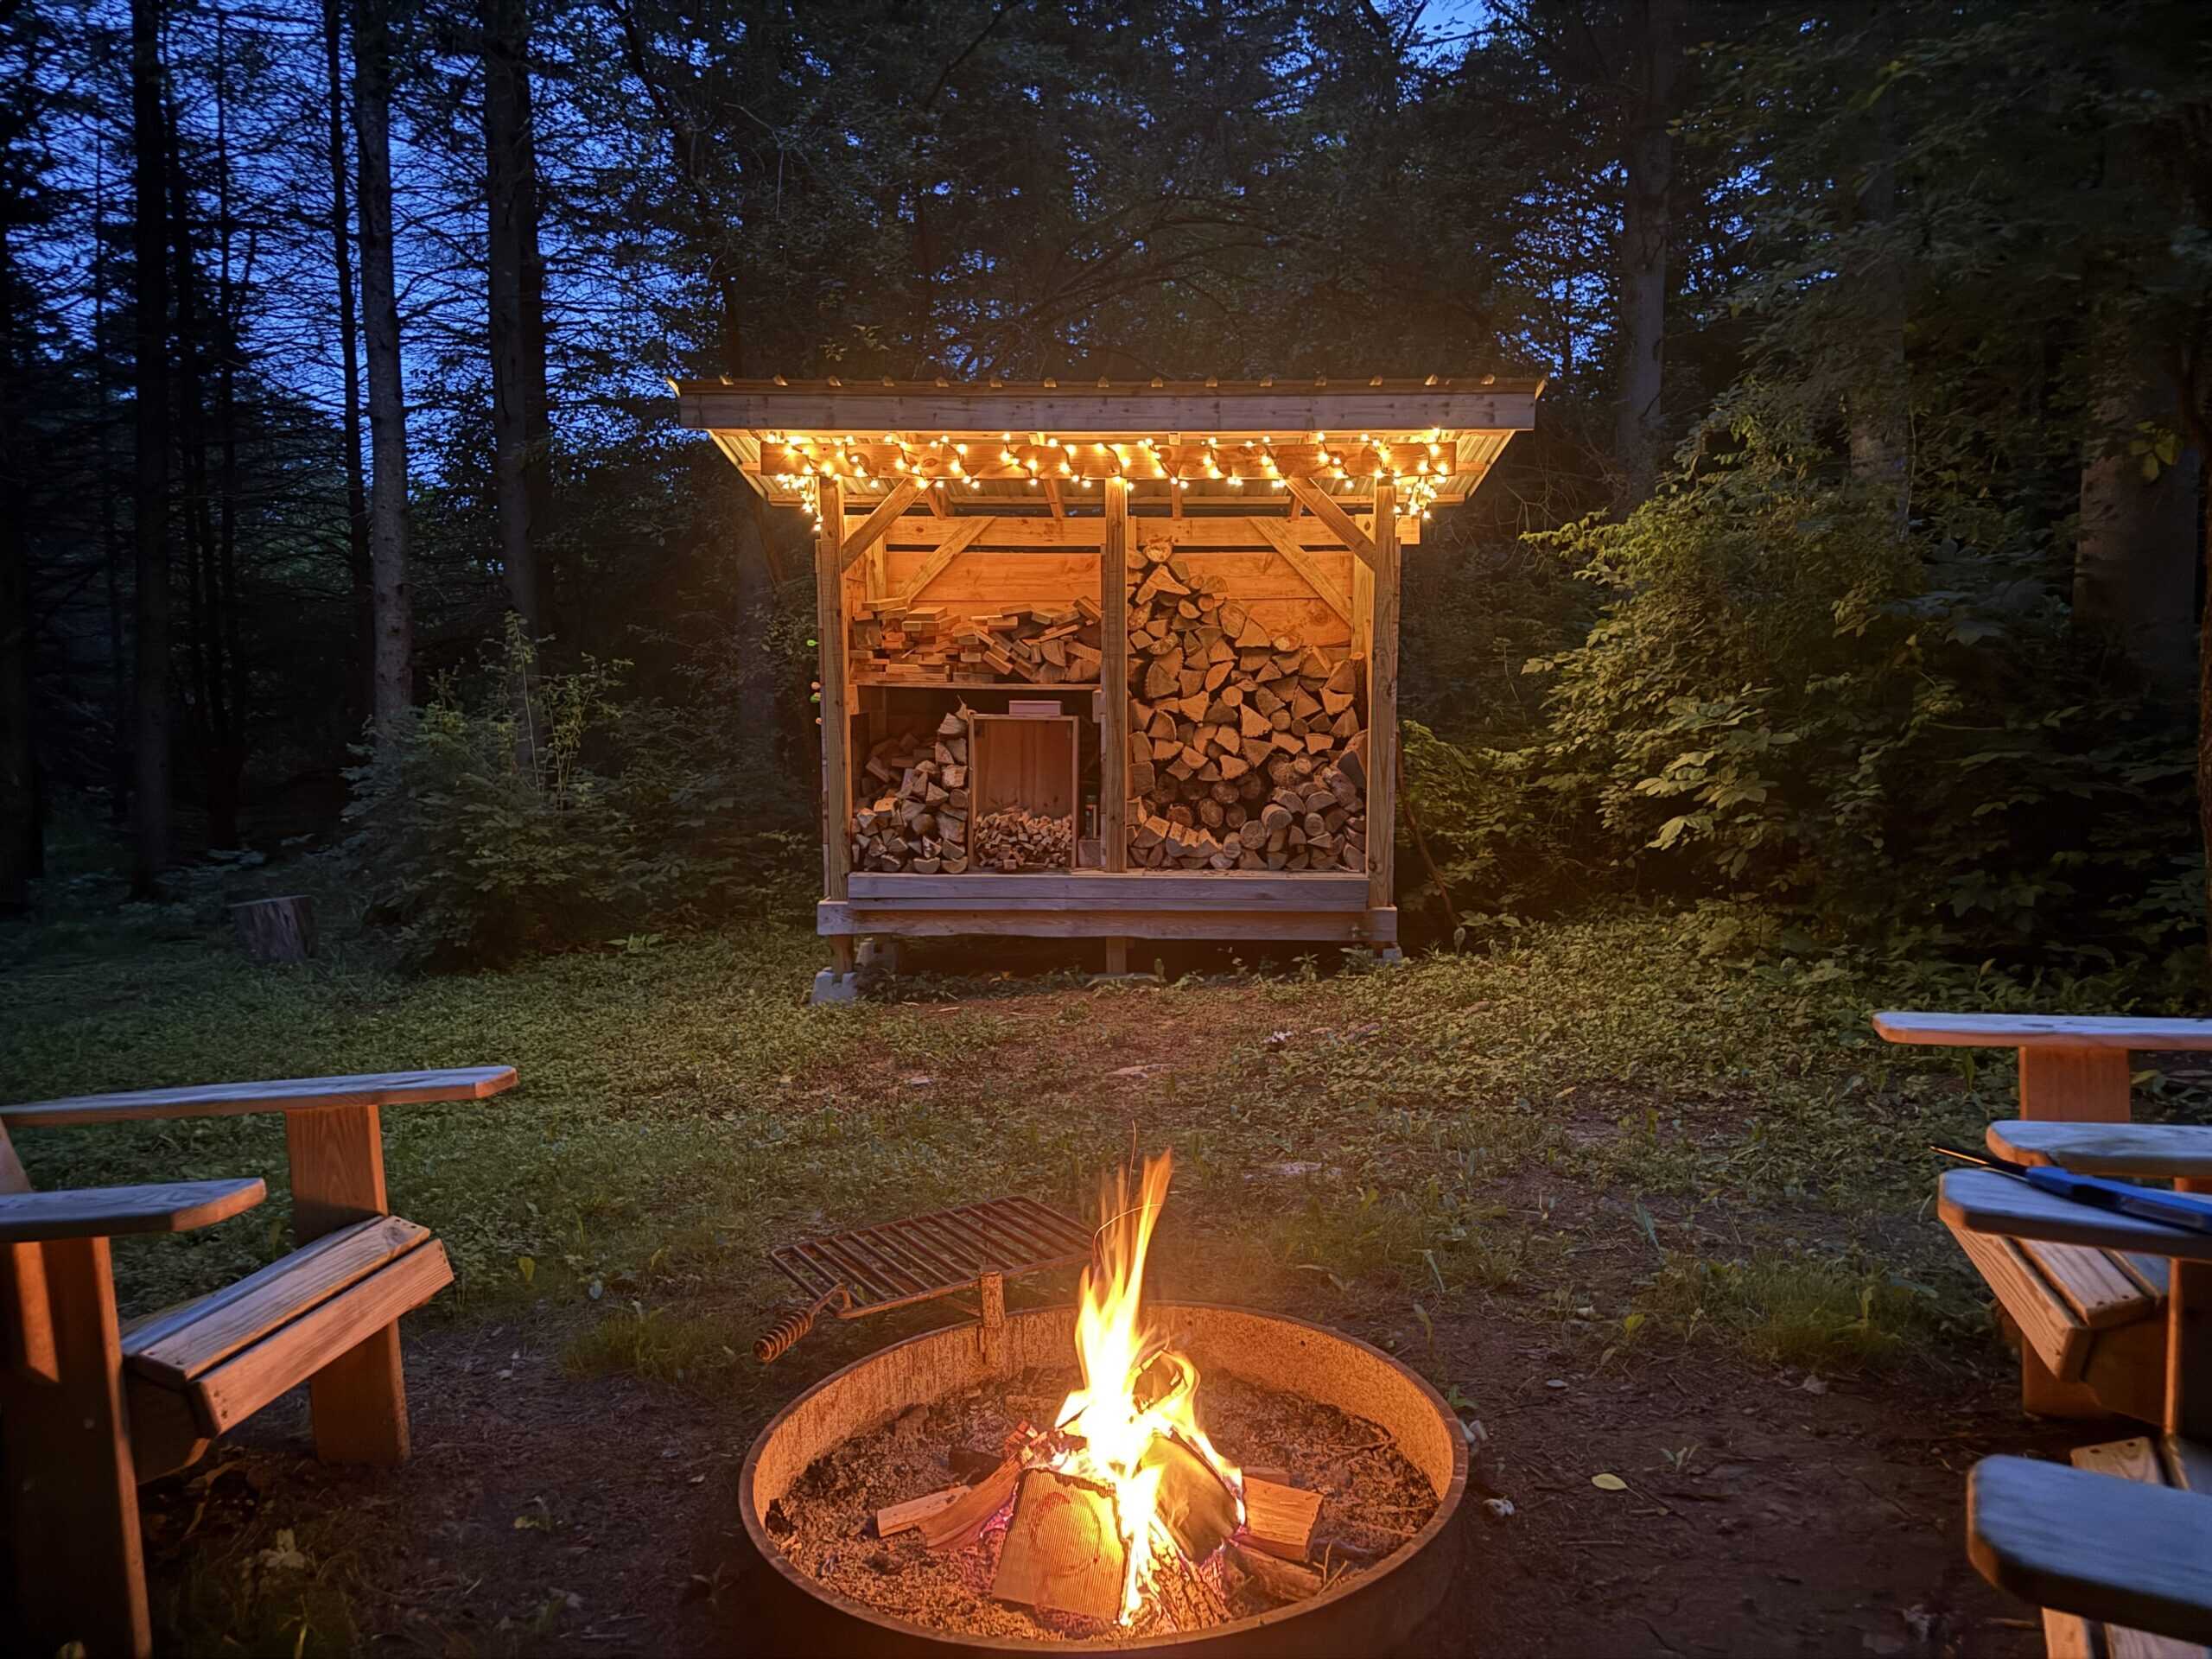
It’s the perfect place for a kindling box, a tin filled with firestarters and a lighter, split and whole pieces of dry firewood.
How This Changes the Fire Pit Experience
Once wood storage is solved:
- Fires start faster
- Fires burn cleaner
- Evenings feel more relaxed
- Guests enjoy the experience longer
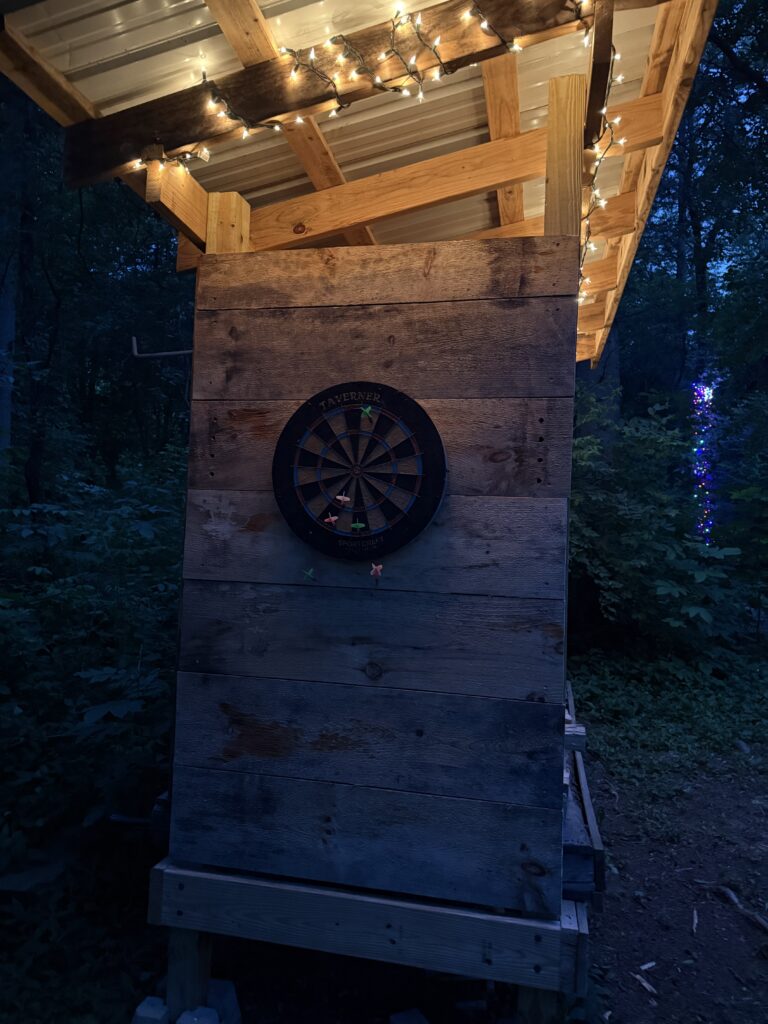
We added lights under the roof and mounted a dartboard on the side and it’s become an important part of the gathering space.
A small, practical build with an outsized impact.
What You Can Apply to Your Own Space
We built with what we had and putting it together wasn’t an exact science but the principles are solid:
- Elevate your wood
- Prioritize airflow
- Assemble a solid roof
- Use what you already have
- Build for function first
Do that, and you’ll end up with a woodshed that quietly improves every fire you build without draining your budget or your energy.
And on the nights when the fire burns clean and steady without a lot of hassle, you’ll be very glad you did.
Enjoy!